

Deck the halls, walls, and furniture with Christmas magic! And what better way to capture the festive feeling than to decorate your home with DIY décor that you made with creativity and love. Lowe’s Creative Ideas is a great source for easy DIY projects, home makeover ideas, decorating tips, and more. They love the idea of using Christmas stencils to decorate for the holidays, and compiled 3 great stencil projects for you to try on your own using stencils from the Royal Design Studio Holiday Stencil Collection! Let’s check out these Christmas stencil tutorials that you can do in a short afternoon for the upcoming holidays:
Supplies:
1/2 x 24 x 48 birch plywood
Small self-leveling picture hanger, #62958
Valspar Signature paint, satin finish, Heirloom Red (#1010-3) and Bistro White (#7006-4)
Table saw or circular saw (optional)
120-grit and 180-grit sandpaper
Tape measure
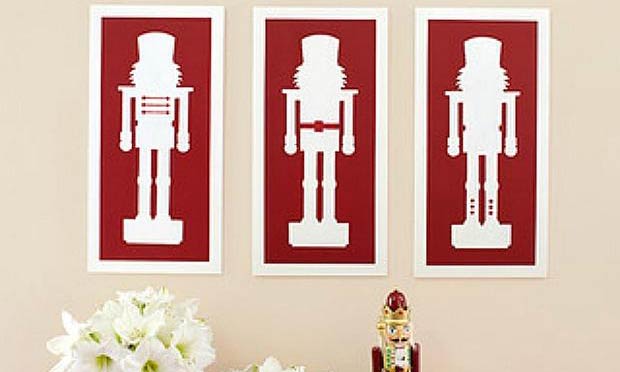
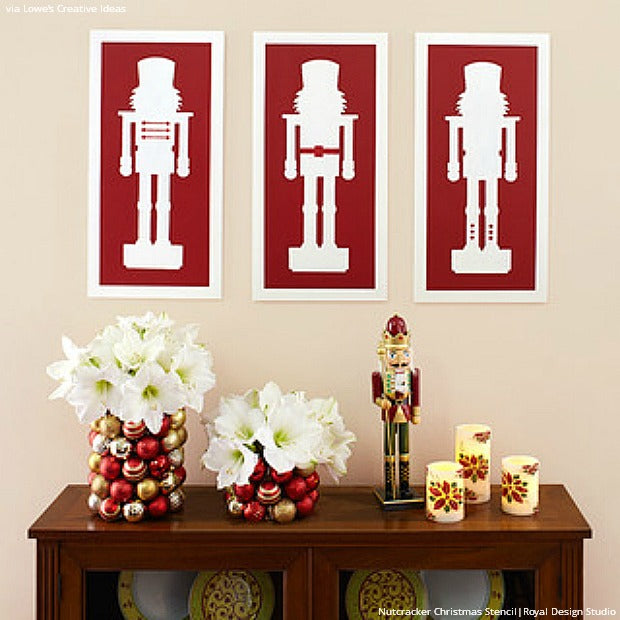
Step 1: Cut a 1/2-inch birch plywood panel into three 12-inch x 24-inch panels. Sand each panel on the outside face and edges. Add wood filler to any gaps, let dry, and sand smooth.
Step 2: Apply three coats of a light color (Bistro White shown) on both faces and the edges of each panel. Let the last coat dry overnight before continuing.
Step 3: Tape around the edges of the front face to form a border 1-1/4 inches wide. Then apply two coats of a contrasting color (Heirloom Red shown) to the center of the panel. Remove the tape after the last coat dries overnight. Repeat for the remaining panels.
Step 4: Center a stencil on a panel and paint the design in the contrasting color (Bistro White shown). Brush on paint carefully to avoid forcing it under the stencils. Apply at least two coats for even color, remove the stencil, and let the final coat dry. Then use separate detail stencils and contrasting paint (Heirloom Red shown) as needed to create the nutcracker details. Repeat for the remaining panels and stencils. Make any touchups with an artist’s brush.
Step 5: Fasten a self-leveling picture hanger centered at the top of a panel and hang it using wall anchors as needed. Repeat for the remaining panels.

Supplies:
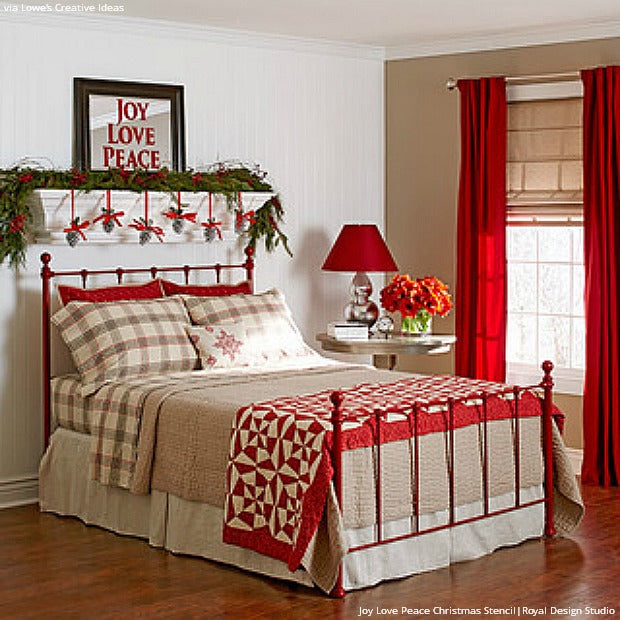
Love Joy Peace Lettering Christmas Stencil
27.5-in x 21.5-in framed mirror, Espresso finish, #197577
Valspar gloss spray paint, Classic Red
Painter’s tape
Kraft paper or plastic sheets
Tape measure
Step 1: Using a utility or crafts knife and a straightedge, separate the words in the stencil and mark the center of each word on the stencil.
Step 2: At the bottom of the mirror, place a piece of tape with a mark showing the center of the frame. Center the “peace” stencil on the tape mark. Add the “love” and “joy” stencils so that the edges touch. It’s okay to make the stencils slightly off-center to accommodate the capital “J” in “joy.” Hold the stencils in place with tape.
Step 3: Tape around the stencils to the edge of the mirror. Then tape strips of paper around the frame to protect it from overspray.
Step 4: Check that the stencils are flat against the glass. Hold the spray paint can over the stencils and spray straight down to avoid paint seeping beneath the stencil edges. Add a second coat as needed and let dry.
Step 5: Remove the paper and tape to reveal the stenciled mirror. Touch up any minor overspray or seepage on the mirror using the blade of a utility knife. Add mounting hardware as needed and use wall anchors for support if you’ll hang the mirror on drywall.
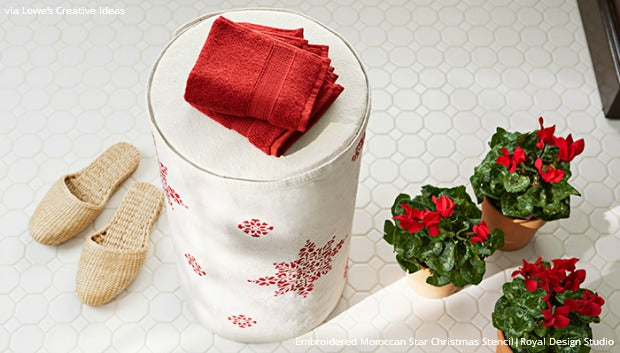
Snowflake Stenciled Bath Stool
Supplies:
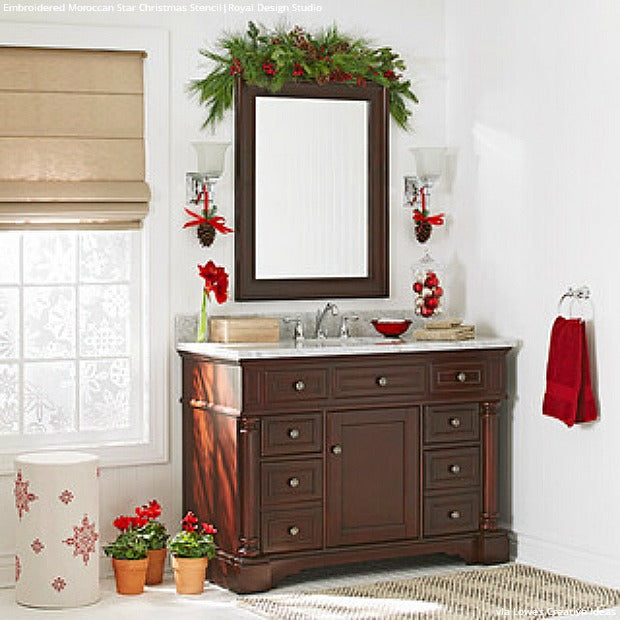
Embroidered Moroccan Star Christmas Stencil
12-in x 48-in Quik-Tube concrete form, #10150
3/4 x 24 x 24 birch plywood
48 x 60 8-ounce canvas drop cloth, #197749
Jigsaw with fine-tooth blade
Circle compass
Measuring tape
Step 1: Measure up 20 inches from one end of the concrete form tube and make a series of evenly spaced marks around the tube. Draw a line to connect the marks. Use a jigsaw with a fine-tooth wood-cutting blade to cut along the line.
Step 2: Draw rings around the tube 3/8 inch from both ends and make eight evenly spaced marks about 4-7/8 inches apart. Hold a piece of scrap wood inside the tube for support and drill 1/8-inch pilot holes at each mark.
Step 3: Measure the inside diameter of the tube from several locations around the edge. Shipping and storage may have created a slight oval shape. Our tube diameter measured slightly less than 12-1/2 inches. Divide the inside diameter by two and set a compass to this dimension. Draw two circles on the plywood and cut them out with a jigsaw.
Step 4: Place a circle within the tube so the outside face of the plywood is flush with the end of the tube. At the pilot hole locations in the tube, drill 1/8-inch pilot holes into the plywood. Then drive #8 x 1-inch wood screws through the tube into the plywood. Repeat for the opposite end.
Step 5: From carpet padding, cut a circle the same diameter as the outside of the tube. Add a second circle if you want additional padding on the top.
Step 6: Set a compass for an 11-inch radius. On a piece of ironed drop cloth or other fabric, draw a circle about 22 inches in diameter and cut it from the fabric.
Step 7: Lay the carpet padding circle on the tube and center the fabric on the circle. Staple the fabric to the tube in one place, stretch the fabric tight and place a staple opposite the first one. Continue working your way around the tube, continually stretching the fabric to remove any wrinkles.
Step 8: Just below the edge of the tube, staple the loop portion of a strip of Velcro tape to the tube. Make the top edge of the Velcro tape a consistent distance from the edge of the tube.
Step 9: Refer to the Bath Stool Skirt Project Diagram to cut a piece of fabric to size using the factory edges along the bottom and one side. Iron 1-3/4-inch hems along the remaining two edges and use duct tape to hold the hems in place.
Step 10: Refer to the Bath Stool Skirt Project Diagram to apply Velcro strips to the front and back faces of the skirt. If necessary, reinforce them with dabs of construction adhesive.
Step 11: Place the stencil on the outside face of the skirt and dab paint on the surface using a lightly loaded brush. Avoid pressing paint beneath the edges of the stencil openings. Repeat to achieve the pattern you like.
Step 12: Press the band of Velcro tape on the inside face of the skirt against the band around the stool and hold the ends of the fabric closed using Velcro patches.
Spread your Christmas cheer! Share your holiday stencil projects! Email us at projects@royaldesignstudio.com or tag us on Instagram with #royaldesignstudio.


