


When we just about start to suspect that there are possibly no more creative ways left for us to see how people use our stencils, we find something new and amazingly creative out there!
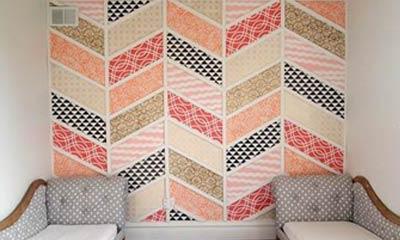
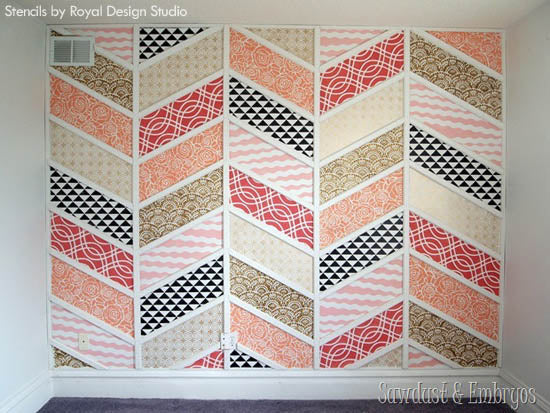
‘Sawdust and Embryos’ is an awesome DIY blog that shares some of the coolest home improvement How-to's out there. They have a beautiful 113 year old house in rural Iowa that they are making their own, one little project at a time. They love to stencil and have used Royal Design Studio stencils on stairway landing walls, dining room area rug and several other projects. The one that particularly caught our eye and we think you will also love is this Herringbone Wall DIY that Beth and Nick designed for their twin girls’ room.
Supplies:
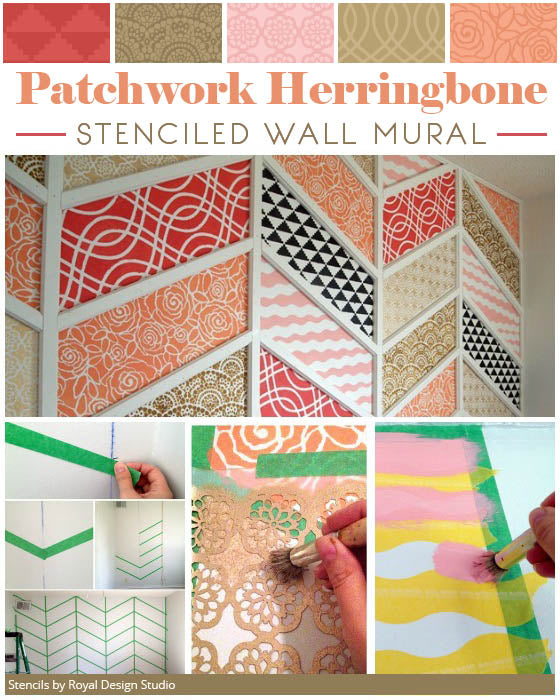
Royal Design Studio Stencils: Small Spanish Lace, Small Margarita Lace, Teardrop Trellis, Rockin Rose Damask, and Step Up Triangles
Paints: Red Cedar, Silver Strawberry, Wool Tweed, and Crab Apple by Pittsburgh Paints and Martha Stewart metallic ‘Gold Pearl’
Wooden Moulding Strips/ Trim Pieces. The sizes for these will depend on the height of your mural and the width of herringbone cells.
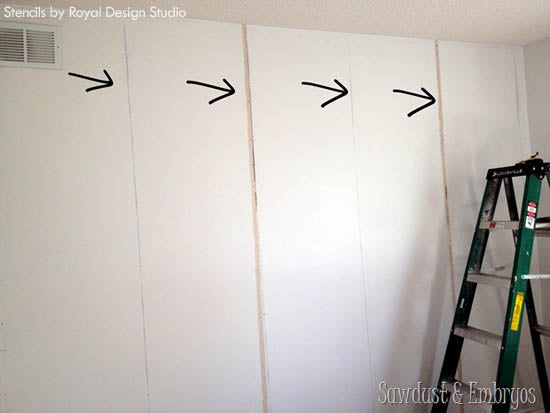
Step 1: Beth and Nick started out by measuring out 5 equal parts of their feature wall and then used chalk to create perfectly vertical lines to work with. This wall is paneled so they made sure that two of the four lines would fall on the trim lines of the panels. These trim lines would be eventually covered by wooden mouldings.

Step 2: Then they marked 12” intervals on each of these vertical lines. These marks were then connected diagonally using painters tape as shown in the image above so as to create the herringbone pattern on the wall.


Step 3: Beth and Nick wanted this wall to look like a patchwork quilt. So they chose a bunch of mixed stencil patterns from the Royal Design Studio website (as listed under the supplies list). They also picked some fun colors by Pittsburg paints (also listed above). While stenciling, Beth ensured to place the colors as randomly as possible to get the quilted look they had in mind. She recommends using a stencil brush instead of a foam roller for smaller stencil patterns which will help to get crisp and clean stencil edges. Each cell took her only 10 minutes to stencil!
To mix things up a little, Beth used FrogTape’s wavy painters tape to create an abstract wavy pattern. (Very creative!!)

Step 4: Once all the cells were filled with beautiful colors and patterns, Beth removed all the painters tape that she had initially used to define the individual cells.
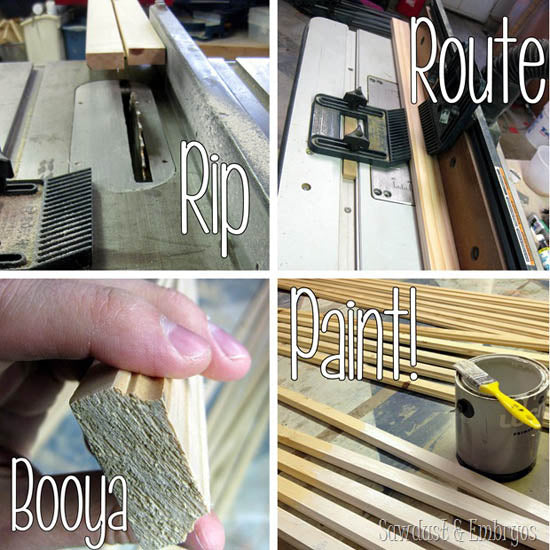
Step 5: Then for the final stages, Nick made ‘trim’ pieces to frame each cell of the herringbone pattern for a more 3-D architectural effect. You could just buy the trim pieces instead of making your own, or make them at home to make the project more economic. To learn more about how Nick made these trim pieces along with the angled sections for each cell be sure to check out their post: Herringbone Patchwork Accent Wall {REVEAL!}

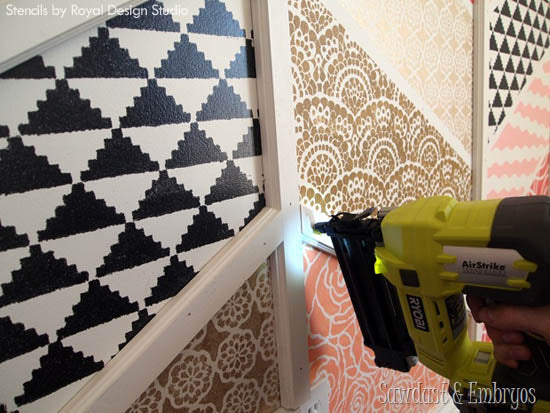

Step 6: To finish up, they started by first nailing up the vertical pieces and then nailing down the angled one’s one after the other. And finally, they filled the seams and nail holes with white latex caulk and did some minor white paint touch-ups. Voila! A stunning, one of a kind accent wall was all ready for the girls' room to play and create beautiful memories in!


Beth and Nick have slowly and steadily added several gorgeous accents to bring this room together for their little girls. They have shared step-by-step tutorials for each of these accents that they have made themselves. If you are impressed with this project, be sure to check out other fun ideas and accent DIYs on the Sawdust and Embryos’ Big Girl Room Archives.
If accent walls are your thing, browse through the following posts to get some ideas:
- Stenciled Feature Wall Designs
- How to Stencil: Copper Leaf Hydrangea Wall Finish
- Polka Party from Project Nursery


