


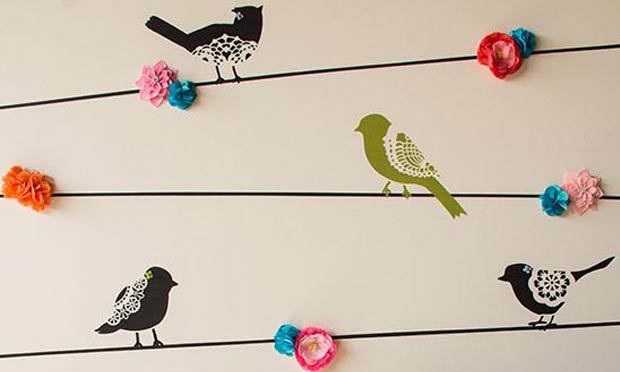
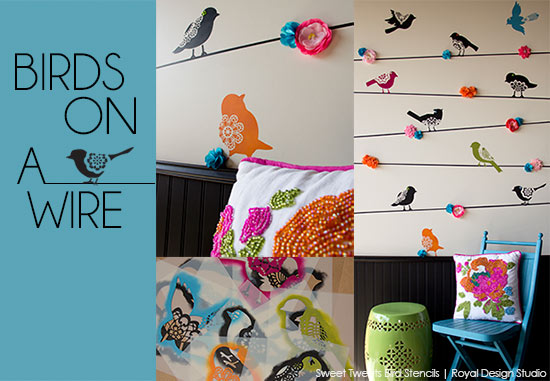
Our new Lace Bird Stencils, Sweet Tweets, star in this colorful wall stencil how-to project that will have you chirping a happy tune!
This would be a super fun stencil project for a nursery or child's room. YOU get to design it and decide where you want to paint the "wires" (done with tape!) and can do as much or as little as you want. Consider this stencil idea for a feature wall-and if you don't want to do the whole wall you can simply use tape to paint in vertical "poles" where you wish and run the wires between them.
Stencil Supplies Needed for This Project:
- Royal Design Studio Stencils: Sweet Tweets Bird Stencil Sets A/B
- Stencil Brushes
- Royal Stencil Crème Paint: Flat Black
- Assorted acrylic or latex paint colors: Bright Green , Blue, Orange, Pink
- Medium or Large Paint Roller, Roller Handle, Paint Tray
- 1/4" striping tape (found at auto parts or auto detailing stores) and 1" Painter's Tape
- Contractor's Paper, Paper Towels
- Dimensional Flower Accents (we used the stick-on variety found in the scrapbook area of a crafts store)

Step 1:
Use the 1/4" striping tape (stretched tight to keep it straight) to define where the wires will be that your birds will be sitting on. You can pencil in lines to start and lay the tape over them, or just eyeball it. We didn't want our wires to be perfectly horizontal, but if YOU do, you should use a large level to get your lines straight. Be sure you are leaving enough space between the wires for the birds to fit comfortably. Then run 1" tape on the top and bottom of the 1/4" tape. Remove the 1/4" tape to reveal the space in between.
Step 2:
Use black paint and a 1" Stencil Brush with the Dry Brush Stencil Technique to stencil the spaces in between the two tape lines, creating your "wires". Remove the tape.
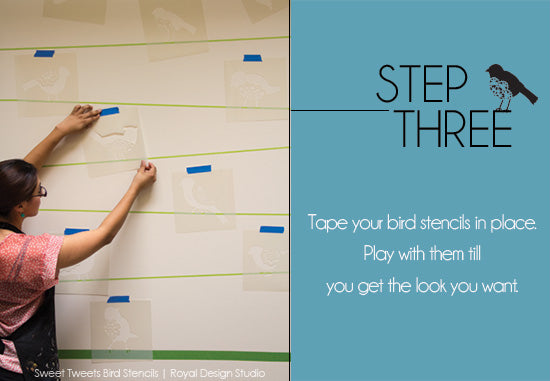
Step 3:
Place your Large Sweet Tweets Bird stencils in a nice arrangement along the wires. You can put the birds as close or as far apart as desired. Also try flipping the stencils around to get different looks. Noticed how we staggered our birds so that they are not necessarily sitting right on top of each other.
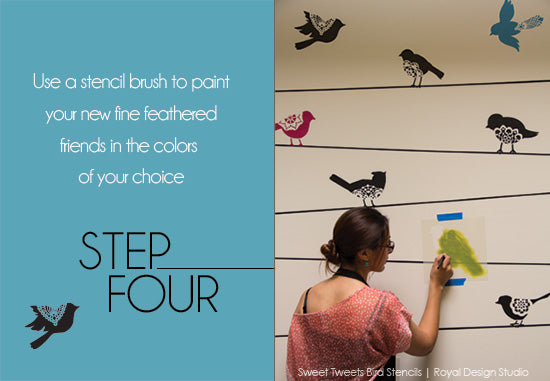
Step 4:
Stencil in the birds in the colors of your choice. We wanted mainly black birds, but accented them nicely with brightly colored birds in pink, lime green, turquoise blue, and orange-using some leftover latex sample paint colors that we had on hand. You could also use craft acrylic paints or, if you want a metallic look, consider using our bright metallic colored Royal Stencil Creme Paints!
We recommend using 1" Stencil Brushes (one for each color) and using a dry brush stencil technique for your stenciling.


How to stencil tutorial with the new Lace Bird Stencils-Sweet Tweets and cute stick-on flowers
Step 5:
An adorable addition to this stenciled wall treatment is to add colorful stick-on fabric flowers that can be found in the scrapbook section of your local craft store. These are SO fun to add-and really take the project to another dimension. Of course you want to consider placing these out of reach of little hands....
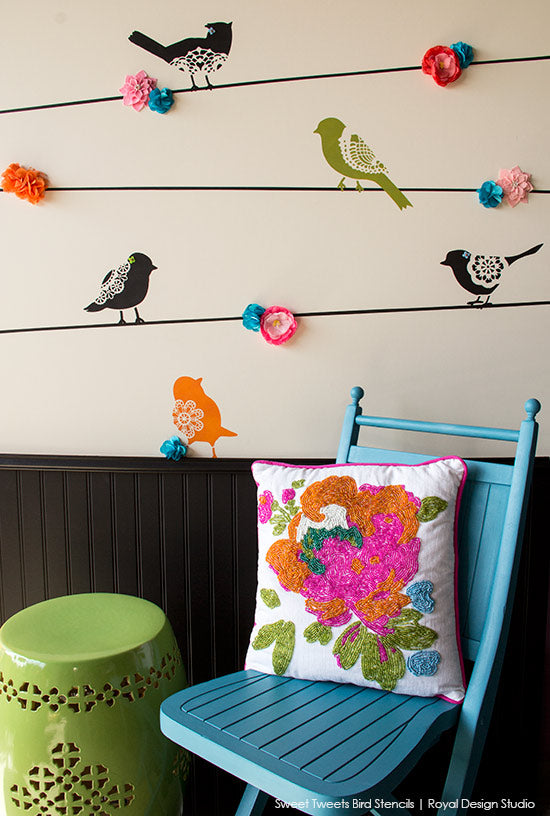
How adorable IS this?! We even added some tiny flowers on some of the birds heads as additional accents. If you have problems getting your flowers to stick you can additional extra-strong double sided tape.
Be sure to check out another precious project using our Small Sweet Tweet Birds along with our Lace Doily Stencils on canvas: Stencil How-to: Lace Canvas Combo.


