


Go little Queenie! This stencil how-to shows you how to create a fun, random stencil pattern with an easy dimensional effect using crown stencils from our Wall Art & Motifs Stencil Collection. Use a combination of two colors of stencil paint with a nifty stencil shift to give some POP to your stencil patterns.
You will need:
- Queen Crown Stencil
- King Crown Stencil
- Antique Gold Stencil Creme
- 2-1" Stencil Brushes
- Pink Paint Color: Glamorous P130-7 by Behr Paints
- Assorted: Black Craft Acrylic Paint, Bounty Paper Towels, White Paper, Painter's Tape, Assorted Stick-On "Jewels"
Lets get stenciling!
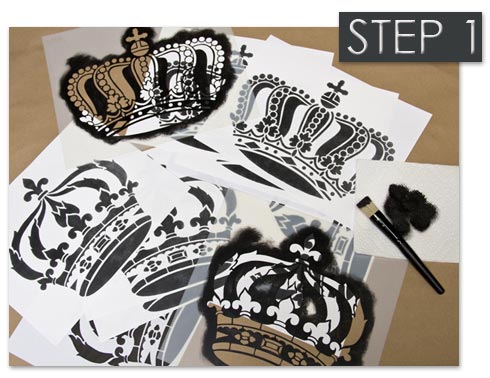
Step 1: This step is optional,but it's a GREAT aid to help you plan out a random stencil pattern on a wall! Simply stencil one repeat of each of the crown stencil designs in black on plain white paper. Run off multiple copies to create a series of stencil "proofs" and you are ready to plot out your pattern design on the wall.
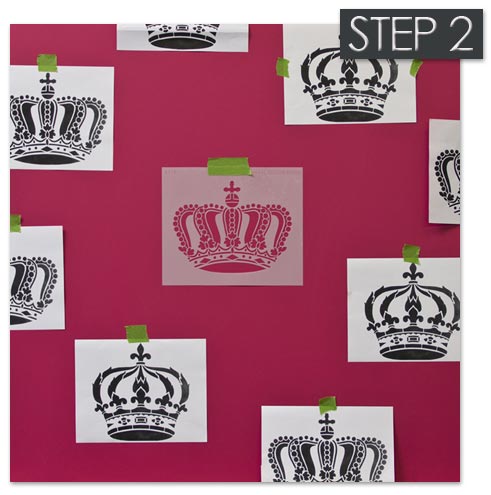
Step 2: Use tape to affix your stencil proofs to your wall area. This will give you a great visual guide to how your pattern lays out and works in your space. Simply move the paper proofs around until you get a desirable effect, playing with spacing and variety of designs. When I do random stencil patterns I try to make sure that all designs are offset a bit-meaning that they do not fall necessarily on the same horizontal or vertical lines, creating balance AND interest. As you work the stencil patterns across the wall, simply remove the paper pattern and replace with the corresponding stencil. You can then keep moving the paper patterns ahead of yourself to keep the pattern placement going.
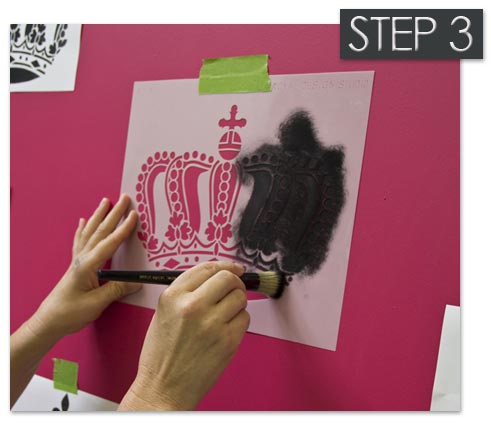
Step 3: Load the brush with paint, and then offload your stencil brush onto good quality paper towels to remove excess paint and get even paint distribution on your brush. See Basic Stenciling with Acrylics for more details.

Step 4: Aim for solid, even coverage with the paint. If you offloaded your brush correctly, you will get a perfect, crispy stenciled print of the pattern.
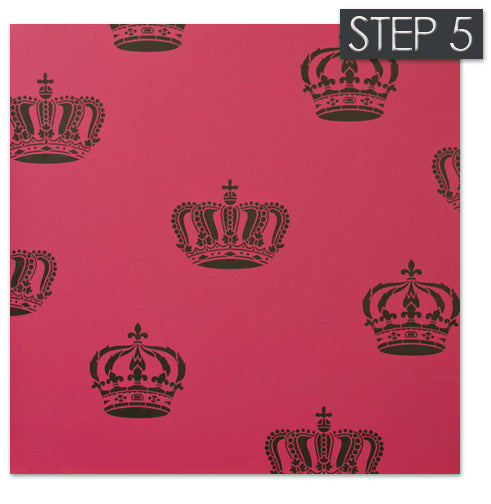
Step 5: Complete all of your stencil patterns first with the black paint. If you like the clean look of the black crown pattern, you can stop here. If you want to "bling it on", read on!
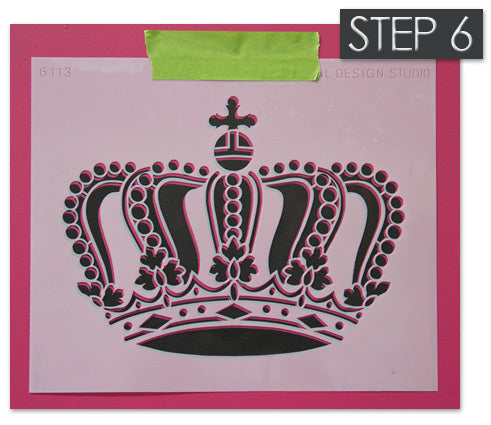
Step 6: OK, here's the semi-tricky part. Place your stencil pattern back on the wall exactly over your previous stenciling. Keeping the pattern level, shift the stencil on the diagonal (up and to the right) between 1/16" and 1/8". The amount of pink background that you see exposed will end up being the amount of black shadow that you will be left with after the next step.
PRO TIP: Practice this first on some scrap paper so that you get the amount of "shift" down. Shift too much and you will be left with a dizzying effect. Shift too little and you won't have a definitive shadow.
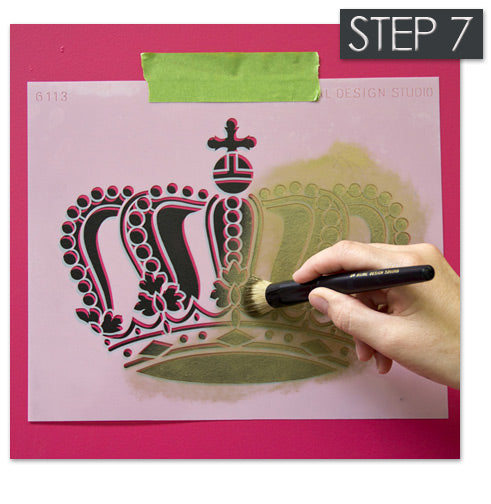
Step 7: Use Antique Gold Stencil Creme to stencil over the entire pattern again. Metallic Royal Stencil Cremes offer AMAZING coverage, usually in just one coat, but you may want to stencil a second coat of paint if you have a "light touch". Read more about how to use Royal Stencil Cremes here!
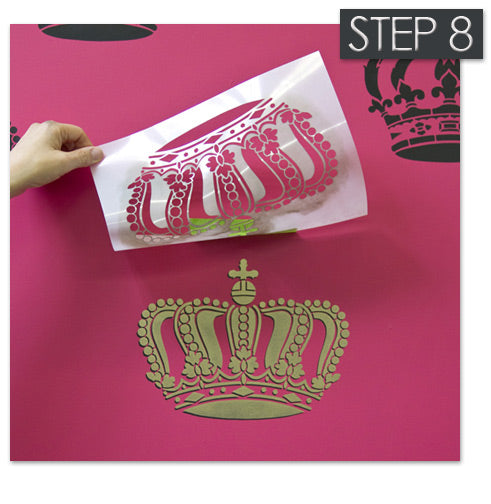
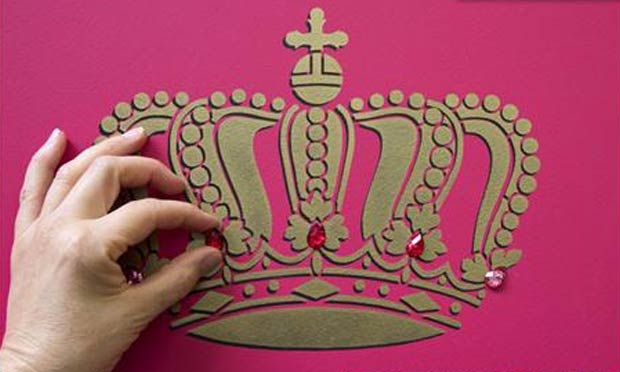
Step 8: Lift the stencil up while keeping the tape in place to check that you have the amount of Stencil Creme coverage you want. Looking fabulous darlings! Continue with your stencil-shift technique to complete your overall pattern. Take care to shift the stencil the same amount EACH time so all your crowns have the SAME COOL SHADOW.

Step 9: What would the Royal Crowns be without the Crown Jewels? Use self-adhesive jewel accents from the scrap booking section of your local craft store to add some more bling. Have fun with this and be creative!
Are you loving this simple Drop Shadow Stencil Technique? It's such a simple way to add a whole new level of detail to your stencil projects. As you can see here this technique looks great on deep colored backgrounds with a black shadow and metallic colored stenciling. For a softer look on pastel backgrounds use a soft neutral gray as your shadow color over a medium colored pastel. Then go with a lighter color for your final stencil layer.


