

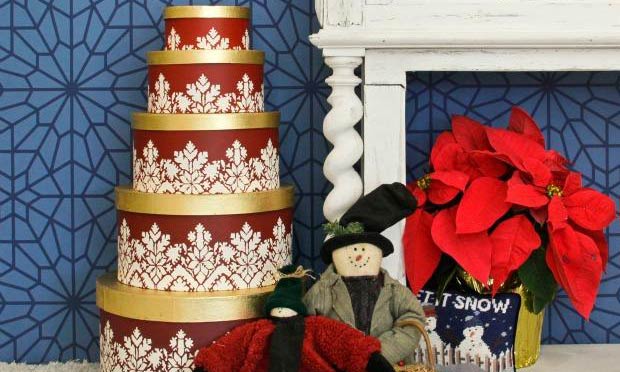
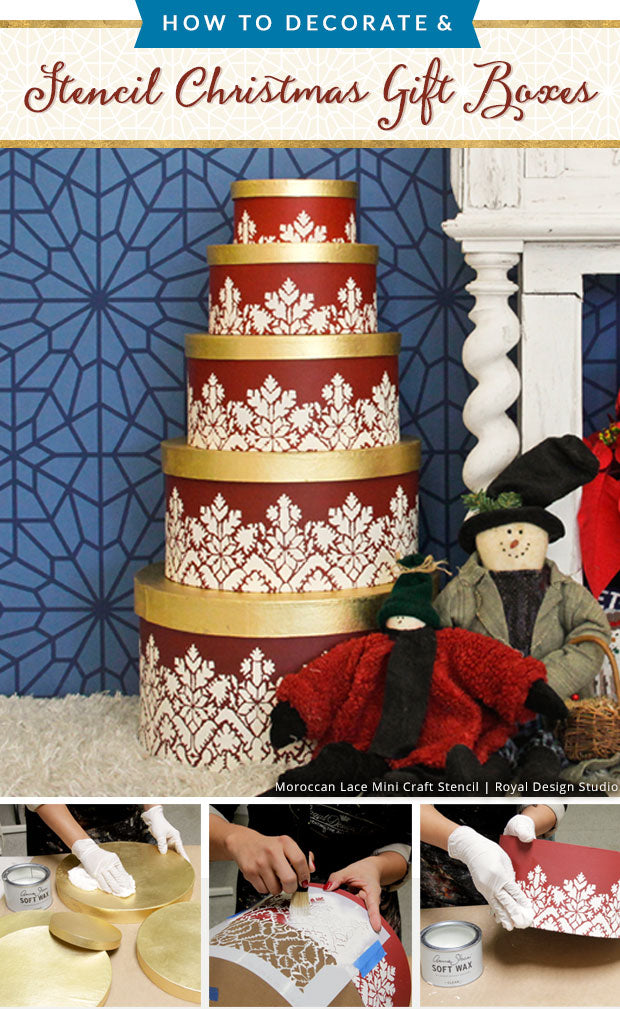
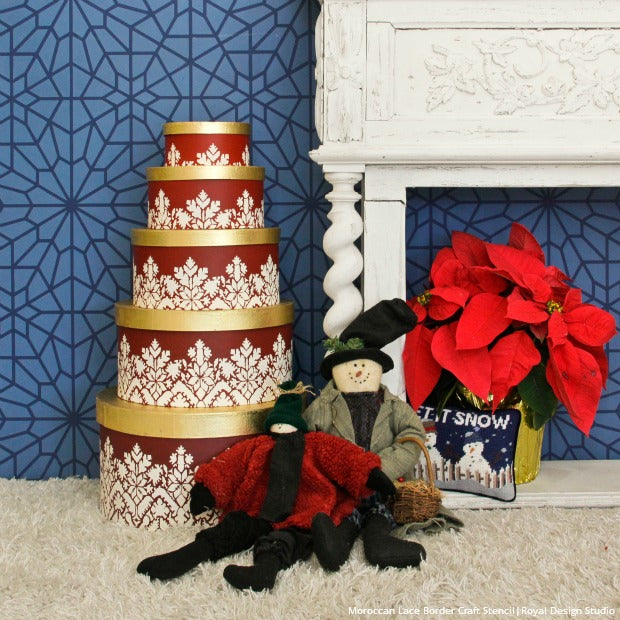
Wondering what to “gift” your loved ones this Christmas? Well, we are stacked high with DIY stenciled gift and decor ideas just for you! These paper mache gift boxes are easy to decorate to give as a gift or to add to your Christmas décor. Our Mini Craft Stencils make this project stylish and budget friendly. These small scale stencil patterns are perfectly sized for Christmas crafts and holiday decorating-and perfect for adding some festive fun to this gift box set! Read on for the full stencil tutorial for this DIY Christmas project:
Supplies:
- Round paper mache gift box set
- Moroccan Lace Mini Craft Stencil
- Royal Stencil Size in Clear
- Chalk Paint® by Annie Sloan: Pure White, Primer Red, Emperor’s Silk, and Burgundy
- Annie Sloan Clear Wax
- Gold Leaf
- 1” Foam Brushes
- Painters Tape
- Ribbon
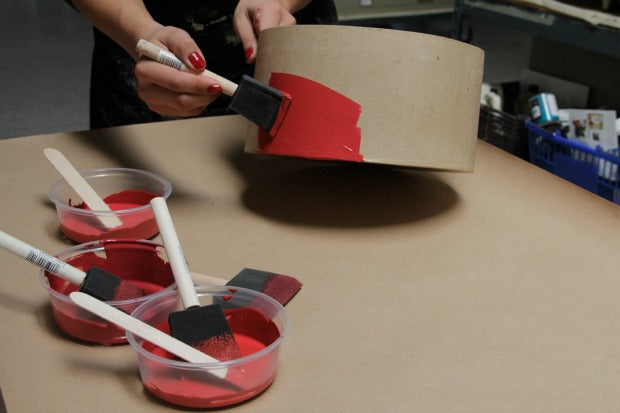
Step 1: Create a subtle ombre look to the gift box set by creating 5 different shades of red to paint them with.
- #1: 1 part Primer Red + 1/3 part Burgundy
- #2: 1 part Mix #1 + ½ part Emperor’s Silk
- #3: 1 part Mix #1 + 1 part Emperor’s Silk
- #4: ½ part Mix #1 + 1 part Emperor’s Silk
- #5 Straight Emperor’s Silk
Step 2: Paint each box with a custom color mix using foam brushes. Paint the largest box with Mix #1, the second largest box with Mix #2, the large medium size box with Mix #3, and the medium size box with Mix #4, and the smallest box with Emperor’s Silk. Allow to dry.
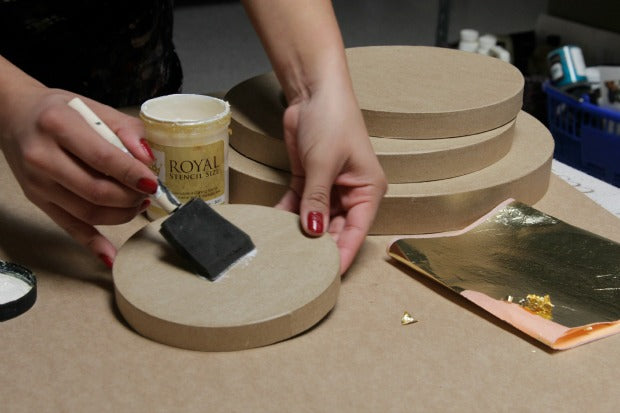
Step 3: Apply Royal Stencil Size to the 5 box lids. Allow the size to dry for 15 minutes and then apply a second coat. Allow to dry for an additional 15 minutes until it becomes tacky.
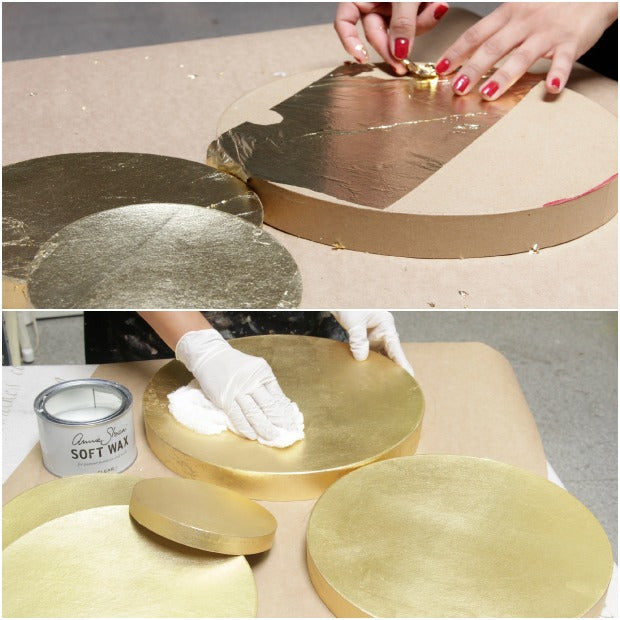
Step 4: Apply a layer of gold leaf to the lids and then use a piece of lamb’s wool to burnish the leaf. This will help it adhere to the size and remove an excess gold leaf.
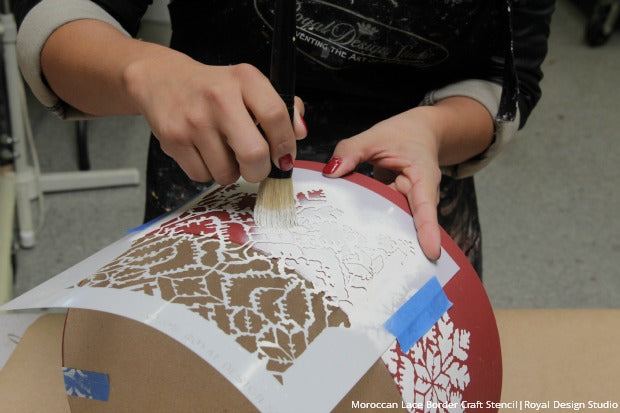
Step 5: Stencil each box with our Moroccan Lace Mini Craft Stencil in Pure White Chalk Paint®. Make sure the design is placed so that the pattern only covers the bottom ¾ of each box. Note: The look pattern will change slightly as your boxes get smaller. Allow to dry.
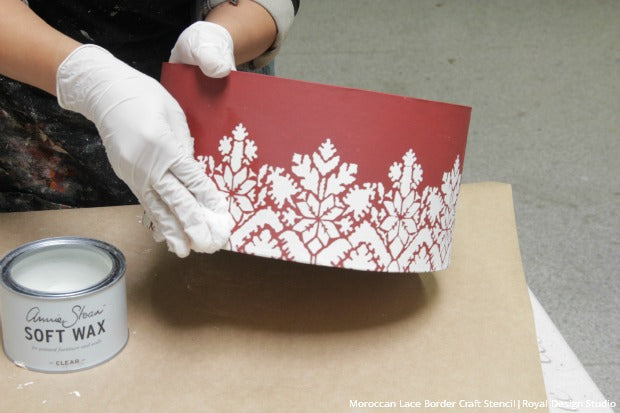
Step 6: Apply a layer of Annie Sloan Clear Wax. Allow to dry.
Step 7: Stack the boxes on top of one another from largest to smallest. So pretty! Your guests or gift recipients will be itching to know what is in these beautiful boxes!
If you’re planning on giving this as a gift, make sure to fill these boxes with festive goodies! Looking for even more DIY Christmas decorating ideas? Check out these stencil projects featuring Holiday Stencils Ideas – perfect for decorating your home easily and affordably for the festive season. Spread your Christmas cheer! Share your holiday stencil projects! Email us at projects@royaldesignstudio.com or tag us on Instagram with #royaldesignstudio.


