

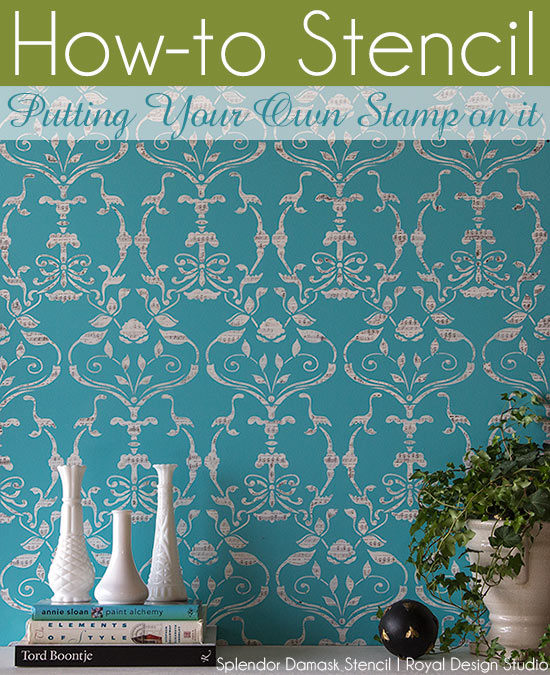
Stenciling a feature wall or whole room is a GREAT way to add pattern and personality to any space. Here's an easy idea to put an even MORE personal stamp on your next stencil project: create a fun and unique pattern-in-pattern look with the addition of an allover craft stamp.
For this Stencil Project You Will Need:
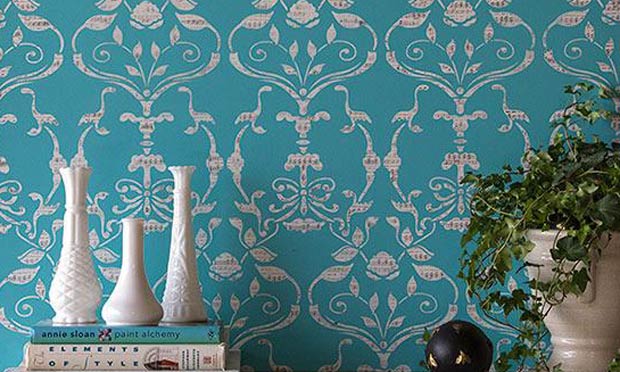
Splendor Damask Stencil by Bari J for Royal Design Studio
6" Flocked Foam Roller and Roller Handle for Stenciling
Rubber Craft Stamp (we found this musical notes stamp at Michael's but you can find many cool rubber stamps online)
Ink Stamp Pad (we used StazOn permanent solvent ink in Timber Brown, also from Michael's)
Paint Colors- Behr Premium Ultra Interior Eggshell in P460-4 Lagoon Rock and Ultra Pure White

We suggest you practice!
It's a good idea to practice any new-to-you stenciled wall finish on a sample board before tackling your actual wall surface. You can create a sample board by painting a scrap piece of wood, drywall, or even posterboard with your wall color. Then stencil a small area so that you can get a feel for the stamping technique. At the very least, practice stamping on a piece of paper first. *smile*
Step 1: Starting with the pattern centered on your feature wall, use the basic foam roller stencil technique outlined here to stencil the Splendor Damask pattern (or stencil of YOUR choice) on your wall. Note that it may take 2 coats of paint for complete coverage, especially when stenciling white over a deep colored base coat. Clean your stencil prior to Step 2. (We recommend spraying the stencil with Motsenbackers Lift Off, let it soak for a 10 minutes, and clean with a stiff bristled scrub brush)
Step 2: Replace your clean stencil over your wall stenciling and tape it securely. Load your Rubber Stamp well by pressing and tapping the Stamp Ink Pad over it, aiming for even, uniform coverage. If you feel like you got too much ink on the stamp, print it first on a scrap piece of paper
Step 3: With the stencil in place, press the loaded Rubber Stamp firmly onto the surface. You will work out your own technique but I found the firmly hitting the stamp with the heel of my hand worked well. If you want a uniform look to your stamping, it's best to reload the stamp every time. If you want a more distressed look that fades in and out you can load your stamp less often. Just remember, it's pretty much impossible to line up the stamp in exactly the same place if you decide you want to go back and add more color.
Step 4: There may be times you just want to focus in on adding stamped pattern to a certain area. In that case, simply tape a piece of paper over the areas you want to protect or keep the stamp from printing in.
Special Note: The permanent stamp inks DEFINITELY will leave their mark on your stencils. As in, you may have a lovely stamped pattern on your stencil for years to come! This will not affect your ability to use the stencil for more painting projects in the future though!


