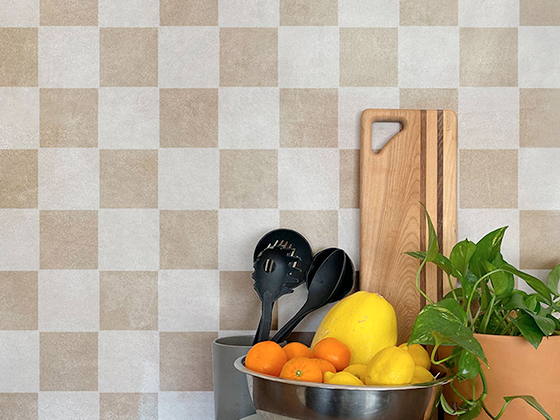


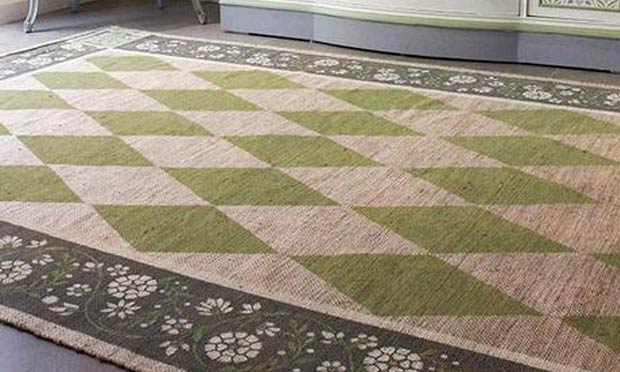
Finding an area rug that has the perfect colors and patterns for your room can be difficult. In this stencil how-to we show you how to use Chalk Paint® by Annie Sloan to create a gorgeous, patterned sisal rug that is completely customizable. Simply alter the Chalk Paint® colors and stencils from Royal Design Studio to your liking to create the rug of your decorating dreams.

We found this thin sisal, woven rug on sale at Cost Plus World Market. It has a printed design on the other side that wasn't quite exactly what was need for this room. The solution? Flip it over to discover a beautiful blank canvas that is just begging to be stenciled.

Stencil Supplies
- Grande Harlequin Wall Stencil
- Sicilia Tile Craft Stencil
- Gota Embroidery Border Stencil.
- Chalk Paint® by Annie Sloan: Old White, French Linen, Arles, Antibes Green, Cream, Paris Grey
- Royal Stencil Brushes in assorted sizes
- Additional supplies: blue painter’s tape, paper towels, foam roller, roller tray and handle

Step 1: Tape around the edge of your rug using 1”wide painter’s tape. Measure in 8” from the taped area on all 4 sides of your rug. Add more strips of blue painter’s tape here to create an 8" wide border of open space in between the two tape lines.

Step 3: Create a custom color of Chalk Paint® using the following formula: 1 part French Linen Chalk Paint® + 1 part Old White + 1 part of water.
Adding water to the mixture will thin it so that the paint absorbs better into the fibers of the rug. Use a foam roller to roll on the custom color. Allow to dry.
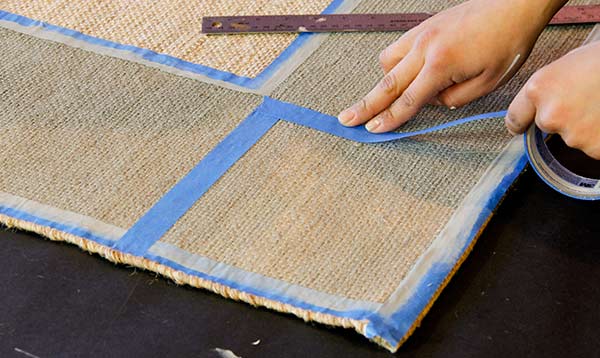
Step 4: Use blue painter's tape to mask off a 8" x 8” square on each corner of the rug.

Step 5: Center the Gota Embroidery Stencil in the section painted with the grey custom color. Stencil using Old White Chalk Paint® for the floral elements. Create a custom green color using a combination of 1 part Arles + ½ Antibes Green + ½ Old White + ¼ Cream + ¼ French Linen. Stencil this color in the vine area of the stencil using a small Royal Stencil Brush.
Stenciling with stencil brushes using a hard circular motion will give you a lot more control over where the color is applies and allow you to really work the paint into the sisal. Be sure to offload the paint by rubbing in a circular motion on paper towels each time your reload your brush with Chalk Paint®

Step 6: When finished stenciling the border around all 4 sides of the sisal rug, move the blue painter's tape on the corners to mask over to the other side of the 8 x 8” squares. Use a foam roller to paint each square with the custom green Chalk Paint® color. Again, water down the paint by adding approximately ½ part of water to the color mix so that it absorbs more readily into the fibers of the sisal rug.

Step 7: Center your Grande Harlequin Wall Stencil in the center area of your rug. Stencil this larger pattern with a foam roller using the same watered down custom green color mix used in the previous step. Follow the registration marks to stencil the whole middle section of your rug with the harlequin diamond pattern.

Step 8: Once the squares on each corner dry center the Sicilia Tile Craft Stencil and stencil it using Old White Chalk Paint®.
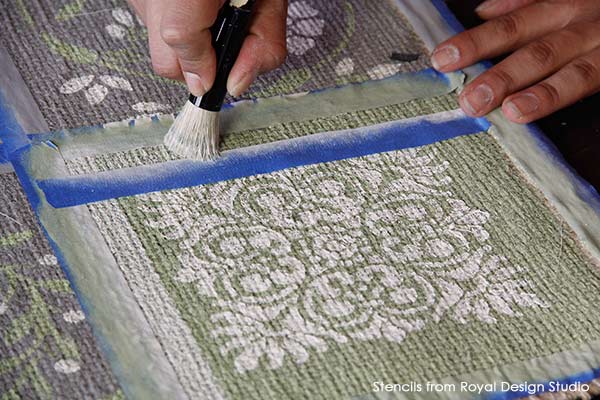
Step 9: Using a piece of blue painters tape mask off a 3/4” border around the squares in the corners and paint with Old White and a ¾” Stencil Brush.

Step 10: To finish off the stenciled sisal rug create a 1” line between the grey border,and the area stenciled with the harlequin diamond pattern. Use blue painter's tape to mask off the area and paint with a 1” stencil brush and Old White Chalk Paint®

There is no need to seal the rug with anything. The rug will "wear" just like any other rug, but the Chalk Paint® is durable even without sealing and will bond to the fabric. We've paired our stenciled sisal rug with a couple of thrift store finds that have also been painted with Chalk Paint®. The chest in the background features our Chloe Furniture Trellis Stencil in custom shades of green and gray.
Of course you can stencil your own custom "rug" on other surfaces, such as floor cloth canvas or even sheet vinyl. We share another stenciled rug how-to using vinyl flooring to create a stunning floorcloth here.


