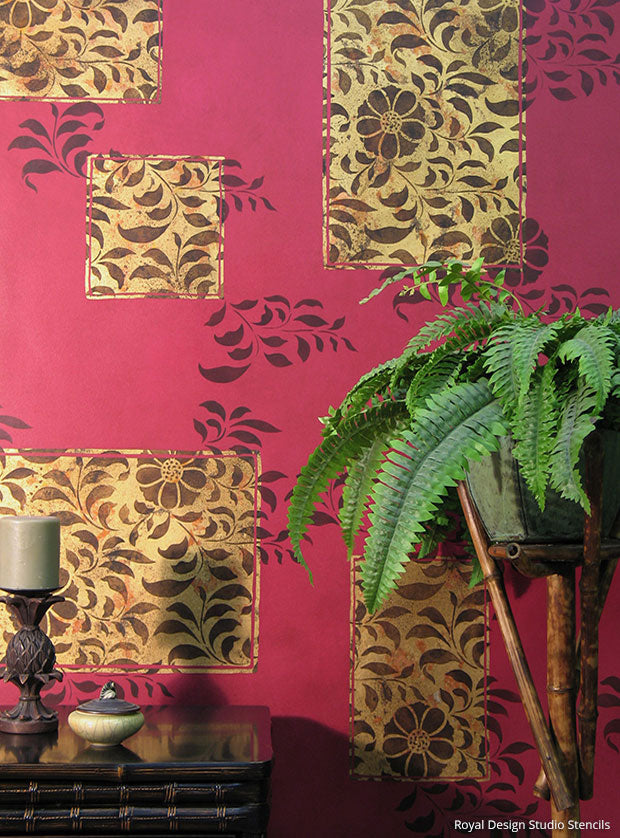

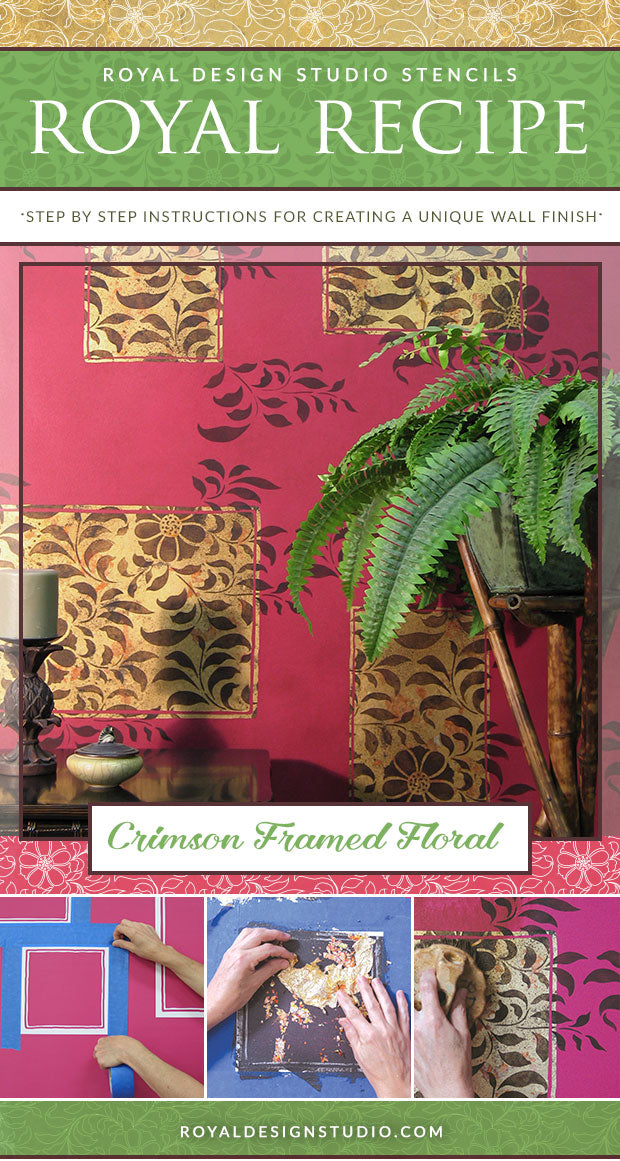
This is a fun stenciled wall finish that allows you to paint outside the lines! We combine various colors of metal leaf and a floral pattern stencil with random geometric shapes to create a fabulous look for a feature wall.
Like all of our Royal Recipe Professional Finishes Stencil Tutorials, this finish is designed for the experienced DIYer or professional decorative artisan. This is not a "beginner" faux finish and a basic understanding of artisan finishing techniques is required.
Supplies:
- Royal Design Studio Stencils: Folk Flower Allover Wall Stencil
- Modello Custom Stencil: ModSet101
-
Stain & Seal: Van Dyke Brown, American Walnut, Rich Brown, Ebony
- Modern Masters Black Patina Solution, Composition Gold Leaf and Variegated Red Mix Tamise Flakes, Rolco Aquasize
- Faux Effects® Products: Ebony Frost Lusterstone, FX Thinner
- Eggshell Ralph Lauren Interior Paint: Racer Pink
- Tools: 1" Stencil Brush, 4" Foam Roller and Tray, Japanese Trowel, Nylon Stipple Brush, Lambswool Mitt, Painter's Tape
Prep: Surface Preparation: Paint surface with two coats of Racer Pink. Allow to dry thoroughly.
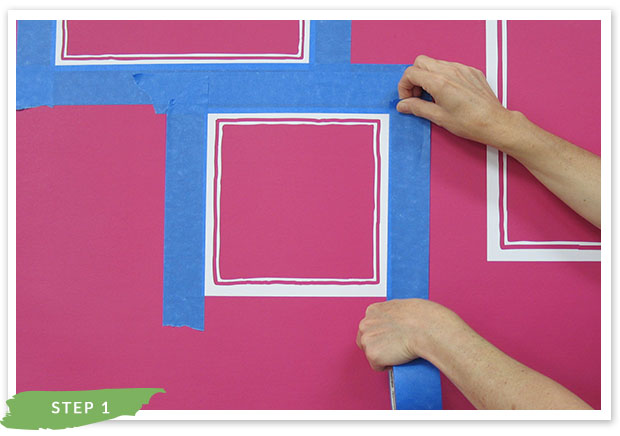
Step 1: Place the Modello Pinstripe Squares and Rectangle in a random arrangement over your wall surface. Apply additional tape around the outer edges to mask off and protect the background.
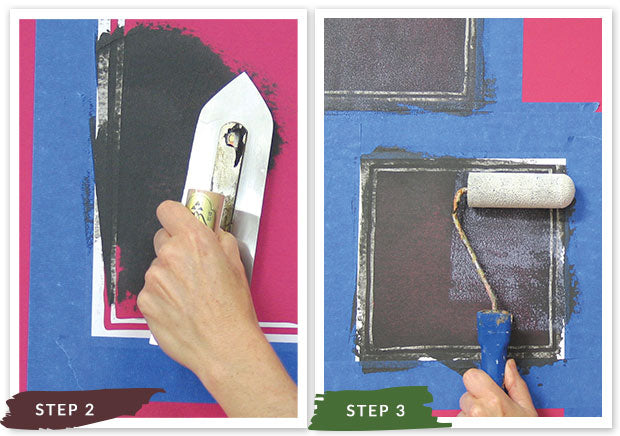
Step 2: Trowel on two thin layers of Ebony Frost Lusterstone to achieve 100%, opaque coverage. Allow the Lusterstone to thoroughly dry between coats. You can speed up the process with a hair dryer.
Step 3: Roll on an even coat of Rolco Aquasize with a 4” foam roller. Lusterstone is slightly porous and some size will be absorbed into the surface, so you may want to either roll it on a little heavier or apply two thin coats allowing it to dry 20 minutes between coats. Caution: If you apply the size too thickly it may “sag” on a vertical surface.
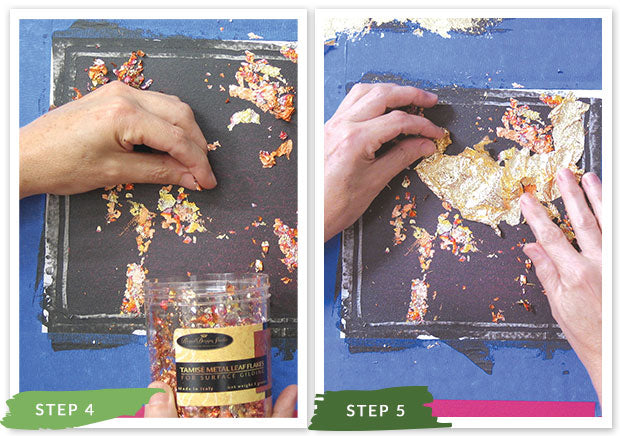
Step 4: After the size has come “to tack”, about 20-30 minutes, use the Variegated Red Mix Tamise flakes to apply small, broken patches of leaf. Simply pick some leaf from the jar between your fingertips and carry it right to the wall. The size will “grab” and hold it. Smooth and lightly burnish it with your fingertips
Step 5: Fill in the remaining open areas with composition gold leaf. You can use loose Schaibin leaf or simply remove individual sheets of leaf from book leaf.

Step 6: Burnish all leafed areas well using a lambswool mitt or soft cloth. This will smooth the leaf on the surface and remove any loose leaf, called “skewings”.
Step 7: Thin Van Dyke Brown or Ebony Stain and Seal with water. Use a toothbrush or chip brush to "fly speck" the color onto the leafed areas to give them an aged look.
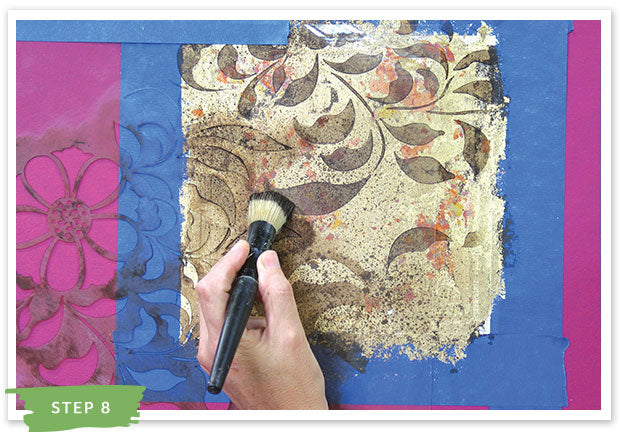
Step 8: Stencil the Folk Flower Allover pattern within the leafed squares, using Van Dyke Brown Aquacolor. You may have to apply two layers of color in order to get even, solid coverage. Where your squares and rectangles have been placed close together on the wall you will want to have the pattern repeat across the spaces, but just confine your stenciling to leaf at this point.
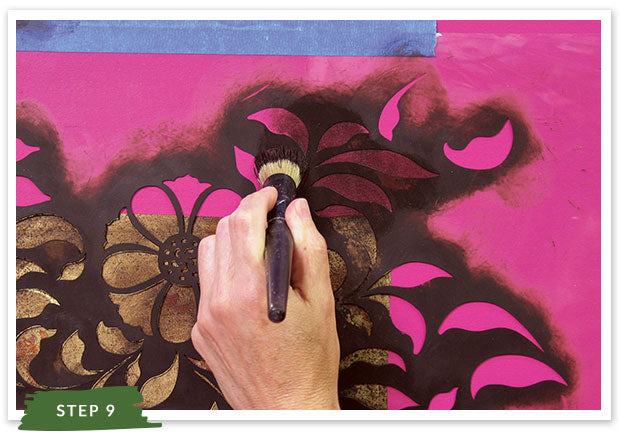
Step 9: Remove the tape and outer frame from the squares and rectangles, but keep the smaller pinstripe in the masking material still in place. Reposition the stencil over the pattern you have established and continue the pattern selectively and randomly outside the frame here and there to establish a nice balance of design and movement.
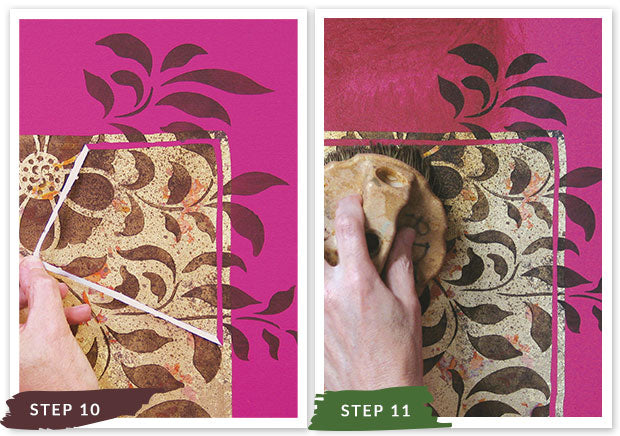
Step 10: Remove the inner pinstripe now. Note that just some areas of leaves and flowers have been stenciled on the pink background, not the whole repeat.
Step 11: Create a custom stain color by combining 2 parts American Walnut to 1 part Rich Brown. Blend that mix 1:1 with FX Thinner to create a watery stain. Apply this to the overall surface with a chip or foam brush and blend in and around with a Neon Leon nylon brush.
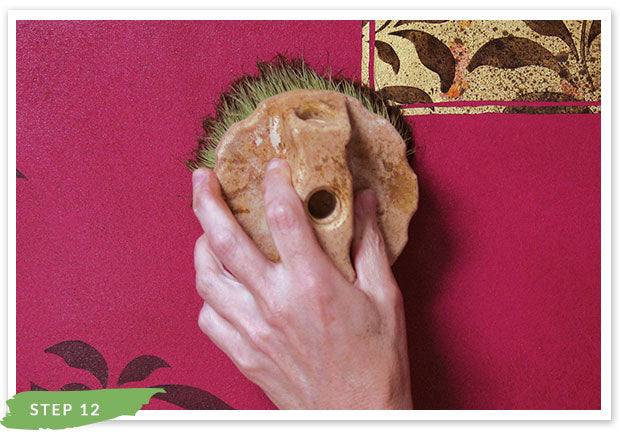
Step 12: Use the same brush with a lighter pressure and swirling motion or stipple to blend out and indication of brush marks.