


Supplies:
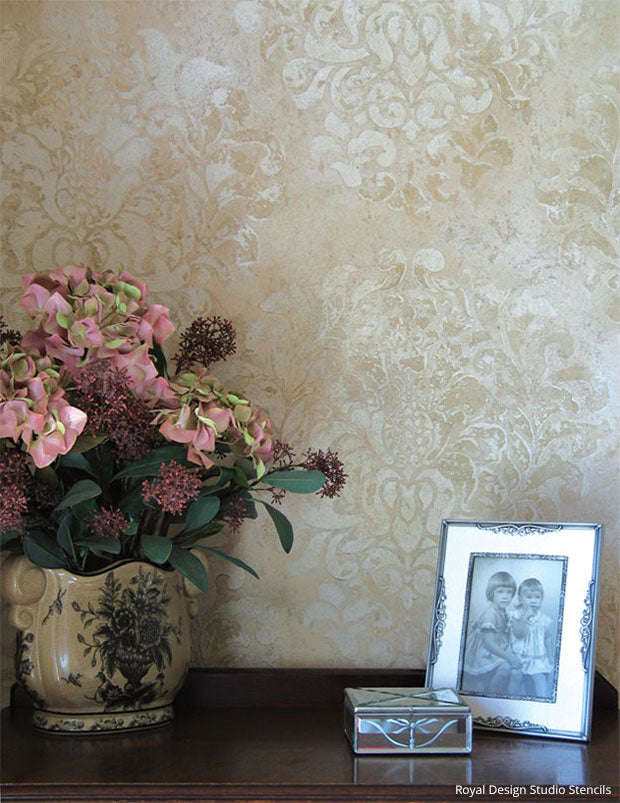
- Royal Design Studio Stencils: Grand Damask Wall Stencil
- Faux Effects® Decorative Products: Aquacolors: Brown, Earth Brown, Metallic Gold, Thick White Sandstone, Texturecoat or Off White Aquabond, Aquacreme, Aquawax
- Tools: Foam Brush, Sea Sponge, Japanese Trowel, Large 3" Stencil Brush, Venetian Trowel, Neon Leon Nylon Stippler, Spray Bottle
Prep: For orange peel or otherwise lightly textured walls, prepare you surface by rolling on two coats of Off White Aquabond. For smooth wall surfaces roll on one to two coats of Texturecoat to give the surface some “tooth”.
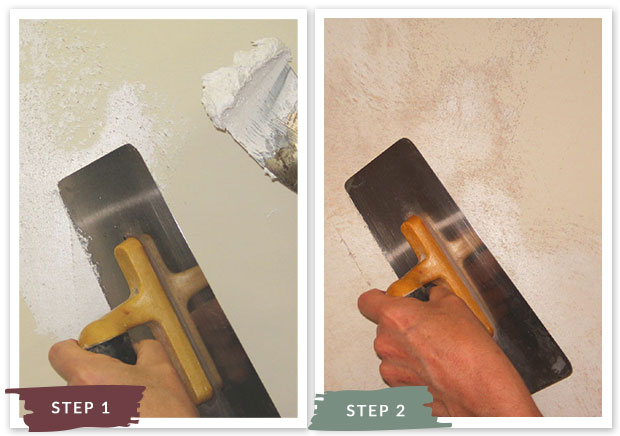
Step 1: Ideally, always allow your basecoats to dry for two days. Thin the Sandstone about 10% with water. Trowel on a thin, tight, smooth coat of Sandstone overall.
Step 2: Use a very hard pressure and higher angle as you trowel, and change the direction of your hand often. This will “pop” the embedded color in the Sandstone and naturally create dark and light areas within the finish.
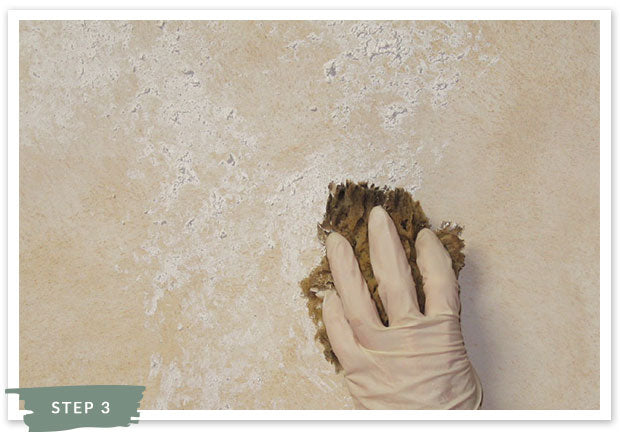
Step 3: Thin the Sandstone a little more for this step, about 15%. Place it in a paint tray and use a large, damp sea sponge to sponge on random patches of Sandstone. “Random” means varied shapes, sizes and thickness of product. Avoid creating a spotty, spongy look by just dabbing allover.

Step 4: Use the Venetian trowel to very lightly knock down just the highest peaks. Hold the trowel at a very low angle, parallel to the surface and very little pressure as you drag the trowel down vertically. Once the texture has dried to a half wet half dry state, go back and burnish harder with the trowel here and there to randomly bring out more of the dark, embedded color.
Step 5: Reapply the thinned Sandstone here and there to about 20% to 30% of the finish area and lightly knock it down immediately with the trowel again. Do not go back and burnish. Leave this layer of color lighter to create more depth within the finish.
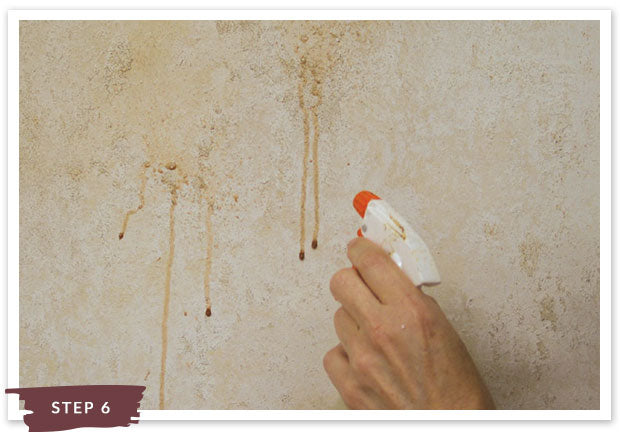
Step 6: Create a colorwash by mixing Brown Aquacolor into water at a ratio of 1T. color to 1 pint of water. Pour into a spray bottle and spray over the dried Sandstone surface, beginning a the top of the wall and working down.
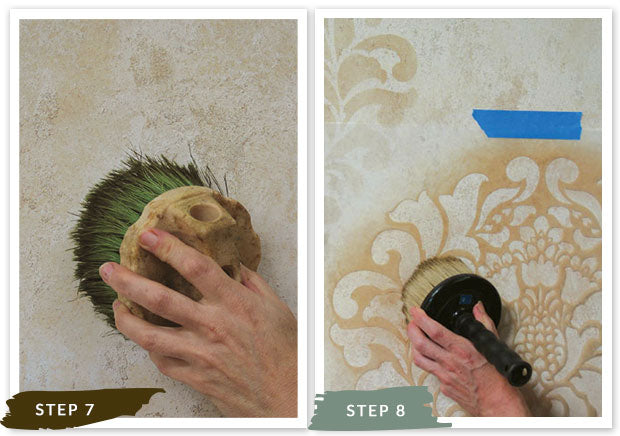
Step 7: Blend with a nylon round brush as you go, working the colorwash into the recessed areas of the textured surface. Colorwashes are ideal because they dry quickly and additional coats can be applied until the desired depth of color is achieved. Let dry completely.
Step 8: Use an Ultimate Stippler to quickly stencil out the pattern repeat with tinted glaze. Mix 1 part Earth Brown Aquacolor into 2 parts Aquacreme and transfer to a paint tray. Use a foam brush to apply the glaze mix to the textured part of the tray and load your brush from there to avoid picking up an excess amount of color/glaze. Offload excess onto paper towels before applying to your wall. Let dry.
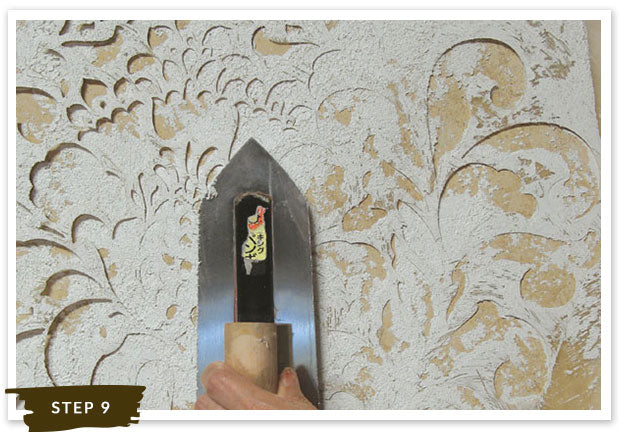
Step 9: Thin Thick White Sandstone with about 15% water. Reposition the stencil over the existing images and use a flexible Japanese trowel to apply the material through the stencil for a patchy effect. Hold the trowel at a parallel angle to the surface and use a light pressure to deposit the material through the stencil. Hint: you might want to practice this first before trying it on the wall.
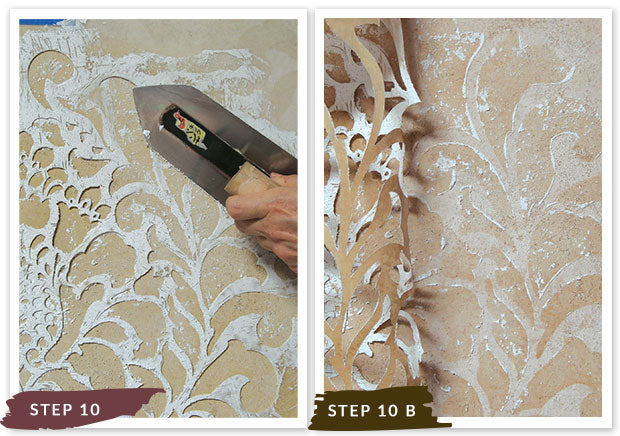
Step 10 & 10B: OPTIONAL: To create a slightly different look on some of the repeats is to “lace” the material so that it is just predominantly deposited just around the edges. This is accomplished by placing a “dirty” stencil (one that has material on it already) over a repeat and just using the trowel to press it against the wall. Let dry.
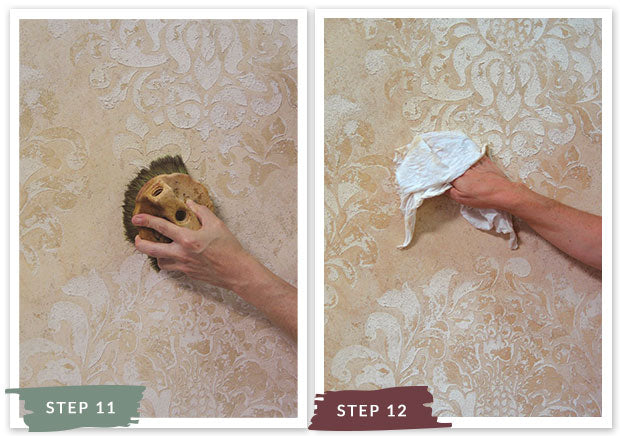
Step 11: OPTIONAL: To create more depth to the finish apply a thin coat of tinted Aquawax using a nylon round brush. To mix, add 2T. Metallic Gold and 1teas. Earth Brown Aquacolor into 2C. wax.
Step 12: Wipe off the design areas immediately with a painter’s rag to highlight those areas. For more color control with the tinted wax you can first apply a layer of clear wax overall and let dry.