
Supplies:
- Royal Design Studio Stencils: Foliate Damask Wall Stencil in Production Size
-
Royal Stencil Cremes: Bronze Age, Antique Silver, Copper Kettle
- Modern Masters: Warm Silver and English Brown Modern Masters Metallic Paint, Latex Extender, Tintable Glaze
- Tools: 3" Stencil Brush, 4" Nylon Roller and Tray, Nap Roller and Tray, Neon Leon Stippler, 1mil Plastic, Badger Softener
Prep: When painting with metallic paints it is best to start with a primer/basecoat underneath of latex paint that has been tinted to a color that closely matches your metallic color or is even slightly darker.
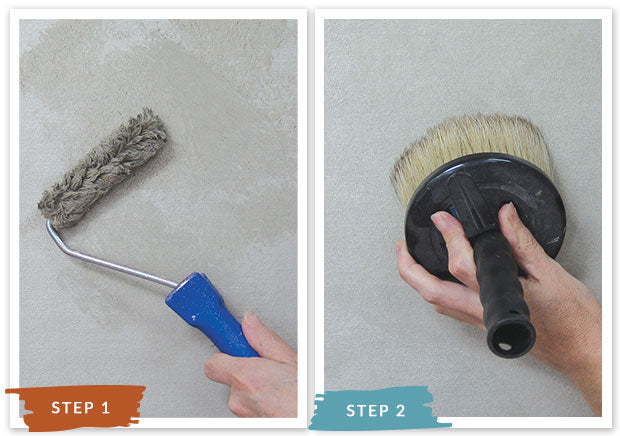
Step 1: Roll on your first coat of Warm Silver Metallic Paint according to the manufacturer’s instructions for reducing lap lines. Let dry. For the second coat, add 10%-20% Extender and use a 4” or larger nylon “nap” roller to apply the paint to smaller areas using a cross-hatching motion.
Step 2: Immediately stipple out the paint with a large stippling brush such as our Neon Leon Stippler. This will effectively reduce any “method of application” marks and will also give it a very light, even- textured look.
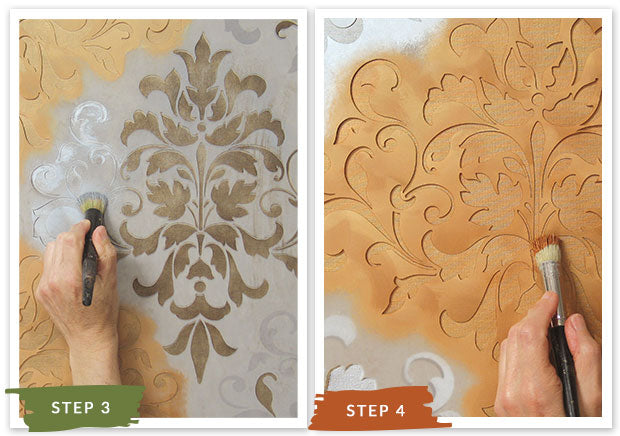
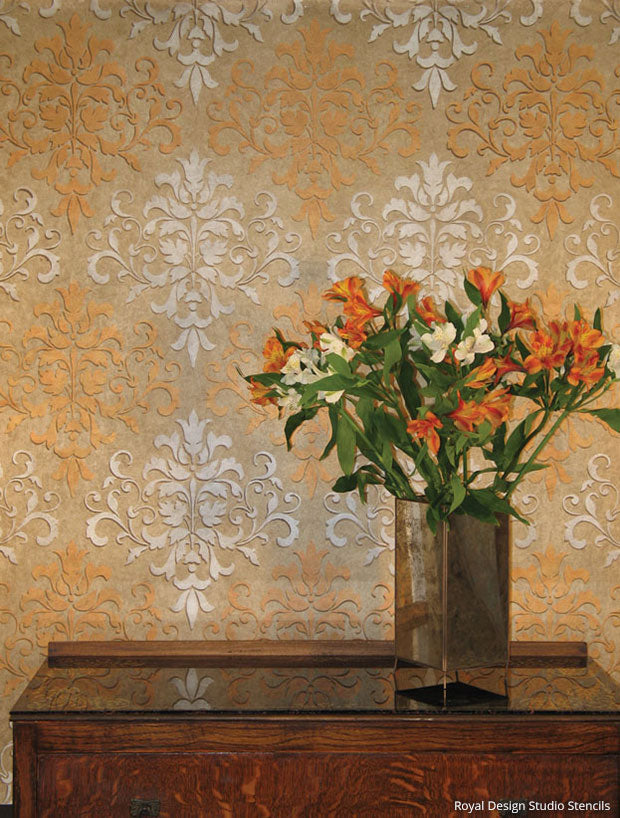
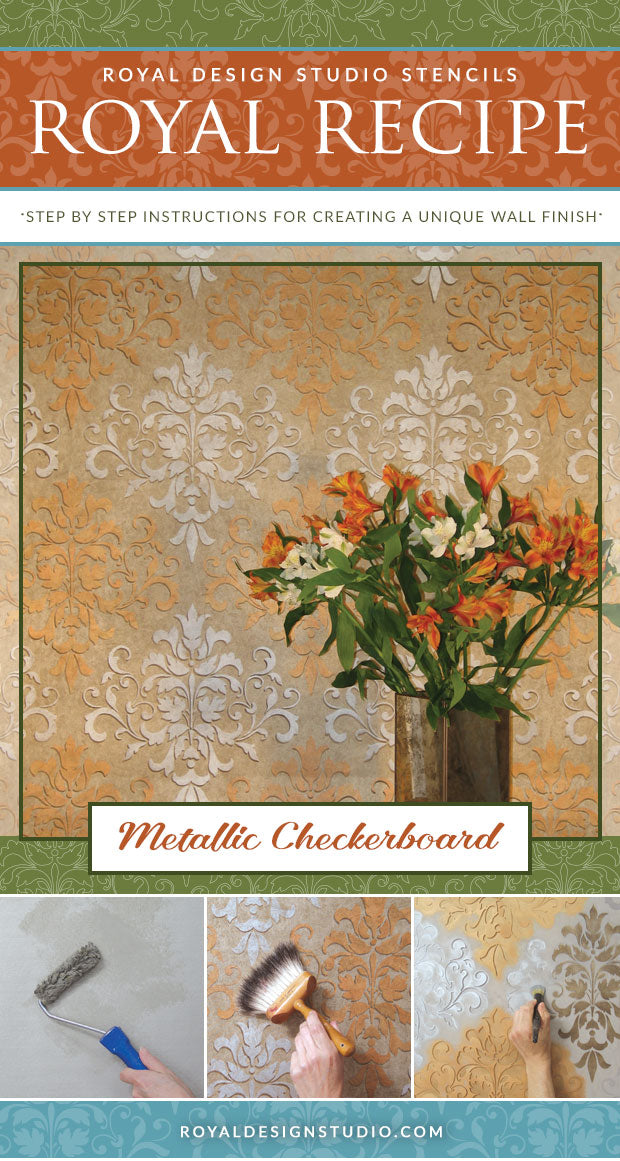
Step 3: Add about 20% Extender to English Brown Metallic Paint. Use a large stencil brush to stencil the Foliate Damask pattern over the wall surface, aiming for solid, even coverage. Replace the stencil in its original position and then shift it on a diagonal (up and to the right) about 1/8”. Use a swirling motion to stencil Bronze Age and Antique Silver Royal Stencil Creme in every other repeat.
Step 4: To create additional texture and make the metallic stenciling “pop” go back over theBronze Age stenciling with Copper Kettle. In this case, use a stippling or pouncing motion randomly over the surface.
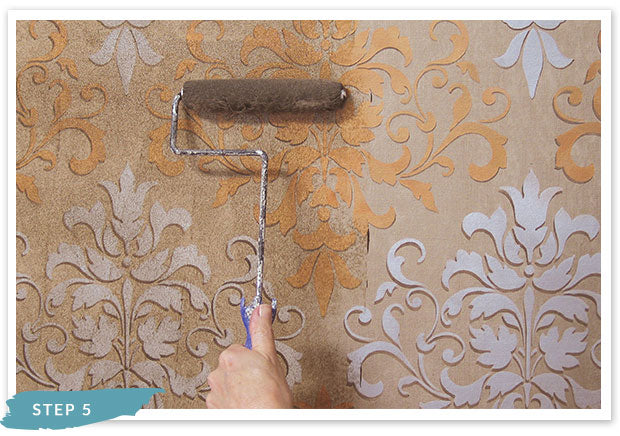
Step 5: Mix English Brown into MM Extender at a rate of 1 tsp. English Brown to 1 cup Extender. Use a ½“ nap roller to apply a generous, even layer of glaze from floor to ceiling in a workable area (approx. 4’ wide).

Step 6: Keeping a wet, leading edge to your glaze, use a large, lightly crumpled piece of cut 1mil plastic to roll gently over and around the surface to create a texture. You can soften the texture, if desired by simply continuing to press into it lightly with the plastic.
Step 7: After setting up a bit, the texture can be further softened with a Badger Softener. Use a very light pressure and random stroke to gently soften any harsh edges.