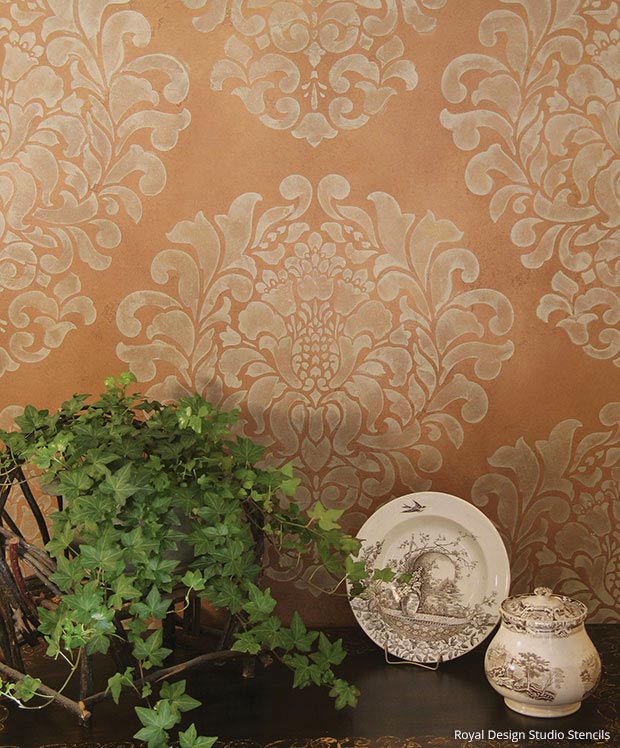


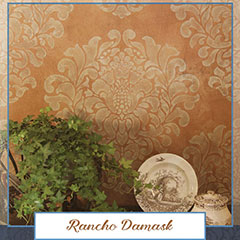
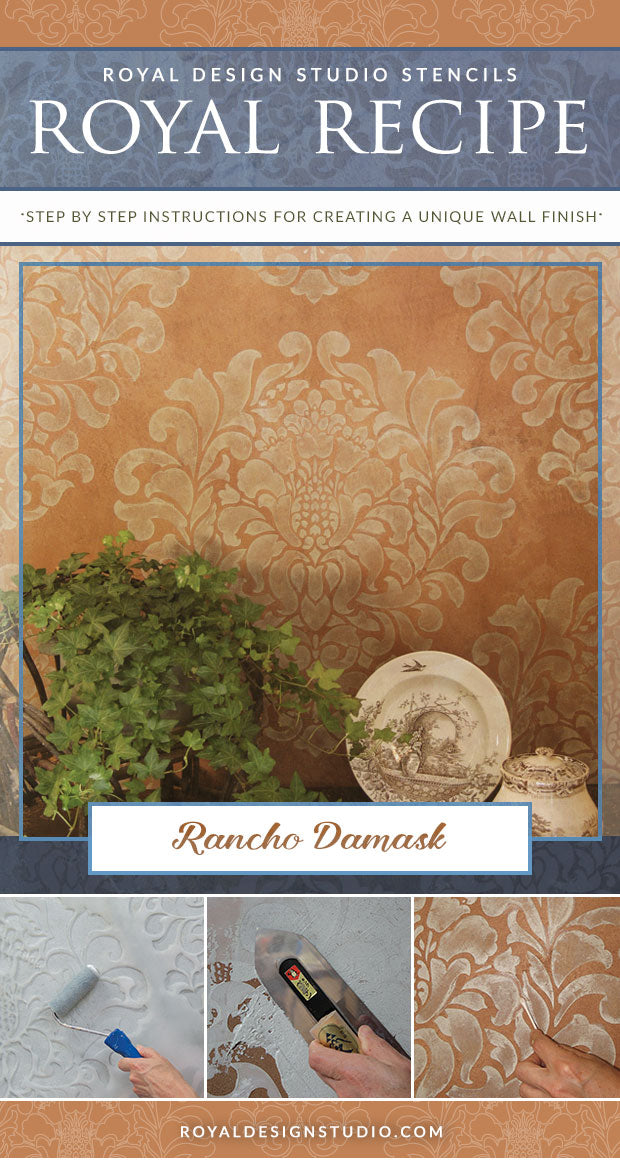
Supplies:
- Royal Design Studio Stencils: Grand Damask Wall Stencil in Standard and Production Sizes
- American Walnut and Rich Brown Stain & Seal,
- Faux Effects® Decorative Products: Texturecoat or Off White Aquabond, Aquawax, Blue and Earth Brown Aquacolor, Untinted Plastetex, Plastertex, FX Thinner
- Tools: 4" Foam Roller, Neon Leon Nylon Brush, Japanese Trowel, 3M Super 77 Spray Adhesive, Cotton Towel, Q-Tips
Prep: Apply one to two coats of Texturecoat with a short nap roller to a smooth wall surface. If your wall surface is already slightly textured you can simply basecoat with Off White Aquabond. Let dry for 1-2 days, if possible.

Step 1: Use a Japanese or Venetian trowel to apply a tight skim coat of Plastertex over the entire surface. As you work, you can create some slight texture here and there by using a skip-trowel method. To do this, use a lighter pressure with very little material on the trowel to deposit random, low patches of product with irregular edges. Let dry.
Step 2: Wax Resist Technique: Mix up a custom color of Aquawax by adding colors at the following ratio: 1 ½ teas. Blue and ½ teas. Earth Brown to 1 C. of wax for every 200 sq. ft. of wall space (approximate). Mix well and place in a roller tray. Load a foam roller and distribute well on the roller by first rolling repeatedly on the paint tray and then offloading slightly on paper towels to remove excess. Use a light pressure to roll the tinted wax through the Grand Damask stencil, aiming for even coverage. Stencil with the tinted wax over your entire surface area. Let dry.
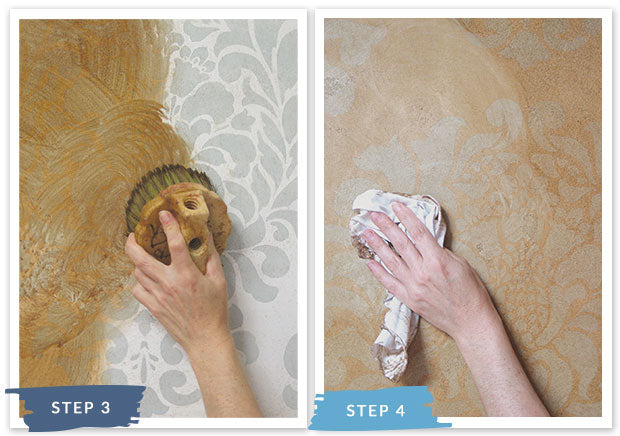
Step 3: Create a custom stain mix by combining 2 parts American Walnut and 1 part Rich Brown Stain and Seal. Blend that mix 1:1 with FX Thinner. Apply to the wall surface generously with a Neon Leon Nylon Brush using a scrubbing, circular motion.
Step 4: Keeping a wet edge in front of you, remove excess as you go by blotting with a cotton towel.
Step 5: Blend further and soften any “method of application” marks with a large soft brush or a clean, dry Neon Leon. Let dry.
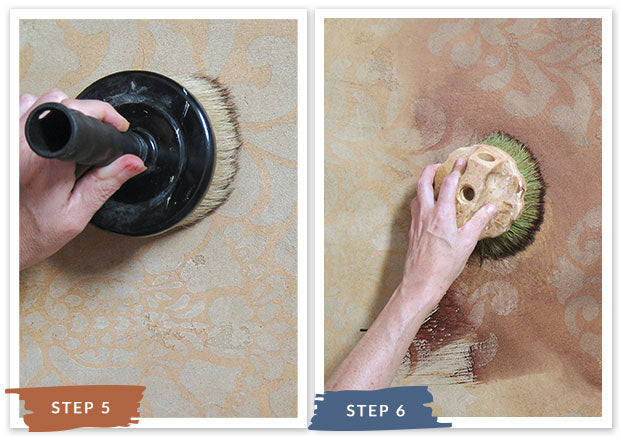
Step 6: Repeats steps 3-5 to further darken your finish, as desired.
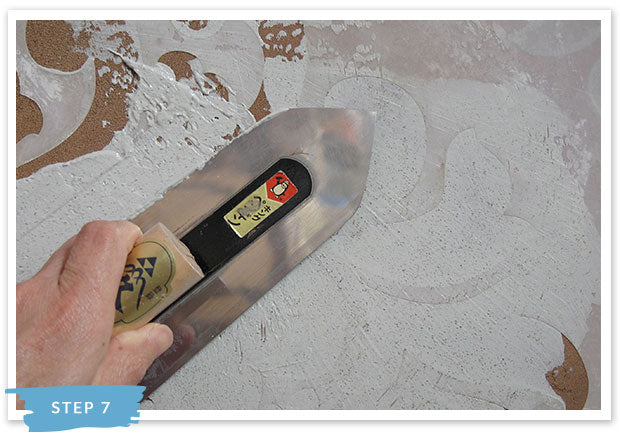
Step 7: Tint the Untinted Plastertex by adding ¾ teas. Blue and 1 teas. Earth Brown Aquacolor to each Quart of Untinted Plastertex. (Note: Untinted Plastertex differs from regular Plastertex as it does not contain any white colorant. This makes it it easy to tint to darker, non pastel colors) Replace the stencil directly over the wax-stenciled image. Use a flexible Japanese Trowel to carefully apply the tinted Plastertex mixture through the stencil. Keep the trowel at a fairly flat angle (parallel to wall) and use a lighter pressure, as if you were icing a warm cake.
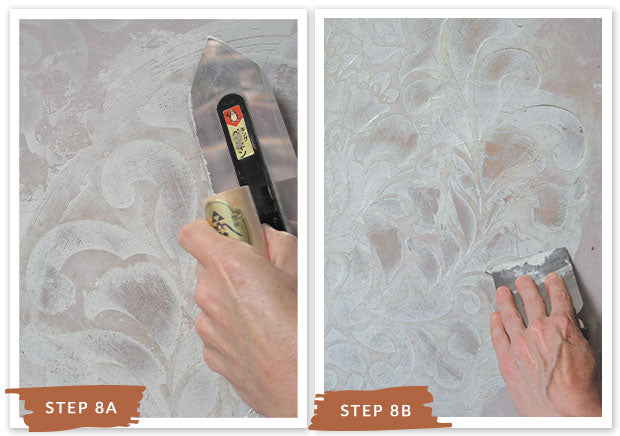
Step 8: Once the image is filled in, use a clean trowel to then remove the excess material from the center areas of the design elements by pressing slightly harder and raising the angle on the trowel (more perpendicular to wall). A Japan Scraper could also be used for this step. Hopscotch around to every other Damask repeat to continue without damaging the fresh embossed images.
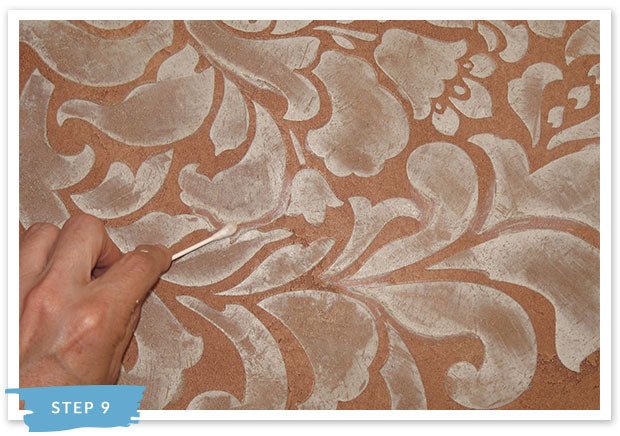
Step 9: “Run-unders” are inevitable and should be considered an integral part of the finish, however you can clean up material seepage with dampened Q-tips. You can use 3M Super 77 Spray Adhesive to hold the stencil more tightly to the surface while embossing, if desired.