


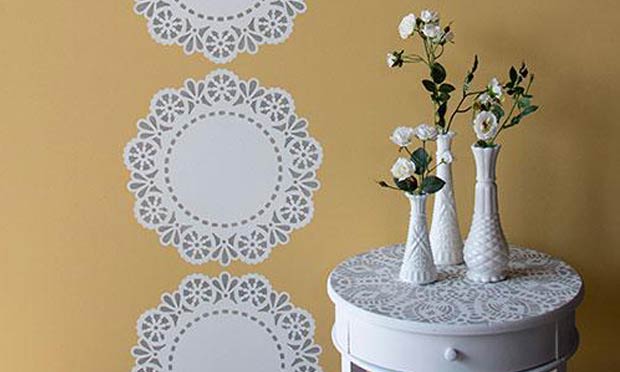
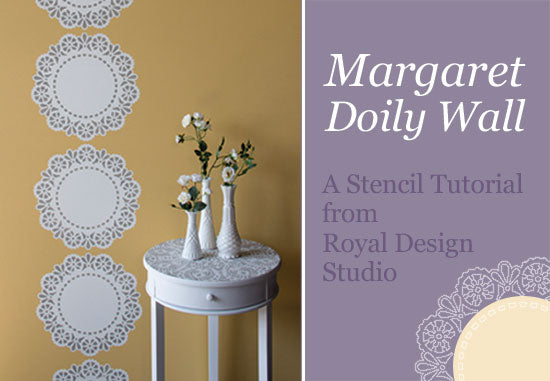
Here's a simple and simply lovely how to stencil tutorial for using one of our romantic lace doily designs, the Margaret Doily Lace stencil. Rather than repeat the stencil pattern randomly on the wall, consider creating an elegant focal point on a wall by repeating the stencil vertically to create a lacy stripe effect.
All of our Lace Doily stencil patterns come in 2 layers-a silhouette shape layer and a design detail layer. This gives you different options for how to use them. In this case, we started with a soft yellow color on the wall (created with a 1:1 mix of Chalk Paint® in Arles and Cream). In order to get a white doily we first use the silhouette shape layer to paint a solid white shape.
Stencil Supplies for This Project:
Chalk Paint® Decorative Paint Colors: Pure White, Paris Grey, French Linen, Arles + Cream
Small Foam Paint Roller, Roller Handle, & Paint Tray
Contractor's Paper, Paper Towels, Painter's Tape, Level, Ruler, Spray Adhesive (we love 3M Super 77)
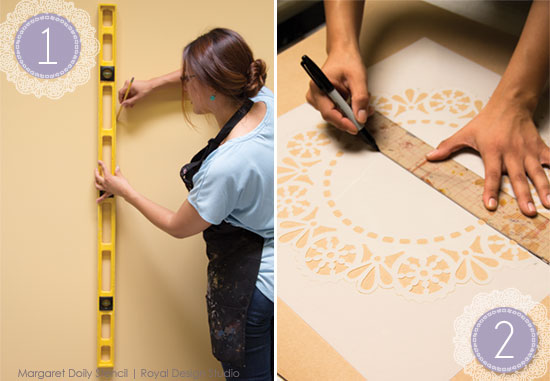
Step 1:
Use a level and soft pencil to mark a "plumb" line on the wall where you want the center of your lacy stripe to be.
Step 2:
Use a Sharpie marker and ruler to draw a line down the center of both layers of the doily stencil pattern.

Step 3:
Begin by stencil painting in the silhouette layer of the doily pattern. Align the line you made on the stencil up with the pencil line on your wall.
Step 4:
This step is optional, but helps you to get a cleaner edge on your stencil print as you will have little to no bleed-under with the paint when using a Stencil Brush. Load a 1.5" Stencil Brush with Chalk Paint® in Pure White, and offload excess paint by swirling on a paper towel. Use a circular motion with the brush to paint all around the edge of the open shape. This will build up a little ridge of paint around the edge of the stencil which will discourage any paint seepage when you use the foam roller to stencil on the next step.
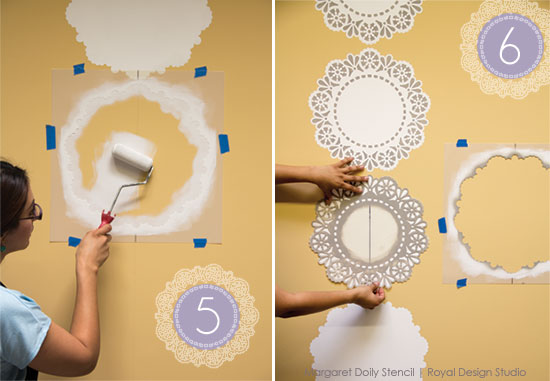
Step 5:
Load a 4" foam roller with Pure White paint and offload excess paint on paper towels or contractor's paper. Use a light but firm pressure to fill in the silhouette shape of the stencil with the white paint. You will need to do at least 2 coats for good coverage, but the Chalk Paint® dries super fast!
Step 6:
One all your silhouette shapes are completely filled in and dry, spray the doily detail layer of the stencil lightly with spray adhesive and position it carefully over the painted white shape.
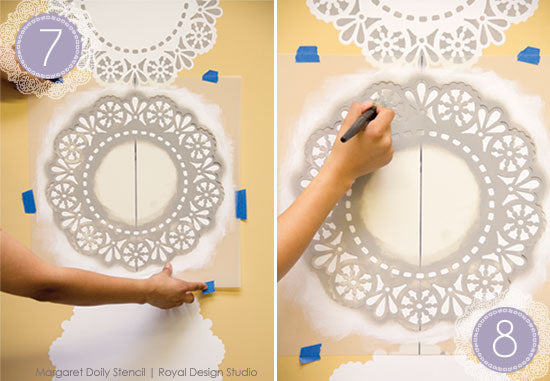
Step 7:
Tape the silhouette stencil layer back in place. This will keep the gray paint used in the next step from getting on your wall!
Step 8:
Mix the Chalk Paint® color Paris Gray and French Linen 1:1 to create a warm, soft gray. Use a 1" Stencil Brush to stencil in the detail areas of the design with solid color. (Substitute any warm gray craft paint if you wish)
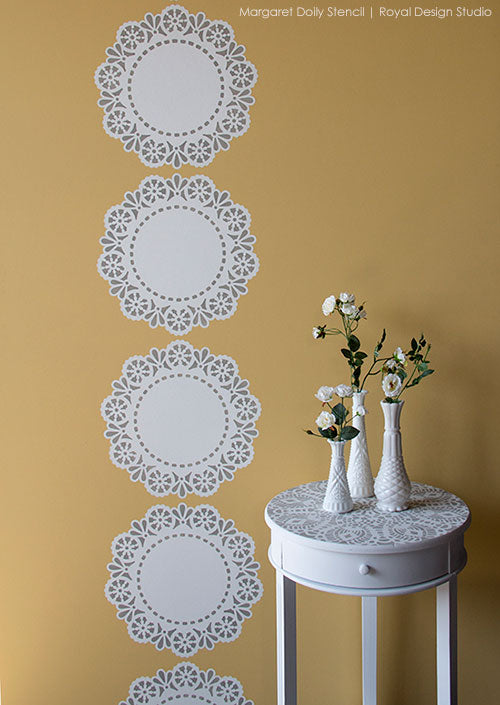
The stenciled lace doily stripe creates a perfect backdrop and accent for a romantic spot in a sunny room. Here, we've finished off the look with a coordinating white stenciled table and some thrift store milk glass vases filled and white roses.
Here are some additional ideas for this stenciled stripe effect to get your creative paint wheels turning:
- Stencil some doilies down the center of a table runner, on a door, or at the edge of floor to ceiling curtains.
- Create a horizontal stripe around a high ceiling to create a lacy valance effect.
- Stencil a large doily design, such as our Elizabeth Lace Doily Stencil on a wood floor down a long hallway.
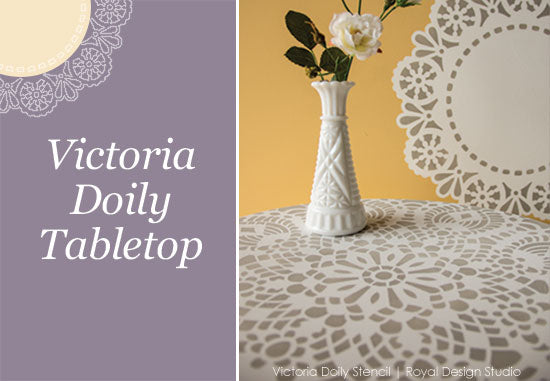
Stencil Bonus!! The gorgeous Victoria Doily Lace stencil was used in the same colors to glam up a simple table. The Victoria Doily is quite large at 21" wide, and we centered on the small round tabletop, allowing the design to run off the edge. It makes for a great allover stencil effect!


