


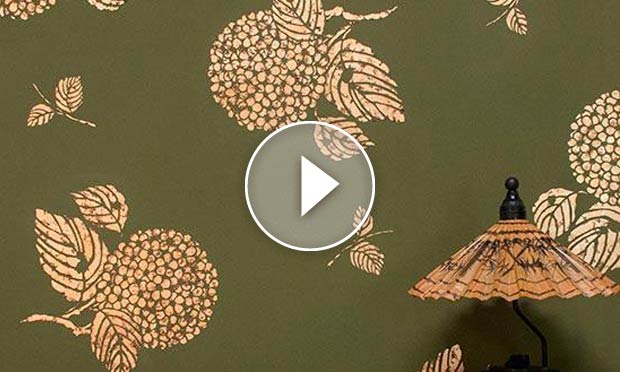

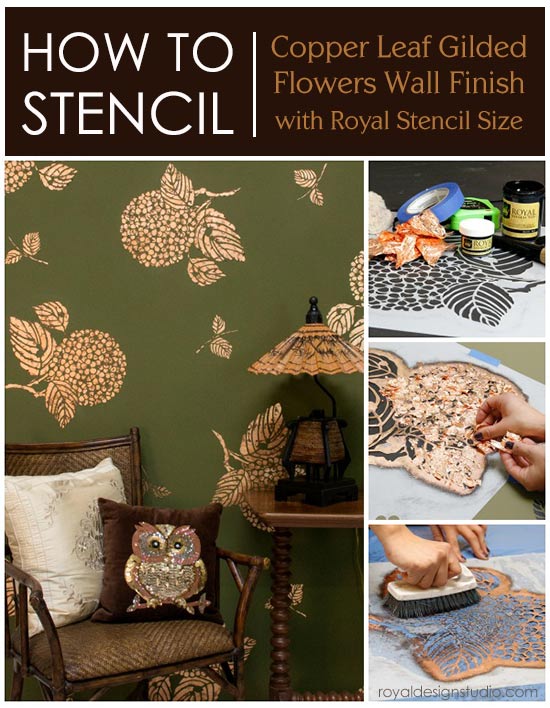
Get ready to make your walls glimmer and glow! Here we show you how to stencil a rich allover wall treatment using randomly placed Japanese Hydrangea flower stencil motifs with copper metal leaf and our new Royal Stencil Size. The Royal Stencil Size is a special “glue” for metal leaf that comes in a clear formula, and also pre-tinted in Black and Red. Like our Royal Stencil Cremes, it features a thick, creamy finish. This allows you to apply the size through the stencil easily and cleanly, wait a few minutes, and then apply the metal leaf of your choice through the stencil to create a crisp, gilded design.
This copper leaf wall finish features our Black Royal Stencil Size with a broken leaf technique that allows some of the black background to show through, creating more depth and interest. A large floral stencil motif is used randomly on the wall here to create a unique allover pattern that would be ideal for a stenciled feature wall or even a whole room wall finish.
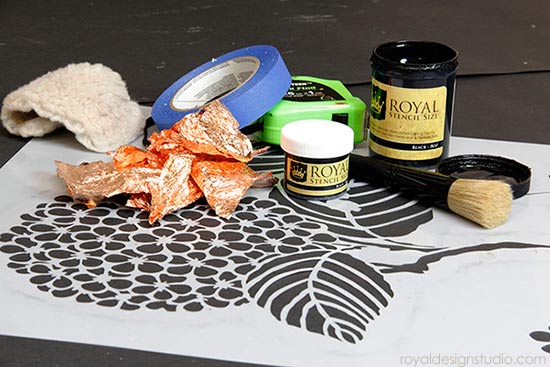
Stencil Supplies you will need for this project:
- Large Japanese Hydrangea Floral Stencil
- 1.5" Stencil Brush
- Black Royal Stencil Size
- Copper Leaf
- Large 3" Stencil/Wax Brush
- Annie Sloan Soft Wax
- Painters Tape
- Paper Towels
- Lambswool Pad
- Motsenbocker’s Lift Off Latex Paint Remover
- Scrub Brush
You can start with any wall color painted in a good quality flat or eggshell latex paint. In this case, we painted 2 coats of Chalk Paint® Decorative Paint in the color Olive.
For this finish we have chosen to take a large stencil motif and repeat it randomly. This will require some designing on your part, but it is really quite easy. We recommend starting in the middle of the wall and working out from there, turning the stencil as you go
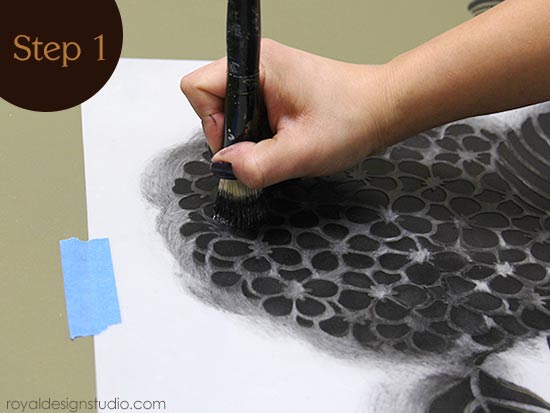
Step 1: Apply the Royal Stencil Size through the stencil with a basic "dry-brush" stencil technique. Load just the tips of the stencil brush with Royal Stencil Size and offload excess onto paper towels using a hard circular motion. Stencil the size through the stencil with a light, circular motion to apply the size evenly.
Stencil one layer of size though 3 or 4 Japanese Hydrangea stencil repeats. Then go back and stencil a second layer of size through each one again. After two coats, the Stencil Size will achieve the right level of "tackiness" for applying the leaf after about 15 minutes, so you can keep moving through each stenciled element in order to apply the 2 layers of Stencil Size and then move on to applying the Copper Leaf in Step 2.
You will repeat this same process to complete the stenciling of 3 or 4 repeats as you move across the wall.
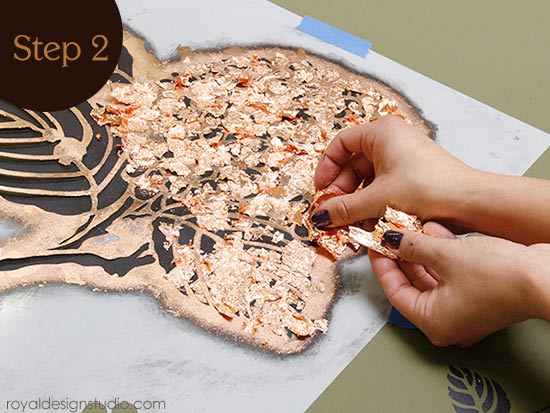
Step 2: Replace the stencil over the first motif and apply the copper leaf in a broken manner through the stencil to leave some of the Black Royal Stencil Size showing through. Do this by removing a sheet of copper leaf from the book and breaking it into smaller pieces as you place it through the stencil.
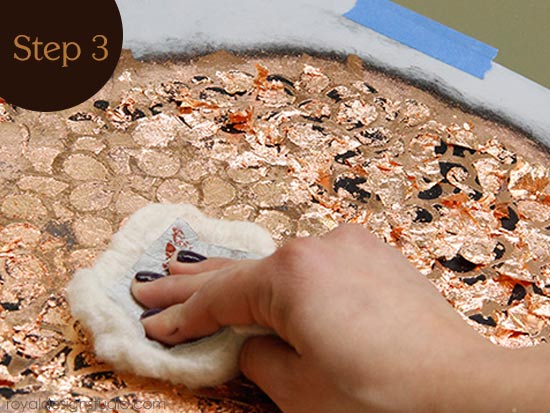
Step 3: Use a lambswool pad (purchased from the paint department at Home Depot or Lowe's) to press and buff the leaf into place. Alternatively you can use a soft cotton rag or even the flat of your hand. As you burnish the leaf it will continue to break down into smaller piece, filling in more of the exposed black areas.
 .
.
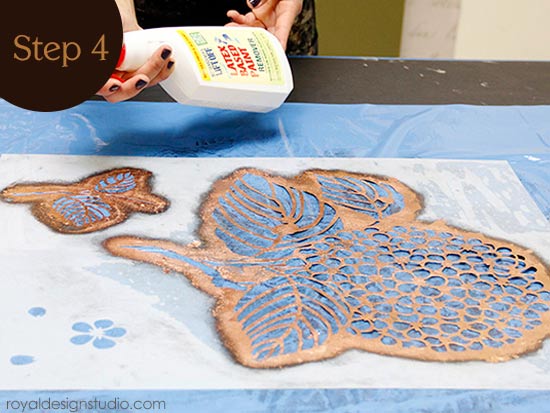
Step 4: Remove the stencil and clean before moving on in to the second set of repeats. The easiest and fastest way to clean the stencil is to lay it on a flat surface. This could be a plastic covered tabletop, large sink, or even a bathtub. Spray the dirty stencil with Motsenbocker's Lift Off and let it set for a minute or so
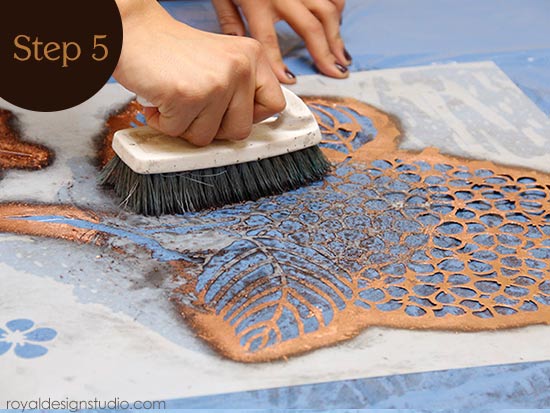
Step 5: A scrub brush makes it easy to clean the stencil quickly and will not damage the stencil by bending any of the tiny points or pieces in the pattern. Scrub with a hard pressure on both sides of the stencil.
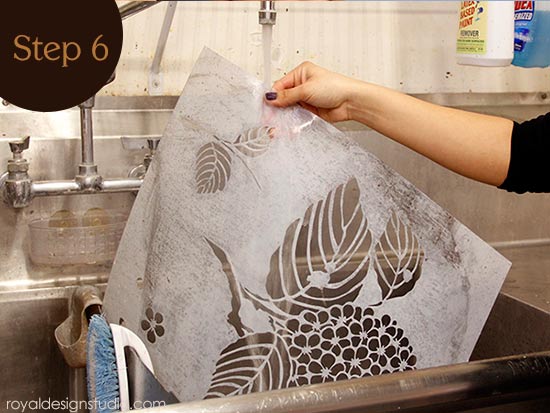
Step 6: Rinse the stencil off and pat dry with a towel before continuing on the wall.
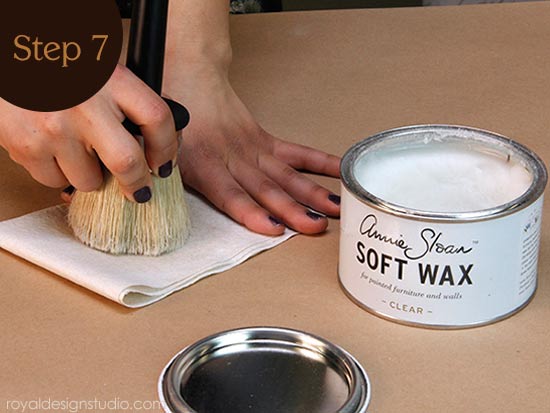
Step 7: If it is left unsealed, copper leaf can tarnish over time, especially in a humid environment. Copper leaf (and gold leaf) can be sealed with shellac, oil-based polyurethane, or wax. Here, we demonstrate an easy way to seal the stenciled floral elements with wax.
Load a large stencil/wax brush with just a SMALL amount of wax on the tips of the brush and offload any excess wax off the brush by rubbing in a hard circular motion onto paper towels.
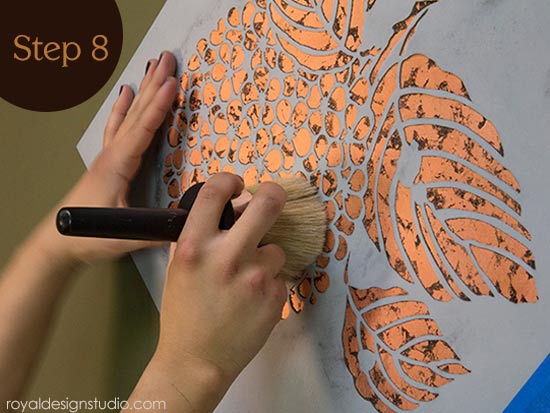
Step 8: Replace a clean stencil over the stenciled elements and use a light pressure to swirl a thin layer of wax through the stencil. Repeat this over each of the stenciled element.
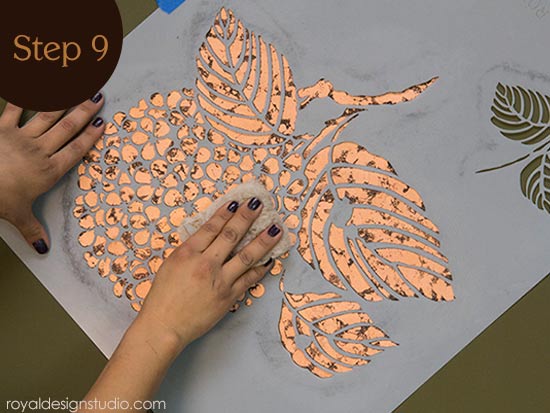
Step 9: Once the wax has dried, replace the stencil one more time and buff the wax with a piece of lambswool pad or a soft cotton rag. The wax will not only seal the leaf but will add more depth to the overall look.
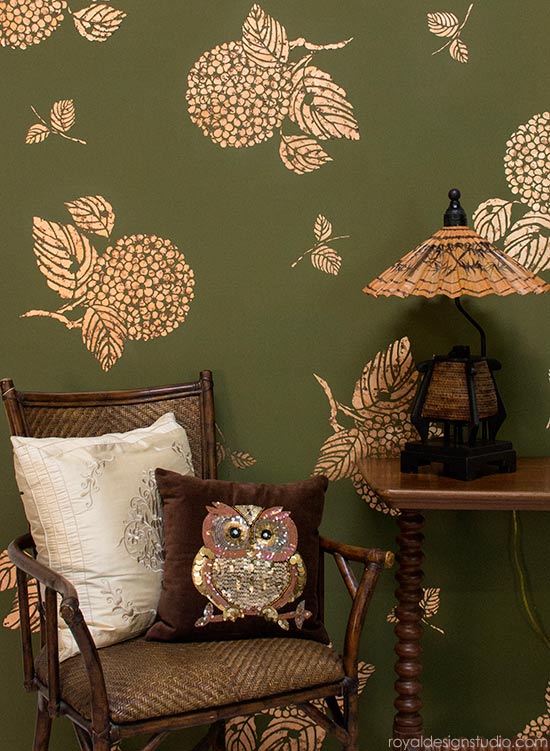
The final gilded stencil finish in a room setting is quite dramatic and dazzling. You can use this same technique with different colors of metal leaf and size. Consider translating this idea to stenciled furniture or even a medallion stencil on a ceiling from our Ceiling Stencil Collection.
See more How-to Tutorials on how to use Royal Stencil Size:
How to Gild a Frame with Gold Leaf and Royal Stencil Size


