

See how to create an easy and exotic wall art treatment using pre-cut Wall Art Wood Shapes, a damask stencil embossing technique and layers of Metallic Royal Stencil Creme Paints.
This elegant wall art project can be done in less than a day! Best of all, the Wall Art Wood Shapes are removable and can be repainted or rearranged in any number of ways when you are ready to update your look!
Stencil Supplies:
- Foliate Damask Stencil
- Trellis Wall Art Wood Shapes: Large
- Royal Stencil Creme Paints: Bright Gold, Antique Gold, Metallic Teal, Peacock Fancy, Patina Green, Lime Shine, Frosted Lilac, Copper Kettle
- Stencil Brushes
- Wood Icing
- Van Dyke Brown Stain and Seal
- SoSlow Super Extender
- Japanese Trowel, Taping Knife, Sanding Block, Chip Brushes, Dust Mask, Contractor’s Paper, Paper Towels
Optional: Base coat your Trellis Wall Art Wood Shapes first with black paint using a roller or foam brush. A black background will add instant depth to the Metallic Royal Stencil Cremes.
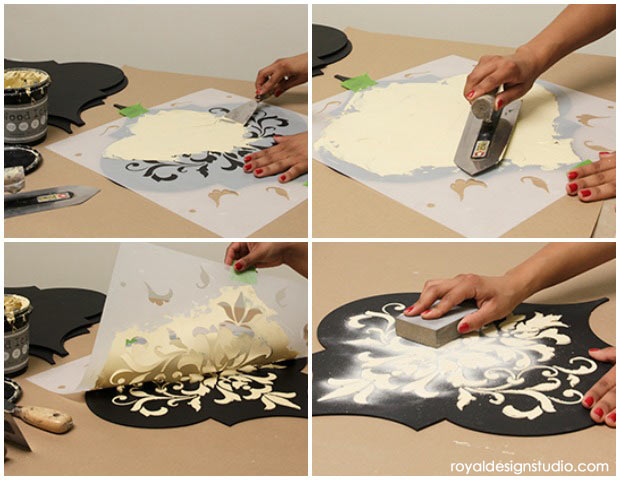
Stencil Embossing with Wood Icing:
Wood Icing is a heavy textured material that is ideal for creating raised effects with stencils. Center your Foliate Damask Stencil on the wood shape and apply Wood Icing with a taping knife to cover all over. Hold the knife at a low angle and apply as if you were icing a cake.
Use a plaster trowel, like the Japanese Trowel shown here to level out the Wood Icing and remove lines.
Lift just one edge of the stencil carefully to check to see if you’ve gotten the desired thickness and amount of coverage. Clean excess Wood Icing off the stencil by placing it on contractor’s paper or heavy plastic and scrape off with a trowel (this can be reused!). Rinse the stencil, dry and continue with other wood shapes.
Once the Wood Icing is completely dry, sand with a medium grit sanding block to create a smooth finish. Sanding Wood Icing will produce a lot of dust, so we recommend that you do this step outside and wear a dust mask! Brush off excess dust with an old paint brush and wipe with a dry cloth.
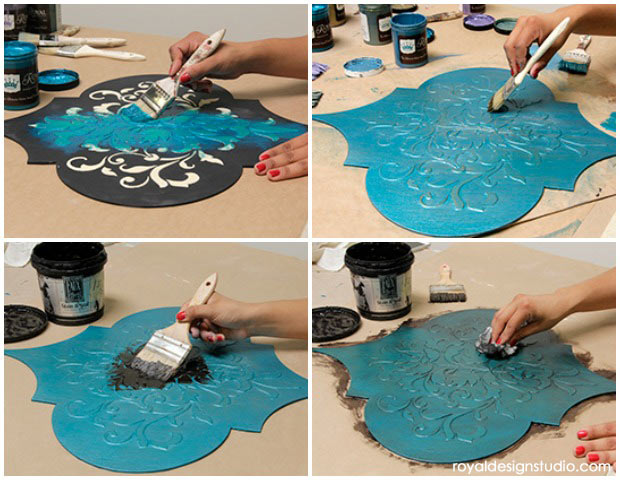
Dry Brushing with Royal Stencil Cremes:
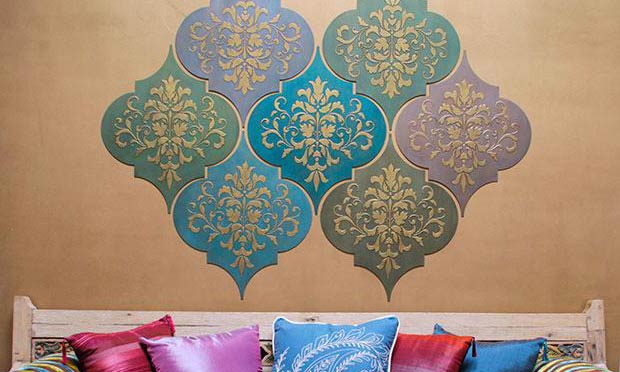
The beautiful colors and patina look on these Trellis Wood Shapes was created by dry brushing various colors of Metallic Royal Stencil Cremes after base coating them with a complimentary color. For this project we base coated one shape with Peacock Fancy, 2 with Metallic Teal, 2 with Patina Green, and 2 with Frosted Lilac. You can use a Chip Brush for this step. 2 coats may be required for full coverage.
Once the Metallic base coat is dry, use a chip brush to dry brush different Royal Stencil Creme colors on top of the base coat. For dry brushing dip just the tips of a clean, dry Chip Brush into the paint. Then offload the excess paint by rubbing back and forth on a piece of contractor’s paper or paper towel. Lightly drag the brush back and forth using straight vertical strokes from the top to bottom (and back) across the surface. It is important to use a light touch and just apply the color here and there. You can always go back and dry brush your base color back over if you apply too much. You really can’t mess this up!! The more layers and colors you add the better it gets!
Reading from left to right, top to bottom these are the colors used:
- Frosted Lilac base- dry brush with Peacock Fancy and Antique Gold.
- Metallic Teal base- dry brush with Patina Green and Lime Shine.
- Patina Green base - dry brush with Peacock Fancy and Lime Shine.
- Peacock Fancy base - dry brush with Teal and Antique Gold.
- Frosted Lilac base- dry brush with Copper Kettle, Metallic Teal and Antique Gold.
- MetallicTeal base - dry brush with Peacock Fancy and Antique Gold.
- Patina Green base - dry brush with Peacock Fancy, Bright Gold and Antique Gold.
Toning with Stain and Seal:
Applying a toning layer of translucent stain will give the trellis wood shapes more depth and also help to unify the overall look. For a good translucent stain, mix of 1 part Van Dyke Stain and Seal with 1 part SoSlow Super Extender. Use a chip brush to apply overall and immediately remove excess and soften the look with cheesecloth. Note: You will probably want to wear gloves for this step if you value your manicure!) Allow to dry.

Highlight the Foliate Damask Stencil:
Now it’s time to highlight that beautiful, raised stencil pattern. Reposition the Foliate Damask Stencil on top of the raised pattern you created with Wood Icing. Stencil it with Antique Gold Royal Stencil Creme using a 1” stencil brush. Be sure to offload excess paint from your brush onto paper towels before stenciling so you get a nice crisp look.
To further highlight the pattern, go back with a 3/4” stencil brush (with the stencil still in place) to dry brush and stipple/pounce here and there with Bright Gold Royal Stencil Creme.
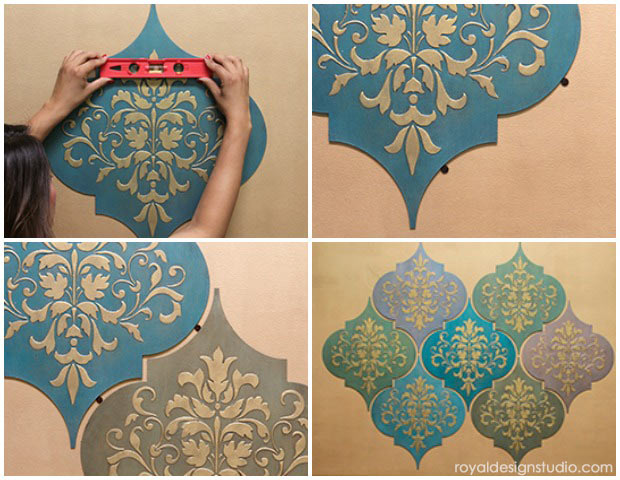
Hanging Wall Art Wood Shapes:
Wall Art Wood Shapes are cut from ¼” MDF and are lightweight and easy to hang using several low-tack Scotch Removable Mounting Squares for each wood tile shape. These are ideal for smooth walls, will hold securely and will not damage your walls when you remove them.
The trellis shapes can be butted right up against each other or spaced evenly apart to allow some of the wall color to peek through. To get even spacing between the tiles use Felt Pads from Home Depot. The size we used was 3/8” in diameter. These come in different sizes and you can simply reuse the same two repositionable pads and move them around as you place your tiles. Be sure to check that your first tile in particular is level before continuing on with the rest of the tile placement.
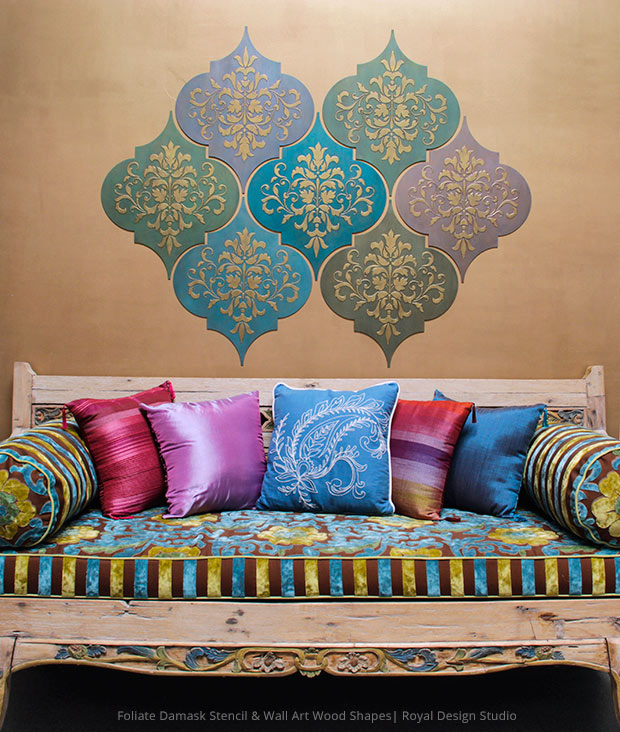
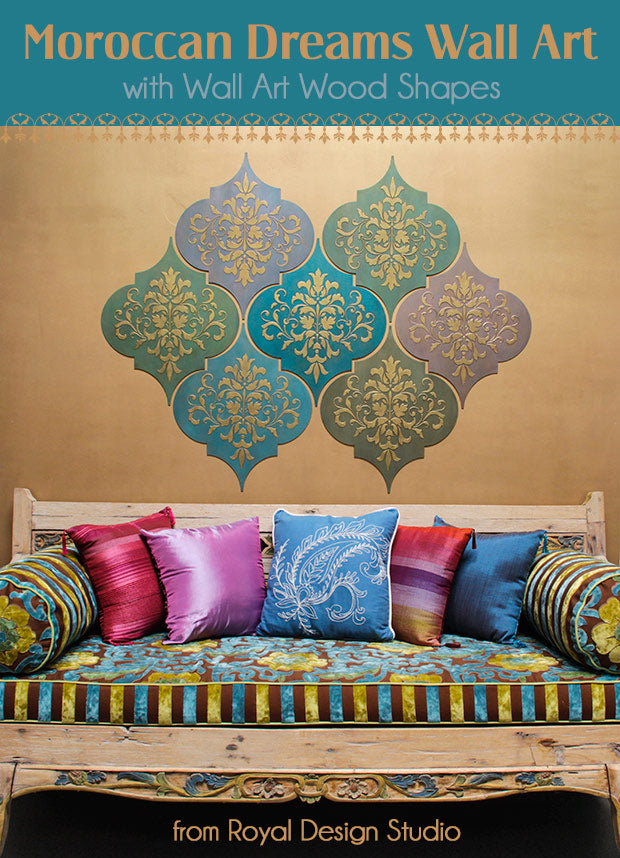
Moroccan Dreams Wall Art:
This would be a great look on any focal point wall. Consider using these behind a bed to create an elegant faux headboard, or over a fireplace or entry table. The wood shapes can be butted up against each other like tile and cut with a saw to fit a fixed space like a back splash or recessed niche.
Learn more about stenciling our Wall Art Wood Shapes for Wall Decor here!


