


Today we are sharing how to stencil tone on tone patterned stripes for an elegant finish that only LOOKS super complicated! The trick is to combine just two colors of paint: one flat and one metallic with a simple ornamental stencil pattern. The secret is in the tape! Read on and all will be revealed…
Stencil Supplies you will need for this project:
- Ornamental Flower Wall Art Stencil from Royal Design Studio
- Royal Stencil Cream paint: Antique Silver, Pearl Oyster
- BEHR Marquee Almond Butter Matte Paint
- Martha Stewart Mercury Glaze
- 2 -1 ½” Stencil Brushes.
- Flocked Foam Stencil Roller, Roller Tray, Roller Handle.
- Level, Ruler, Measuring tape, Painters Tape, and Paper Towels.
Basecoat
Paint the wall you will be working on with 2 BEHR Marquee Almond Butter Matte Paint. Allow to dry. Only one coat of paint will be needed. BEHR Marquee Paint colors are a combination of paint and primer that allows you to have a better coverage with just one coat.
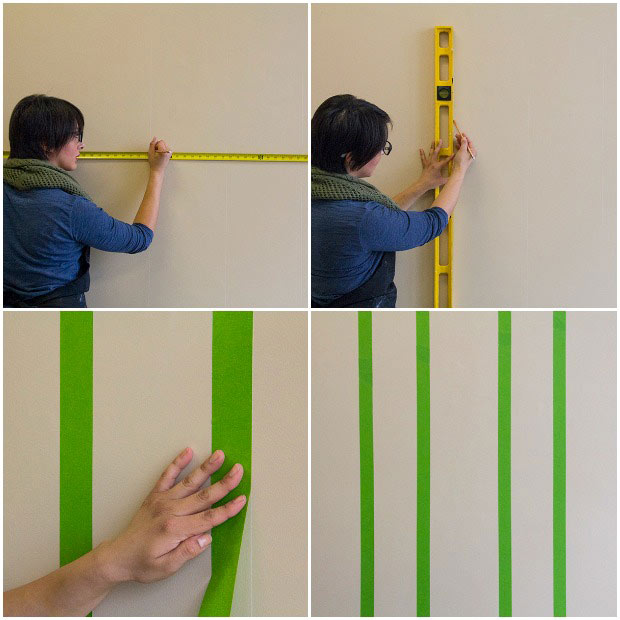
Step 1: Find the center of your wall and then mark lines from the ceiling line to the floor 10″ apart. Start from the center and move in both directions from your center line (Left and Right). Use a level to make sure each line is straight. Use a good quality Painters Tape (we used Frog Tape) to mask off every other 10” stripe space. Burnish the edges of the tape well to make sure that your glaze paint doesn’t seep under the tape.
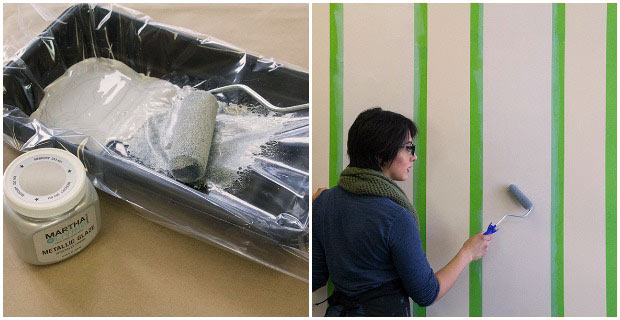
Step 2: Use Martha Stewart Metallic Glaze and a Flocked Foam Stencil Roller to paint the masked off 10” wide stripes on the wall. Allow to dry. The drying time will be longer than with regular latex paint, so allow 12 hours to make sure it is completely dry before moving on to the next step.
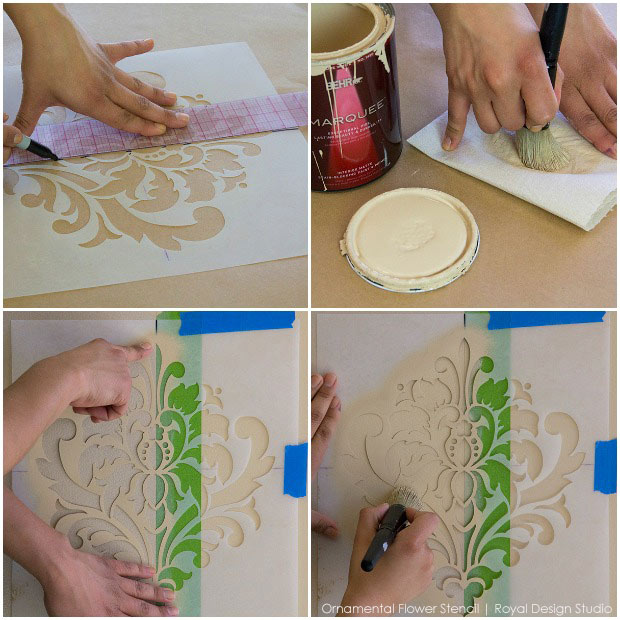
Step 3: Use a sharpie and a ruler to draw a straight line going down the center of your stencil pattern; you will use this stripe as a guide when placing the stencil.
Starting from the top of your wall, place one half of the stencil over the glazed stripe, matching the line you just drew to the edge of the Painter’s Tape.
Use a 1 ½” Stencil brush to Stencil with BEHR Marquee Almond Butter Matte Paint. Load your stencil brush with paint then off load on a paper towel, to remove excess paint and avoid bleeds in your work. Stencil using circular motions and light pressure. Stencil only the half of your stencil that sits over the glazed stripe. Leave a 1″ space between each motif as you repeat stencil down the stripe.
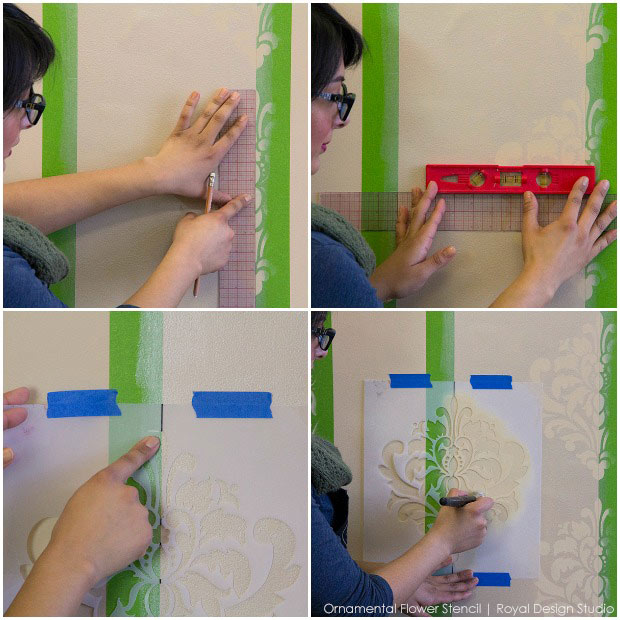
Step 4: To create a half drop allover pattern effect with the Ornamental Flower Stencil motif, first find the center of the motif you just stenciled and using a ruler and a level mark that point on the other side of the glazed stripe. That point is where the motif on the opposite side of the stripe will start. Basically, you are centering the flower motif on the left side of the stripe between the two motifs on the right side of the stripe
Repeat until you reach the bottom of the wall, then move on to the other stripes to complete the wall. Be sure to begin each motif at the top of the stripe at the same point.
Step 5: Once you are finished with the first side of the pattern, remove the Painter’s Tape from the wall, and place it on the other side of the lines. This time you will mask off the 10″ spaces between the stripes that you painted with the metallic glaze.
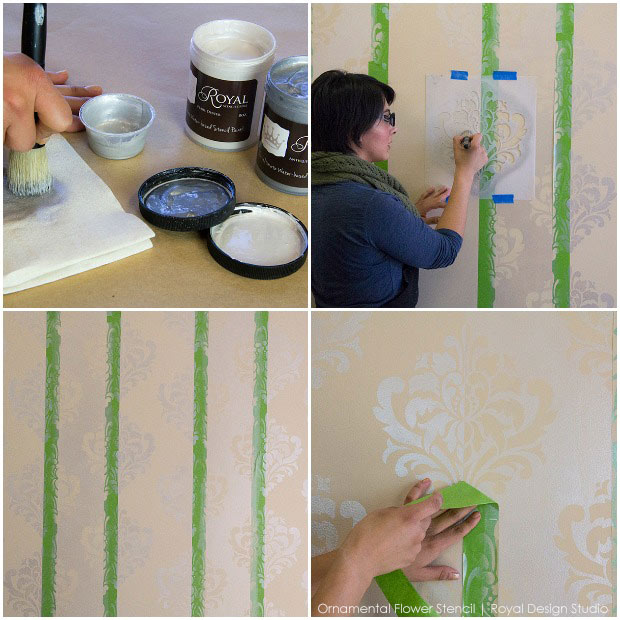
Step 6: Mix 2 parts of Pearl Oyster Royal Stencil Creme + 1 part of Antique Silver Royal Stencil Creme. Load a 1 ½ stencil Brush with the Stencil Cream Color Mix, and off load on a paper towel, to remove any excess paint from the brush.
To stencil the second half of your wall, instead of measuring each repeat, just place your stencil on top of what you previously stenciled with the Behr Marquee paint. Make sure the pattern matches perfectly with the half you stenciled first.
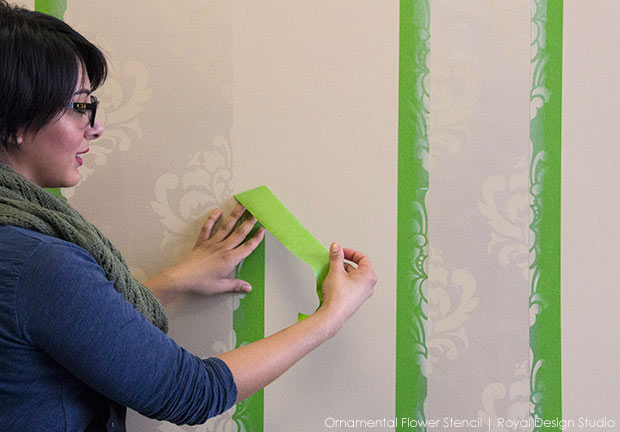
Stencil the second half of each motif with the custom Stencil Creme color mix, using a circular motion and a light pressure on the stencil brush. Repeat throughout the wall to complete your pattern. Remove the Painters tape to reveal your amazing work!
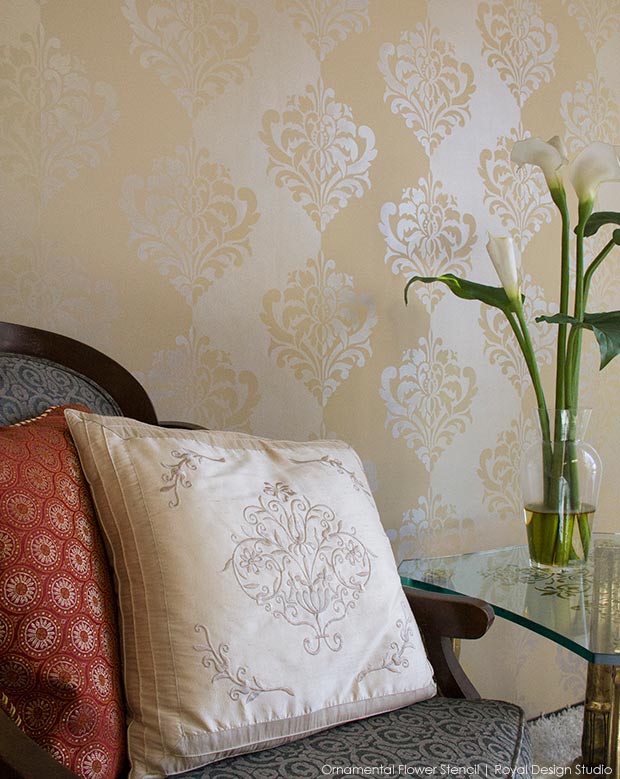
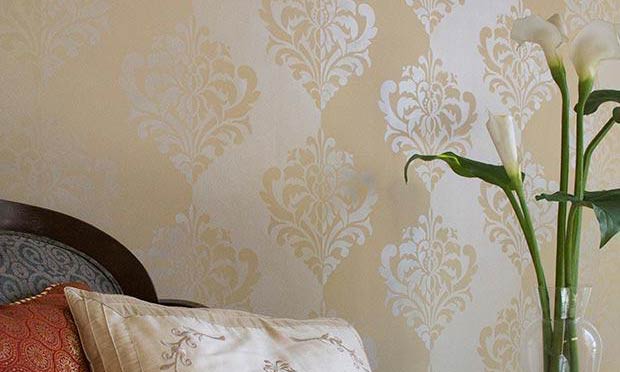
Stenciling with metallic paint or glaze will give you a beautiful, shimmery finish that changes across the wall, depending on how the light hits it. Stenciling with two closely related colors gives you a neutral tone on tone effect that is an elegant stenciled finish for a living room, bedroom, or dining room. You can also use a smaller stencil motif to stencil tone on tone finishes on a smaller scale on a piece of furniture such as a flat fronted chest of drawers. You can find many more suitable stencils for this type of finish in our Wall Art Stencil Collection.


