

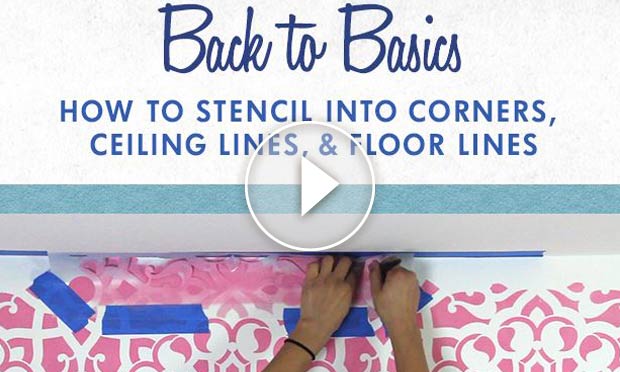
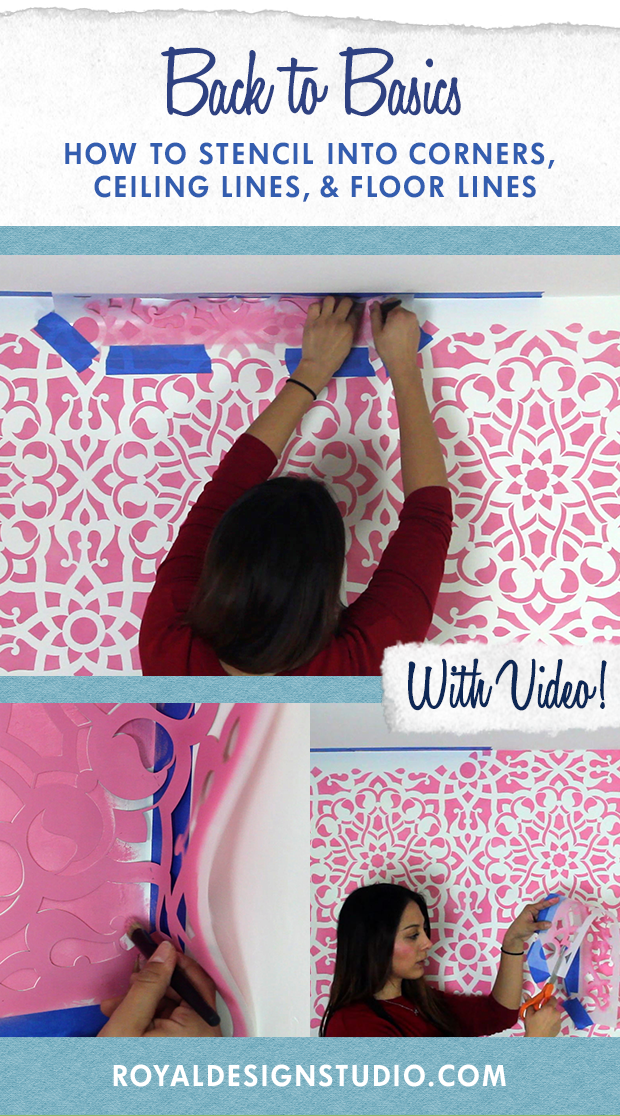
Stenciling into corners can seem a bit tricky, but once you know how to do it, it’s actually pretty easy! It signifies the end of a stenciled wall, and that your beautiful project is almost done – YAY! All Royal Design Studio stencils are made with durable, yet bendable 10mil Mylar®, making it the perfect material not just for flatter surfaces like walls, but also those crazy corners. Click play to watch this Stencil Basics video below and learn how to stencil into corners, ceiling line, and floor line. Crisp stenciled edges are right around the corner!
How to Stencil into Ceiling Line
- Tape off your ceiling line.
- Once you reach near the ceiling line after stenciling your wall, place and secure the ceiling filler stencil using the stencil’s registration marks and painter’s tape.
- Use a foam roller or stencil brush to paint as close to the ceiling line as possible.
- Then use your hand to push the stencil as close to the ceiling edge as possible. Use a small stencil brush to complete painting the design with your free hand.
Pro tip: You can also cut your stencil to fit the area. To do this, measure the gap between your painted pattern and your ceiling line. Trace a straight line using a ruler. Cut the stencil following the line you just traced. Place and secure your cut stencil using the stencil’s registration marks. Paint the design and voila! Note that there’s no going back after cutting your stencil though!
How to Stencil into Corners of Accent Wall
- Use painter’s tape to mask off the adjacent wall that you don’t want to stencil.
- Once you reach near the corner after stenciling your wall, secure your stencil using the stencil’s registration marks and painter’s tape. Secure it only on the wall you are stenciling on and leave the part of the stencil on the adjacent wall hanging loose.
- Use a foam roller or stencil brush to paint as close to the ceiling line as possible.
- Then use your hand to push the stencil into the corner as much possible. Use a small stencil brush to complete painting the design with your free hand. Remove the stencil and painter’s tape to reveal a clean stenciled edge!
How to Stencil into Floor Line
- Tape off your base board or floor line.
- Once you reach near the base board or floor line after stenciling your wall, secure your stencil using the stencil’s registration marks. Leave the part of the stencil that is on base board or floor hanging free.
- Use a foam roller or stencil brush to paint as close to the floor line as possible.
- Use your hand to push the stencil as close to the floor line as possible. Use a small stencil brush to complete painting the design with your free hand.
Check out all of our Stencil Basics videos for need-to-know tips and tricks on how to stencil perfectly and create pretty pattern that you’ve always wanted!


