


Susan of Living Rich on Less shared the most adorable springtime DIY project on her blog last month using Royal Design Studio’s Beehive Allover Furniture Stencil. We loved her project so much that we HAD to share it with all of you stencil lovers.
So, let's jump right in. First, the supplies you will need for this project:
Royal Design Studio’s Beehive Allover Furniture Stencil
Royal Stencil Cremes: Bronze Age and Pearl Oyster
Fabric for stenciling on. Susan used a cream-colored curtain that she bought from a yard sale.
Gold-colored Acrylic Paint for the bees
Beige-colored Acrylic Paint for the honeycomb
A textile medium


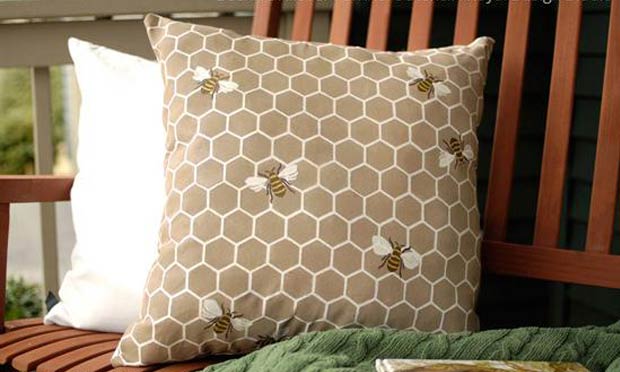
Susan started off by cutting two 22” squares, one each for the front and the back of the pillow, out of a yard sale curtain she already had. To prepare the paint for stenciling, she mixed two parts of the beige paint with one part of the textile medium. She recommends using the textile medium as it facilitates easy transfer of the paint onto the fabric. After ensuring the stencil was properly positioned and taped onto the fabric, she used a stencil brush to stencil the beehive pattern onto the pillow. For those of you new to the stenciling process, be sure to check out our various Stencil Basics posts.
Once the honeycomb pattern was stenciled on the entire surface of the fabric, she let it dry for a few hours before she could start off with the bees. For the bees, Susan chose to use two different colored Stencil Cremes. First, she taped off the wings so that she could just stencil the body and the legs of the bees with the Bronze Age Stencil Crème. After all the bees were complete, she taped off the body in order to paint just the wings with the Pearl Oyster Stencil Crème.


For the final touches, Susan hand painted the yellow stripes on each of the bees and voila! The most adorable springtime DIY project was all ready to be flaunted and be complimented! Be sure to check out the Beehive Stenciled Pillow post on Susan's beautiful blog for more details.
Tell us, in your comments below, about some fun stencil projects you are doing this season to decorate your homes. We would love to hear from you and share your projects with our readers!
If you are looking for more DIY ideas to stencil your pillows, check out these posts:
Fabric Stencil How-to: Lace Pillow
Stencil How-to” DIT Stenciled Pillows with our African Protea Stencil


