


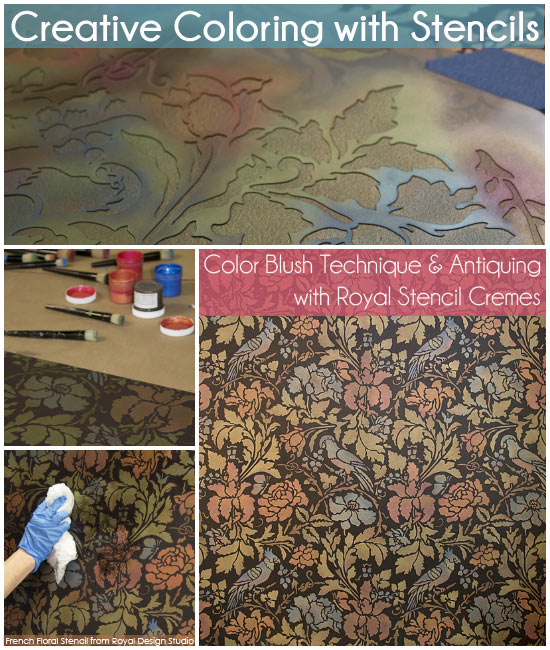
Stenciling with a single color of paint can be fast and easy, but we have an easy way for you to take your wall stencil projects up a notch by adding soft layers of metallic color with our Royal Stencil Creme collection of stencil paints. Each of the stencil layers shown below is beautiful unto itself, and the amount of color layering that you do is a matter of personal taste-and time! Our goal is to show you that layering colors of the Royal Stencil Creme paints is an easy and effective way to build up a subtle but rich look in your stencil projects.
For this Stencil Project you will need:
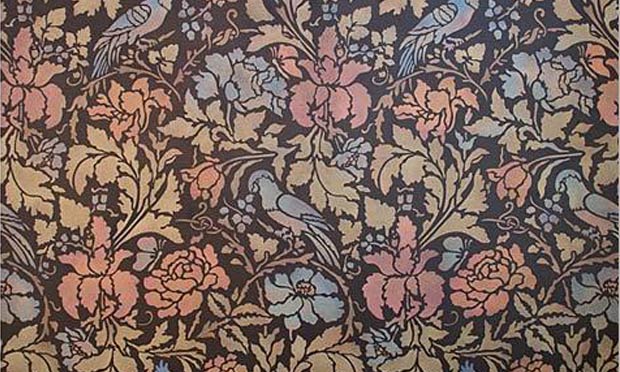
French Floral Damask Wall Stencil (we used the large size)
Dark brown paint for base coat
Royal Stencil Creme colors:
Stain and Seal American Walnut
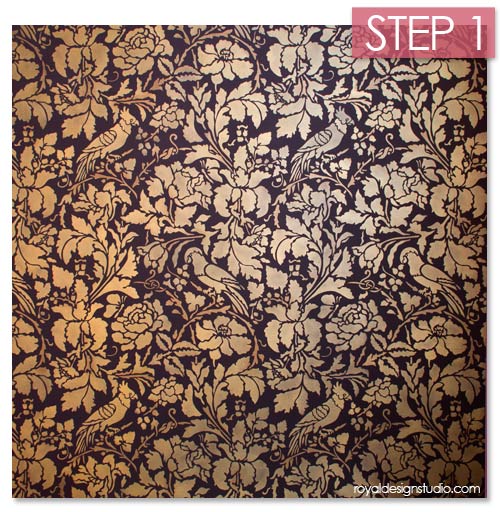
Step 1: Start by stenciling the pattern overall with a large stencil brush and Antique Gold Royal Stencil Creme. The stencil creme paints provide AMAZING coverage, so this layer will actually go very quickly. You can read more basics about how to use Royal Stencil Creme paints here.
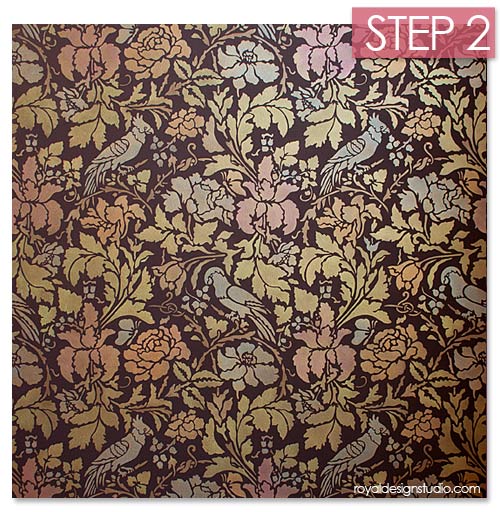
Step 2: Replace the stencil over the pattern and use a very dry, offloaded stencil brush with a soft touch to "blush" various colors back over the Antique Gold paint-almost as if you are simply tinting the gold here and there. We used Royal Blue on the birds and smaller flowers and alternated Shimmer Pink and Orange Ice on the larger flowers. Lime
Shine is used on the leaves. The branches were left Antique Gold at this point. It's perfectly FINE to go outside the lines and let the colors blend into each other. In fact, it creates a much more "painterly" look to have some blue and pink in the leaves and some touches of green here and there in the birds and flowers....
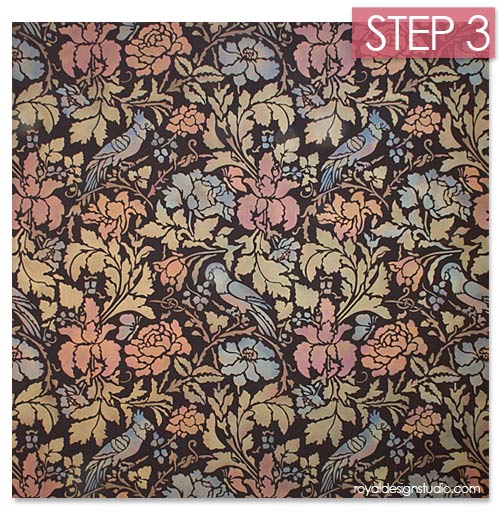
Step 3: Continue on, if desired, to add more depth and dimension to your stenciling. Here we introduced some Frosted Lilac and Teal into the blue areas and layered pink over orange and vice versa in the flowers. Blush the birds bellies with some pink and highlight with additional green. There are really no "rules" to this stencil technique, and you can layer colors until you are happy with your overall look.
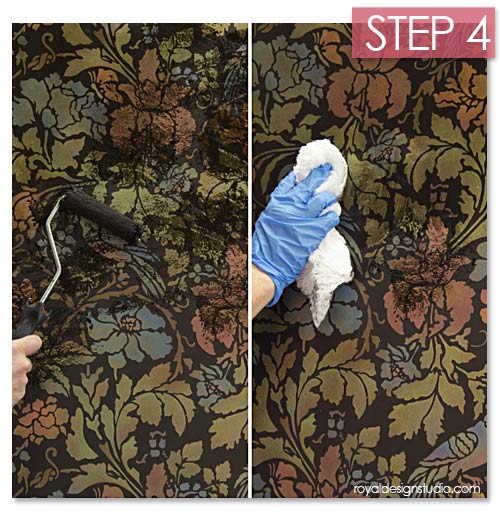
Step 4: An ideal way to add even more depth and richness to an elegant stenciled finish like this is to add an antiquing or toning glaze layer. Besides providing more depth and color, this translucent layer of glaze will tone down your stencil colors (if desired!) and create a more unified overall look. Stain and Seal is a water-based gel stain for wood, but works wonderfully as a glaze-as long as you add So Slow Extender to it. Without the extender you will get an opaque look that simply will dry too fast to use over a stenciled finish.
Mix the American Walnut Stain and Seal with about 30% So Slow Super Extender. Roll on in small, workable areas and pat off excess while "smooshing" with cheesecloth to soften any ridges or "method of application" marks. Feather the edges of the glaze out to irregular edges and then move out to a new area and feather the glaze back in to the previous area. This will help you to avoid any "lap lines" Feel free to spritz your glaze areas lightly with water if it is drying too fast, or simply add more extender to your mix.

Don't think that this stencil technique is limited to walls. This would be a fabulous finish for a furniture stencil project too. Our Stencil Creme paints also work amazingly well on fabric. And just imagine this stencil technique (minus the antiquing glaze) on velvet drapes or pillows!
Want to learn more advanced stencil techniques?
- Check out our extensive and highly regarded Instructional Stencil Video series.
- Melanie's book Painted Illusions is full of fabulous stenciled finishes that incorporate glazes, textures and more!
- Check out our whole How to Stencil area on this website


