


Are you looking for an easy peasy DIY stencil project that can be done in a dash AND adds a darling dose of color and pattern to an otherwise boring light fixture?? Well, look no further because we have a super simple how-to stencil project for you today: Lampshade stenciling! You can stencil on almost ANY flat surfaced lampshade, but the ever-popular drum shaped shades are by far the easiest. You simply need to wrap the stencil and pattern around the shade and dab on some color for a brilliant new look!
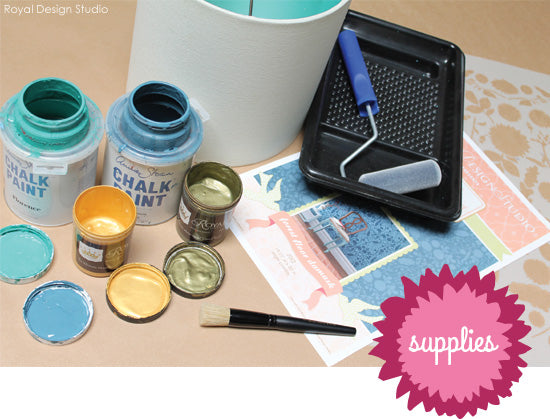
Supplies for this Stencil Project:
- Forest Floor Damask Stencil from the Bonnie Christine Stencil Collection
- Royal Stencil Creme Paints in Antique Gold and Bright Gold
- 1.5" Stencil Brush
- Chalk Paint Decorative Paint: Aubusson Blue and Florence
- Foam Stencil Roller, Roller Handle, Paint Tray
- Plain white or off-white drum shade
Our lampshade was covered in a canvas-type fabric, but you can also you an inexpensive paper shade. For either type, you can stencil directly on the lampshade surface, as is, or paint it in the color of your choice!

Step 1:
We wanted a more colorful lampshade, so decided to first give it two coats of Chalk Paint® decorative paint in a custom color mix we created by combining 1 part Aubusson Blue and 1 part Florence. This makes the perfect shade of Turquoise blue!! We simply rolled it on with a foam roller. You can do two coats quickly because the Chalk Paint® dries VERY fast.

Step 2:
Lampshades will generally have a seam in them. This is where you will begin-and end-your stencil pattern. Run tape along one side of the seam to protect it and begin stenciling on the opposite side of the seam. You may find it easier to use a stencil spray adhesive on the back of the stencil to keep it in place, but we prefer to just use Painter's Tape whenever possible. That is what we did here. As we can back around to the seam, we simply moved the tape to the other side to finish the pattern cleanly.
The stenciling itself was done with a custom color mix created by combining 1 part Antique Gold Stencil Creme and 1 part Bright Gold Stencil Creme. You will find that, like Chalk Paint®, you can mix almost limitless color of Royal Stencil Creme paints! Follow the basic How to Brush Stencil with Stencil Cremes instructions found here for more details on best stencil techniques!
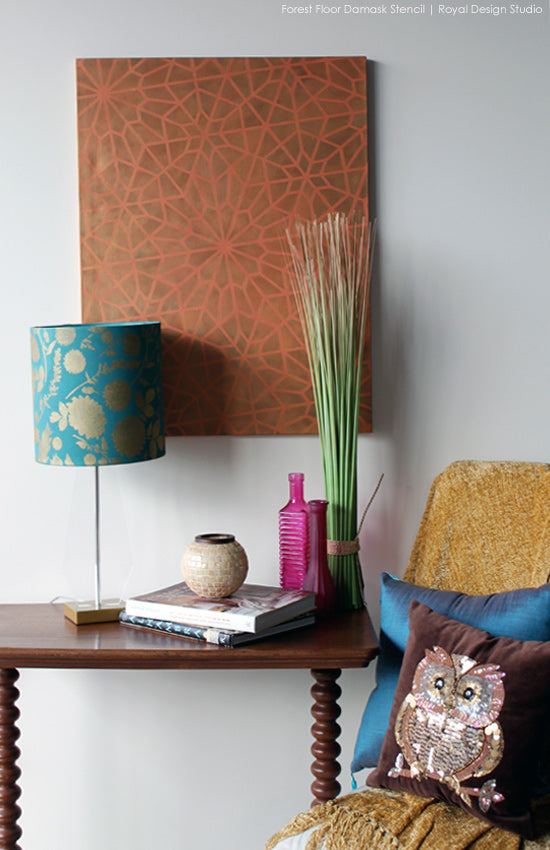
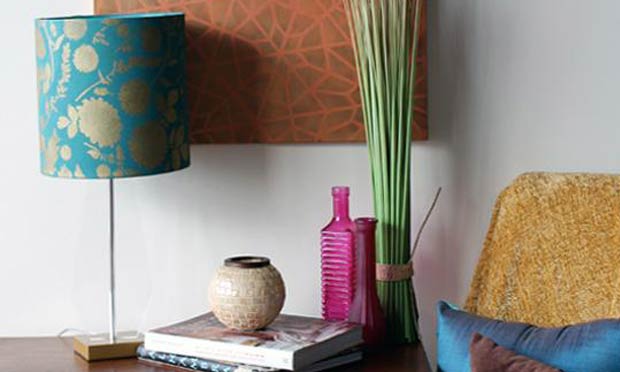
And viola....our colorful new lamp is ready to light up your room! The best part is that you can coordinate your paint colors to match your decor, and this project is SO fast and easy, you can change it again on a whim. You can find boring, inexpensive lamps and shades everywhere from thrift stores, yard sales, outlets-even your Mom's basement.
Shown above with a canvas art piece stenciled with our Starry Night Moroccan Stencil.
Here are a few more fun Stencil How-to Projects to satisfy your DIY urges....
Pillow talk! Stencil a delicate Lace Doily design on a pillow
How to Stencil: Colorful Canvas Art with Moroccan Stencils


