


You can transform a boring flat door panel with the look of intricately carved wood with a few simple steps. All you need is a great furniture stencil design from Royal Design Studio, Wood Icing Textura Paste, Chalk Paint®, stain and some sandpaper.
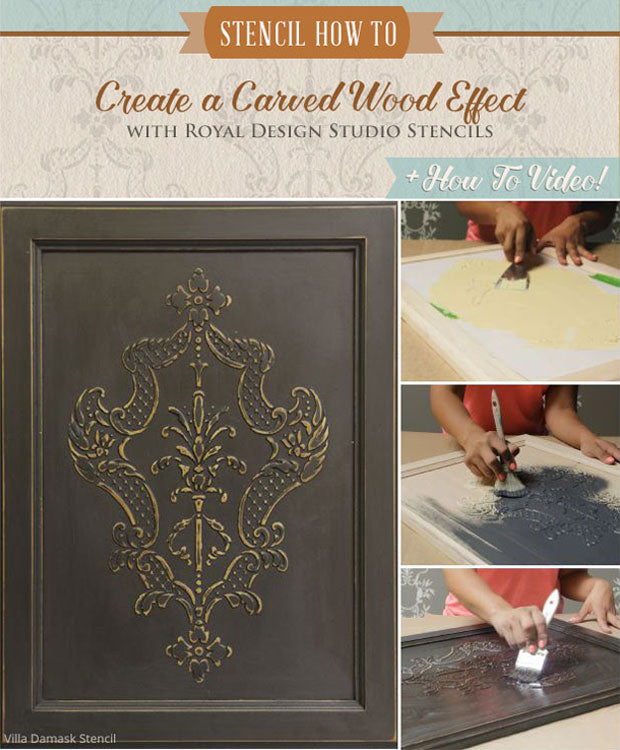
Wood Icing Textura Paste™ is a heavy-bodied, water-based acrylic product that allows you to build up a high relief when troweling a raised pattern through a stencil. It dries and cures to an extremely hard surface, and it takes additional coloring with both paint and stain very well. These qualities make it ideal for creating a durable raised stencil design on furniture, with unlimited decorating options. It can be stenciled directly onto already painted surfaces, and also bare or unfinished wood. Once it has been stained it is hard to tell the difference between real carved wood and a Wood Icing™ stencil design.
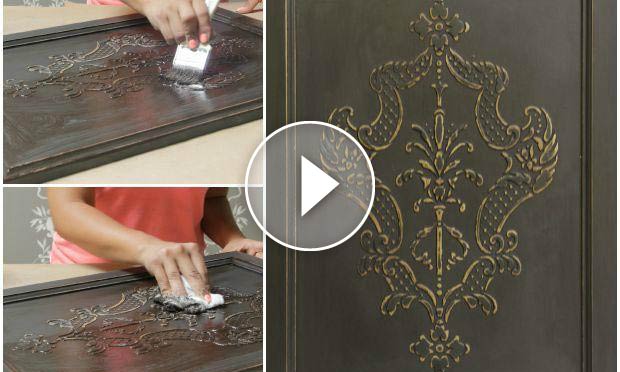
Check out just how easy this process is in this video and then read on for the detailed directions above.

Stencil Supplies
- Villa Damask Furniture Stencil
- Wood Icing Textura Paste™
- Chalk Paint® by Annie Sloan: Graphite
- Van Dyke Brown Stain & Seal
- SoSlow Super Extender from Faux Effects
- Japanese Trowel
- Chalk Paint® Furniture Paint Brush
- Taping Knife, 120 and 320-grit sandpaper, cheesecloth, chip brush, painters tape
Dimensional Stencil with Wood Icing™
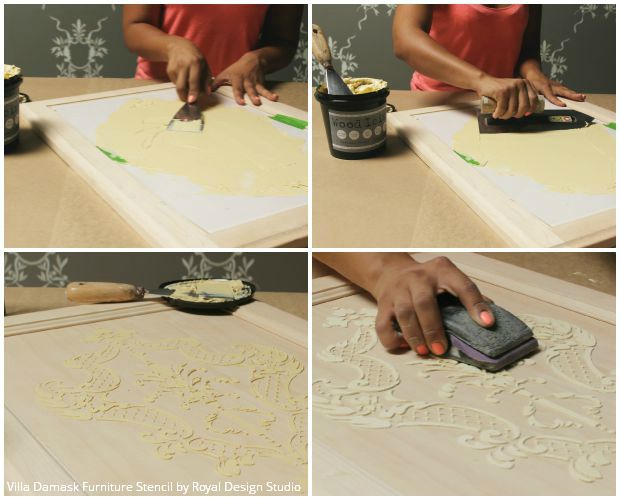
Center the Villa Damask Furniture Stencil in the door panel and tape in place. Use a palette or taping knife to spread the Wood Icing on in a thick, even layer, about 1/8” thick. Hold the taping knife at a low angle. Apply the Textura Paste in the same manner you would “ice a cake”.
Use a larger trowel, such as the Japanese Trowel from Royal Design Studio to smooth and even out the Wood Icing Textura Paste™
The Textura Paste™ should be allowed to dry overnight to a hard, crispy surface. The following day sand to remove any high ridges and further smooth out the stencil pattern. Use 120-grit sandpaper and a sanding block for best results.
PRO TIP! The Wood Icing Textura Paste™ sands VERY easily, so take care not to sand too hard and wear down your raised stencil pattern too much. We recommend that you do this step outside and wear a dust mask. Remove all excess dust with an old brush and/or rag before proceeding on to the next steps.

Paint and Distress Chalk Paint® by Annie Sloan
Paint the door panel overall with two coats of Graphite Chalk Paint® by Annie Sloan and a Chalk Paint Furniture Painting Brush. Allow the paint to dry between coats and for a couple of hours after the final coat.
Distress the cabinet door and raised stencil pattern by lightly sanding with 320-grit sandpaper. Focus the sanding mainly on the raised areas of the stencil and the frame of the door to achieve a natural distressing effect. The sanding will expose areas of the raw wood on the door and also some of the Textura Paste through the Graphite Chalk Paint®.
Wipe all over with a damp cloth to remove any excess dust.
Stain and Seal Stenciled Door
These final layers will stain the exposed wood and Wood Icing Textura Paste™, tone and antique the Graphite Chalk Paint®, and help to seal and protect the surface.
Stain & Seal is a water-based gel stain that is designed for wood and furniture staining, but can also be used for stenciling and as a glazing and toning layer over other decorative surfaces. When used alone, it dries VERY quickly. So Slow Super Extender is designed to work with Stain & Seal to create a more translucent staining medium with a long open time. It can be added as needed at up to a 1:1 ratio.
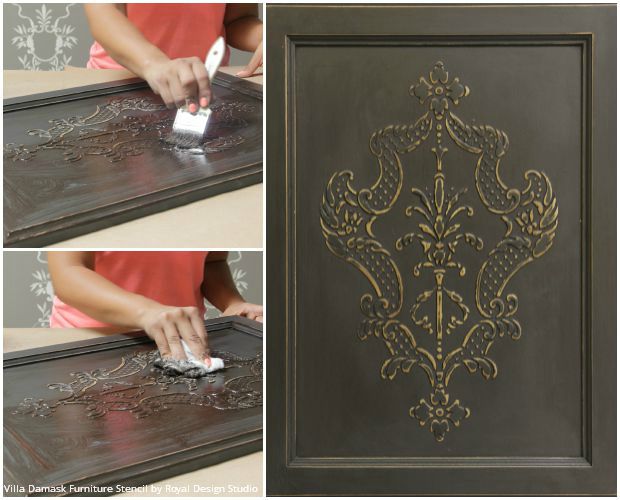
Mix Van Dyke Brown Stain & Seal at a 1:1 ratio with SoSlow Super Extender. Use a chip brush to brush all over the cabinet door panel.
Use cheesecloth to work the stain into the exposed wood and Textura Paste areas and to smooth the stain out evenly over the surface. Finish by dragging a clean area of the cheesecloth across the door panel lengthwise in long even strokes. Allow to dry and apply a second layer of stain to further deepen the color and overall toning effect. Allow to dry.
You can further protect your door panel by apply 1-2 thin coats of Annie Sloan Clear Wax or a suitable water-based urethane.
Looking for more How-to Stencil Tutorials for Painting Furniture? Check these out:


