


The simplest changes can make the biggest impact. This is especially true when these easy DIY ideas are so simple and easy to change up if you change up your style. Thistle Harvest loves sharing her favorite interior styling ideas and simple DIY projects. She believes that it’s totally possible to balance design, lifestyle, and motherhood by adding touches of personality and character with easy-to-do hacks. Check out how she stenciled her bathroom tile floor with Royal Design Studio Bathroom Tile Stencils…
She says, “I decided to give my tiny bathroom a refresh. It has always been a space that was fairly neglected and just seemed so cold and....boring. The biggest transformation was, hands down, my stenciled floors! I knew ceramic tile could be painted and stenciled but I was a little nervous to try my hand at it since I had never done it before. I did a little research watching Royal Design Studio’s How to Stencil Video Tutorials and decided to give it a shot! I'm so so happy that I did.
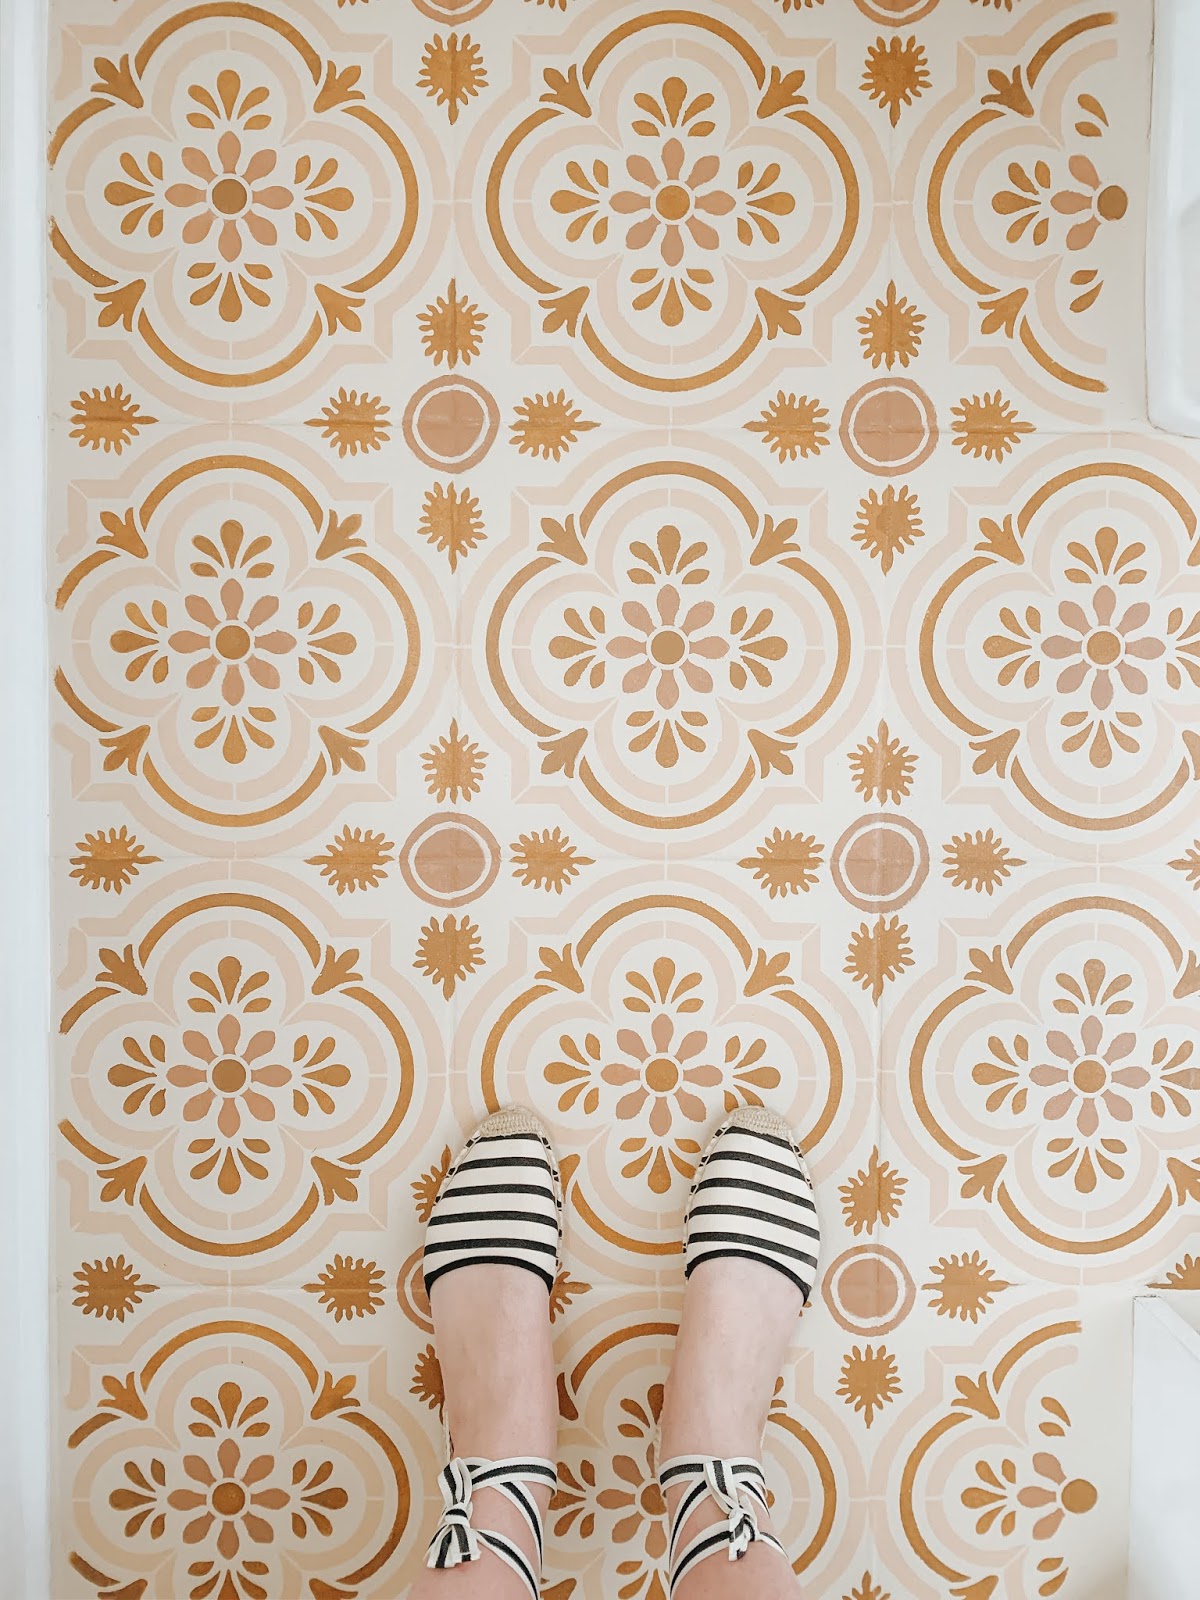
After ordering my stencil and brushes from Royal Design Studio Stencils, I was inspired by Moroccan tiles and found the Havana Tile Stencil to be the perfect choice for this space.
SUPPLIES
- Havana Tile Stencil
- 2" All Over Stencil Brush
- 3/8" Stencil Brush
- 1/2" Stencil Brush
- Zinsser Cover Stain Interior & Exterior Primer
- Valspar floor paint samples
- High quality mini foam roller
- Painters tape
- Sander/Sandpaper 120 grit
- Varathane Ultimate Water Based Polyurethane in Matte

SURFACE PREP
First, I sanded my floor with 120 grit sandpaper. I then thoroughly cleaned my tile by scrubbing it down and making sure it was sparkly clean. I didn't want any residue that would be stuck on there for life when I painted over it. I then took blue painters tape and taped over the toilet, baseboards, and cabinets.
PRIMING YOUR FLOOR
After taping everything off, I went to work priming the bathroom floor with a mini roller. Because the floor was so dark, I had to roll two coats. The primer took at least 24-48 hours to dry in between coats so just keep that in mind! Don't rush it and let it completely dry before adding a second coat or before painting with a stencil.

STENCILING YOUR FLOOR
After your primer is completely dry, tape your stencil down with painters tape. Dab your stencil brush SUPER LIGHTLY with paint and begin stenciling your design. If you are only using one color then I have heard that a high quality foam roller is must faster and easier. Because I was doing multiple colors, I obviously used several stencil brushes. I can't stress enough how you hardly need any paint on your brush. The more paint is on your brush the more likely it will bleed through your stencil.
After the majority of the floor was stenciled, I then went back after it was dry and painted the hard to reach places. You can try bending your stencil to fit or if you don't plan on using it again, just cut it to fit where you need to use it. I cut my stencil in half and then painted the rest of the floor around the toilet and cabinet with the two pieces.

SEALING YOUR FLOOR
I used Varathane Ultimate Water Based Polyurethane in Matte. I allowed it to dry at least 2 hours or so in between coats.
I have loved the transformation! My bathroom feels like a completely difference space now and this was such a satisfying (and fairly simple) DIY!”


Her floor has held up perfectly! However, she decided that her decorating style has changed and the bathroom decor needed updating. She says, “My first stencil project was a lot of fun but I was ready for a change. That is another fun thing about stenciled floors! You can easily switch it up and it’s a relatively cheap project. Excited to share my new stencil design I chose! The Hexagon Tile Floor Stencil made quite the impact to give my tiny bathroom that classic, timeless feel with the octagon tile. Isn’t it crazy the illusion paint can give? You’d never think it wasn’t tile, huh? Budget friendly hack: if you can’t replace the floor, just stencil it! I love stenciling!"


