


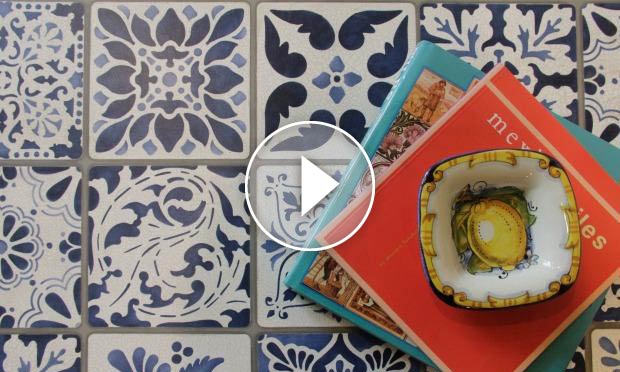

This has to be one of our favorite how to stencil projects ever! We took an old coffee table and transformed it into a show-stopping vintage piece that features faux aged blue glazed tiles enhanced by a Craqueleur finish.
We share the whole process in this step by step video. Watch it above and find all the supplies and steps detailed out below!
Supplies:
Buy the Tutorial Stencil Kit along with your favorite stencil and you're all set to recreate this look!
Or, buy stencil supplies separately here:
- Royal Design Studio Tile Stencils: Ceramic Tiles Trompe L'oeil Stencil, Talavera Tile Stencil Set, Renaissance Tile Set A in size Small & Set B in size Small
- Annie Sloan Chalk Paint®: Old White, Pure White, French Linen
- Annie Sloan Products: Clear Soft Wax, Dark Soft Wax, Craqueleur
- Acrylic paint: FolkArt- Midnight blue, Medium Gray; Americana- Blue Harbor
- Folkart-Extender
- 3/4”- 3/8” Stencil Brushes
- 4” Foam Roller, Pointed Sash Paint Brush
- 220 grit Sand Paper, Paper Towels, Foam Brush, Cheese Cloth
Painting the Table with Chalk Paint®
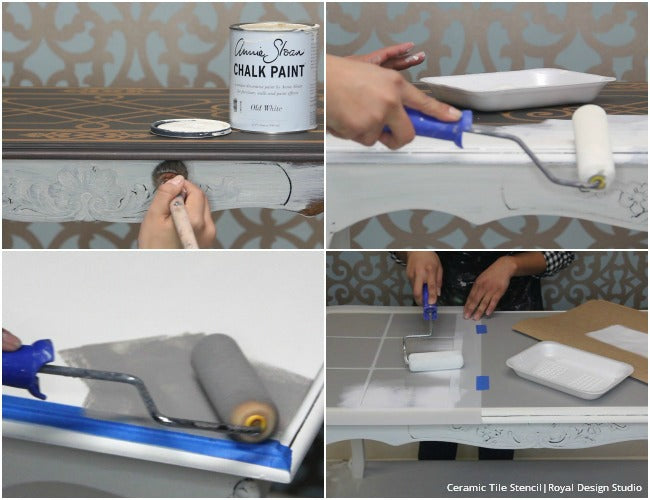
Step 1
Use a brush to paint the table base with Old White Chalk Paint®. Apply the paint liberally and with random brushstrokes. Avoid filling the recessed areas of any carving with the paint. This will give you an instant “aged” look.
Step 2
Use a foam roller to paint the table top with two smooth coats of Old White Chalk Paint. Allow to dry. Measure your area to determine how many repeats of the tile pattern will fit each way. Our Ceramic Tile Stencil contains 6” tiles and ¼” grout lines. Be sure to include space for the ¼” grout lines around the outer edges also.
Step 3
Use blue painter’s tape to mask off the total design area for the grout and tiles. Use a foam roller to paint over it with 1-2 coats of French Linen Chalk Paint®. Allow to dry.
Step 4
Place the Ceramic Tile Stencil to leave some space on the outside for the ¼” “grout line” and secure using painter’s tape. Load a foam roller evenly with Pure White Chalk Paint®. Off load some excess paint on a piece of contractor’s paper or paper towels. Roll over the stencil using a light to medium pressure. You may need to do 2 coats to achieve complete coverage. Repeat the Ceramic Tile Stencil pattern overall using the registration marks for perfect alignment.
Stenciling the Vintage Tiles
We wanted to create a Mediterranean tile look, so chose two beautiful blue colors: Folk Art Midnight and Americana Blue Harbor. For the lighter blue color we mixed a little Midnight into the Blue Harbor to darken it slightly. The darker blue color will just be straight Midnight.
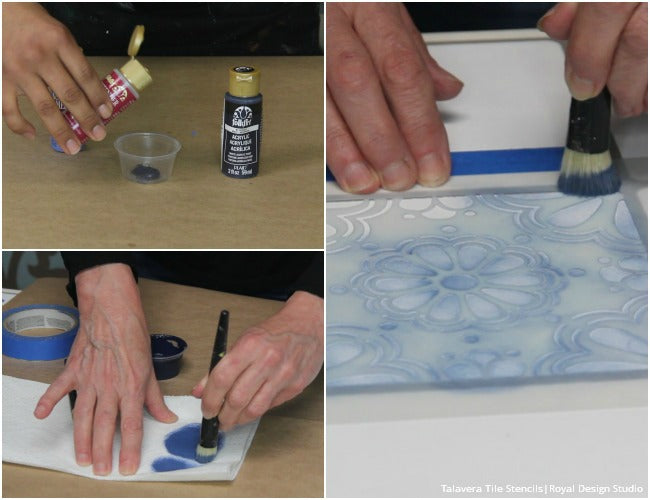
Step 5
To create a glazed tile look you want to make the acrylic paint more translucent. Add Folk Art extender a few drops at a time and stir well until you get a nice flow to the paint. How much to add depends on the thickness of the paint and your desired look. Add just a little at a time (up to 40%) and test it.
Step 6
Load a ¾” stencil brush with the lighter blue. The Extender will make the paint more fluid, so it is very important to off load the excess paint well on paper towels.
Step 7
Make sure that the stencil pattern lines up with the corners of the tiles and tape into place. Stencil the whole design area with the light blue using a light but firm pressure. Always start light and build up the color slowly. Stencil a small area and lift the stencil to check your work. Don’t try to fill the pattern in evenly and opaquely. Leave some areas more translucent than others to create a glazed tile effect.
Pro Tip: If you see brushstrokes when you are stenciling, that means you need to offload more. It should have a very smooth look.
Step 8 (not shown)
Load a smaller 3/8” stencil brush with the darker blue. Off load the brush well again on a paper towels. Using a smaller brush will allow you to have more control to just apply the color in certain areas without having to tape off.
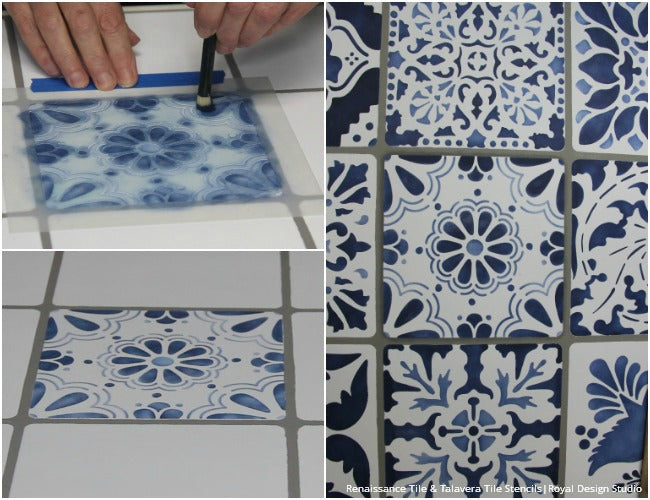
Step 9
Controlling the brush and color placement allows us to paint just certain design elements with the darker blue, without getting the paint where we don’t want it. Of course, you can feel free to tape off design elements for this step just to be sure.
Step 10
Continue stenciling different tile patterns in each of the blank tiles. We use a variety of patterns from these tile sets: Renaissance Tiles A and B, Talevera Tile Set. There is no exact pattern to lay the tile designs, just make sure you have variety throughout the tabletop.
Always start with the lighter color and stencil allover, so you can later come back with a smaller brush and stencil just the darker areas.
Shading the Vintage Tiles for a 3D Effect
The Ceramic Tile Stencil includes the tile shape silhouettes. These give you an edge to stencil/shade around, which adds a realistic dimensional look to the tiles.

Step 11
Mix Medium Grey Folk Art Acrylic Paint with Extender. Add just a little bit at a time to get a fluid, translucent consistency. Load a clean, dry 3/8” stencil brush and off load well on paper towels.
Step 12
Place and tape the tile silhouette shape over the top of a stenciled tile. Paint a “shadow” by hugging the brush along the edge of the plastic as you stencil. Complete all four edges then make the shadow darker on two connecting sides of each tile for a more realistic look. Simply stencil another layer of grey paint to achieve this.
Annie Sloan Craqueleur Finish
Craqueleur is a two-step finish that dries clear and creates a fine crackle effect. It’s perfect to create the look of antique tiles on this project.
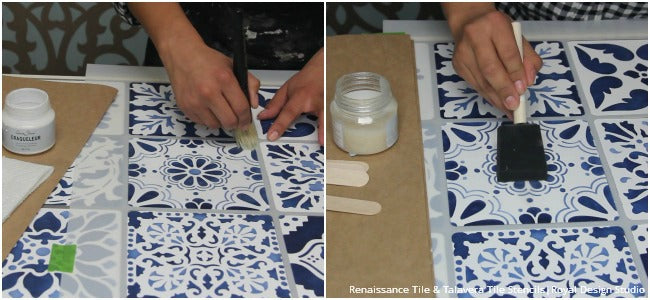
Step 13
Replace and position the Ceramic Tile Stencil. Apply step #1 using a 1” stencil brush. Dip the tips of the brush into the medium and off load slightly on paper towels.
Apply Step 1 through the stencil openings using a soft swirling and dragging motion with the brush. Continue moving the stencil and applying the first coat of Step 1 over the whole surface. Remove the stencil and allow the first coat to dry for about 10 minutes.
Step 14
Repeat with the stencil and apply a second coat of Step 1 over all the tiles. This will give you larger cracks and ensure full coverage. Remove the stencil and allow Step 1 to dry for about 15 minutes.
When Step 1 is dry, replace the stencil and use a foam brush to apply a thicker coat of Step 2. Be very careful to avoid having the product run under the edges of the stencil. Use a light pressure and brush from the outside towards the center of the tiles. Cracks will develop as Step 2 dries.
Distressing and Finishing
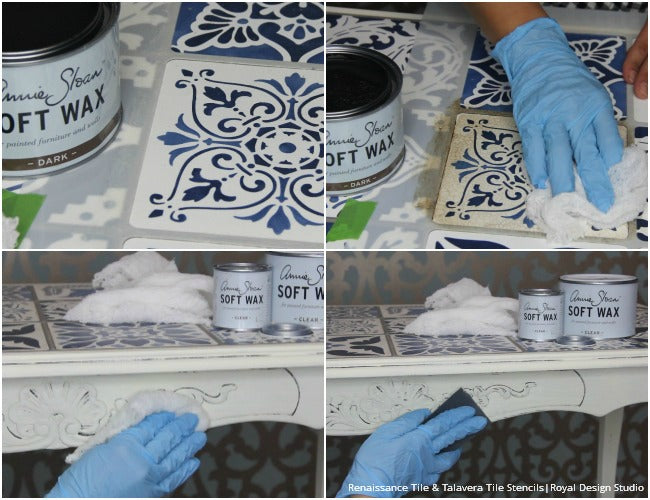
Step 15
Since the crackle finish is clear, it needs to be enhanced with Dark Wax to make the cracks visible and give them some “aging”. Replace the Ceramic Tile Stencil and use cheesecloth to apply a light layer of dark wax through the stencil.
Step 16
Use a clean piece of cheesecloth to remove excess wax and repeat in all tiles.
Step 17
Apply a thin layer of Clear Soft Wax overall to the rest of the table. While the wax is still wet lightly distress the paint finish using a medium grit sand paper.
Step 18
After distressing apply a second layer of Clear Soft Wax overall, including the tile patterns. Remove excess wax with a clean cloth and a hard pressure. Allow your piece to cure from 20 minutes to 24 hours before buffing for maximum durability.
Enjoy Your Beautifully Painted Furniture Piece

And here’s the final result! A gorgeous piece of upcycled furniture that looks like it was inlaid with aged blue glazed tiles.
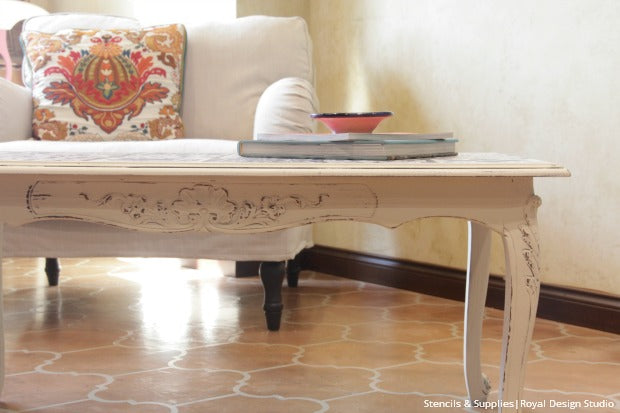

The stencil patterns add a lovely decorative touch, the easy shading around the tiles make it look real, and the craqueleur finish makes it look like a cherished antique.
If you liked this stencil video tutorial please leave us a comment! You can find more How to Stencil Video Tutorials here!


