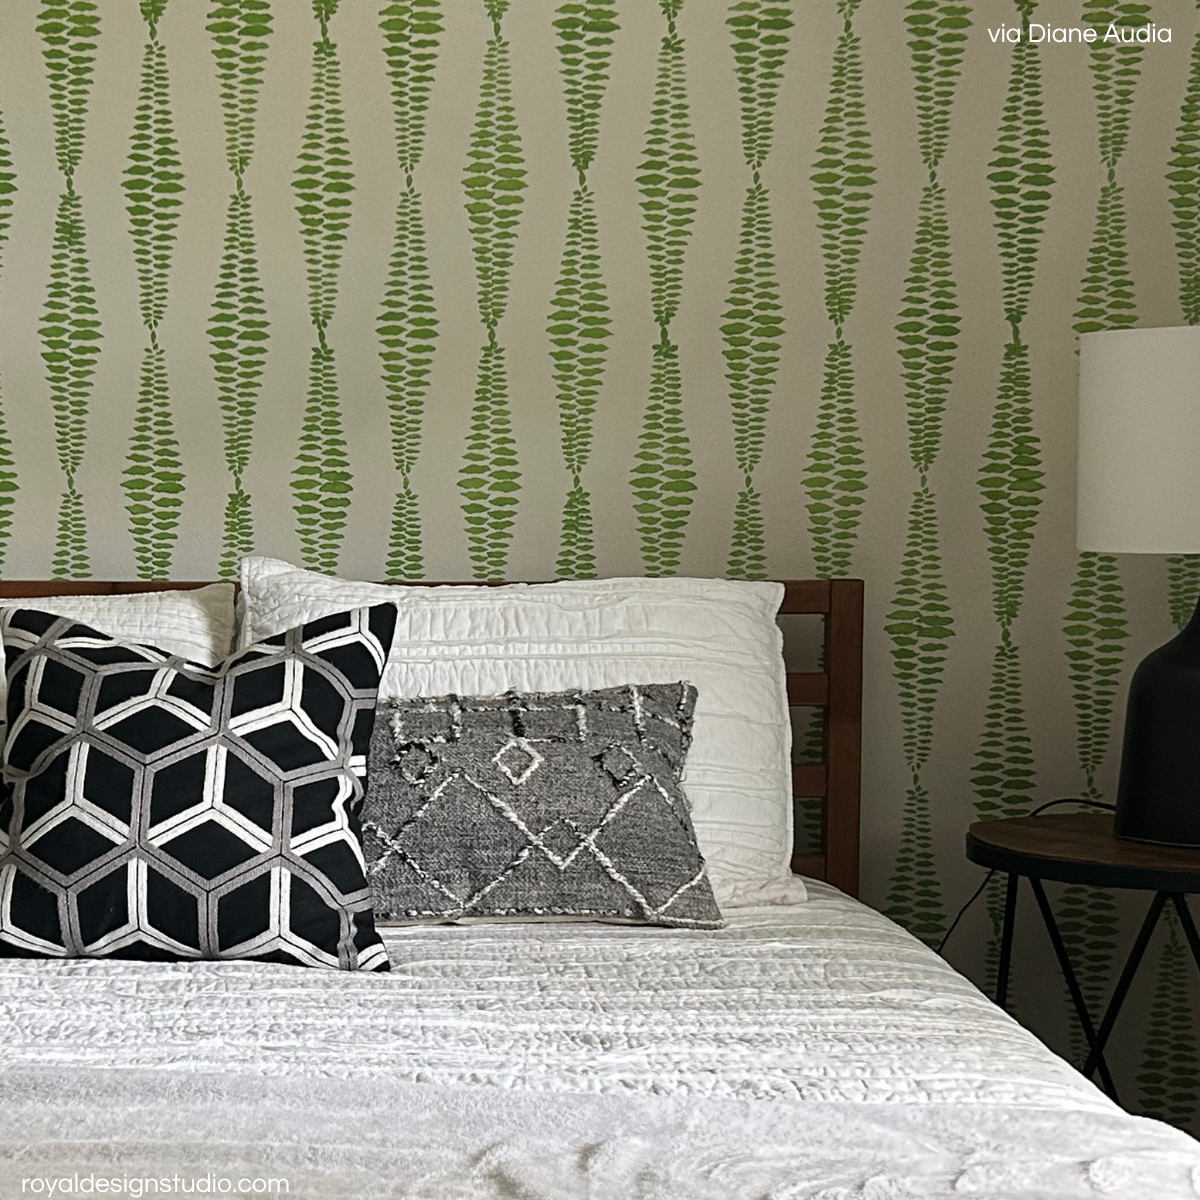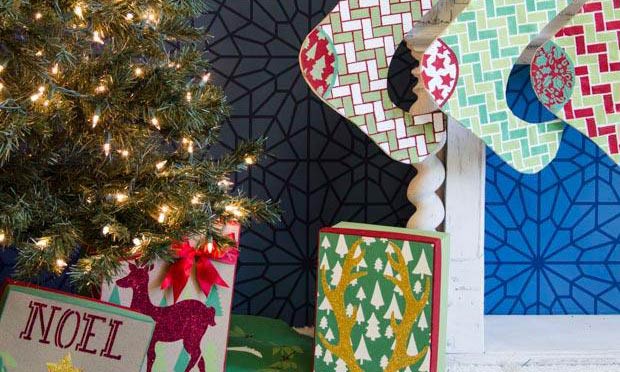
You can create a festive winter wonderland of Christmas décor with just a bit of paint and creativity! Surround your couch, Christmas tree, and fireplace with DIY throw pillows, tree skirts, and Christmas stockings that are easy to make and sure to delight your family. These holiday projects that use our Holiday Stencils also include a tutorial to help you from start to finish. Let’s take a look:
How to Stencil Festive Christmas Pillows
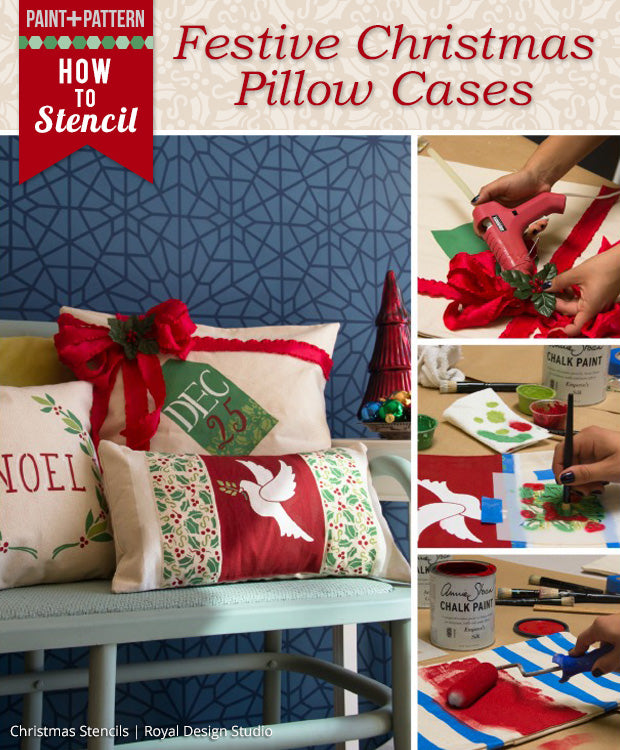
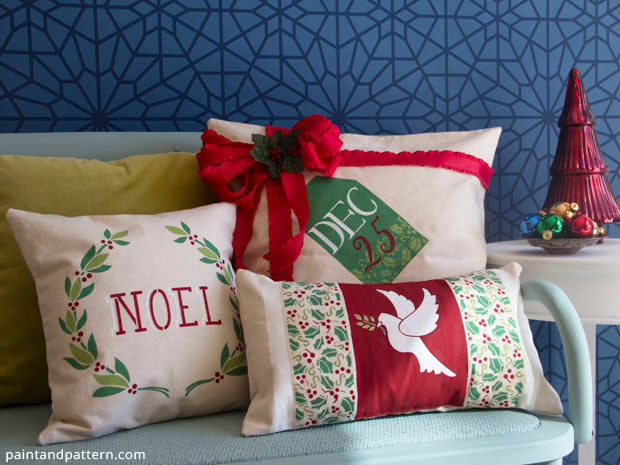
A stenciled Christmas throw pillow easily adds the holiday spirit to any living room or bedroom! This tutorial will show you how you can make three different styles of throw pillows using our Mix and Match Christmas Stencil Collection from Jennifer Rizzo and Annie Sloan Chalk Paint.
Supplies
- Royal Stencils: Holly Berry Christmas Stencil, Peace Dove Stencil, Gift Tag #3 Christmas Stencil, Classic Letter Christmas Stencil, Script Numbers Christmas Stencil, Holiday garland Christmas Stencil, Noel Lettering Christmas Stencil
- Annie Sloan Chalk Paint: Pure White, Emperors Silk, Dark Green Blend: 1 Antibes Green +.5 Greek Blue, Light Green Blend: 1 Arles + .5 Antibes Green
- Royal Stencil Brushes
- Foam Roller, Roller Handle, and Roller Tray
- Red Ribbon
- Painter’s Tape
A Peaceful Dove Pillow
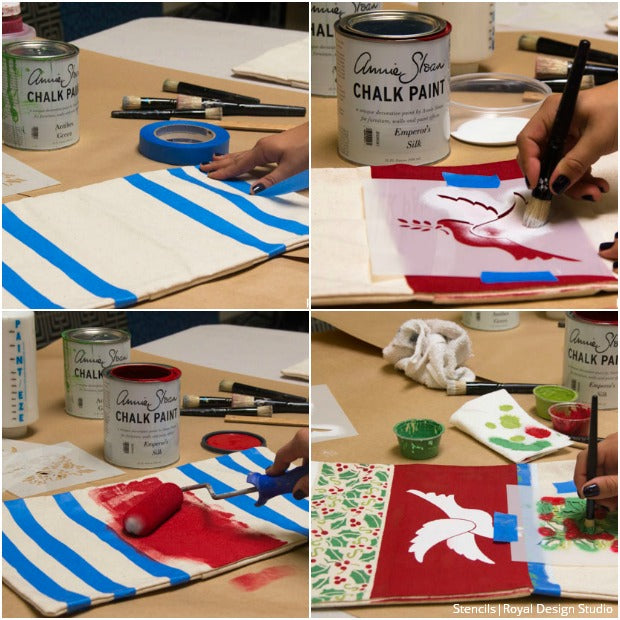
Step 1: For a rectangular pillow, find the center and divide your pillow case into 3 sections using painter’s tape. Then, create a 1” stripe 3 ½ inches from the mid panel.
Step 2: Paint the middle section with Emperor’s Silk Chalk Paint using a foam roller or a stencil brush.
Step 3: Using a 1”stencil brush paint the stripes with pure white chalk paint. Allow steps 2 and 3 to dry.
Step 4: When the red panel is dry, place the Peace Dove Stencil on the center of the pillow case and stencil the bird using Pure White stencil cream. Allow to dry. Use the dark green chalk paint blend and the light green chalk paint blend to stencil the branch details on the stencil.
Step 5: Use the painter’s tape to create a small border inside the blank mid panel. Stencil with Holly Berry Stencil using Emperor’s Silk for the berries and the two blends of Green Chalk Paint for the leaves. Use a 3/8” stencil brush for each color.

A Beautiful Ribbon Pillow
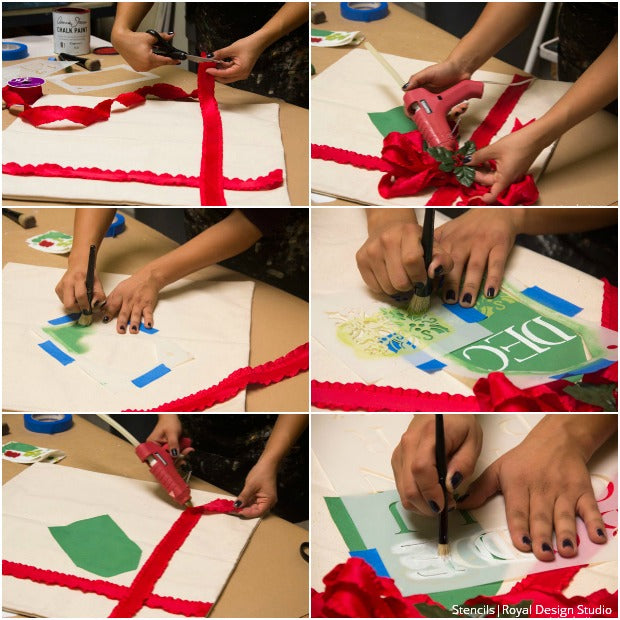
Step 1: Measure the width and length of your pillow and cut 2 pieces of ribbon accordingly. Plan your layout.
Step 2: Secure your Christmas Tag #3 Stencil in place with painter’s tape. Stencil with the dark green blend of chalk paint using a 1 ½” inch brush.
Step 3: While you wait for the chalk paint to dry, use a hot glue gun to paste the ribbon to the pillow case.
Step 4: Use what is left of the ribbon to create a bow and attach it to the pillow case, with hot glue. We also added a piece of holly to finish the bow.
Step 5: Replace the Christmas Tag stencil. Then stencil on top of it with the Holly Berry Christmas stencil. Use the light green blend of Chalk Paint for a subtle contrast.
Step 6: Use the Classic Letter Stencil and the Script Numbers Stencil to spell a short message. You can write the name of a loved one or write the date, like we did, with Pure White Chalk Paint.

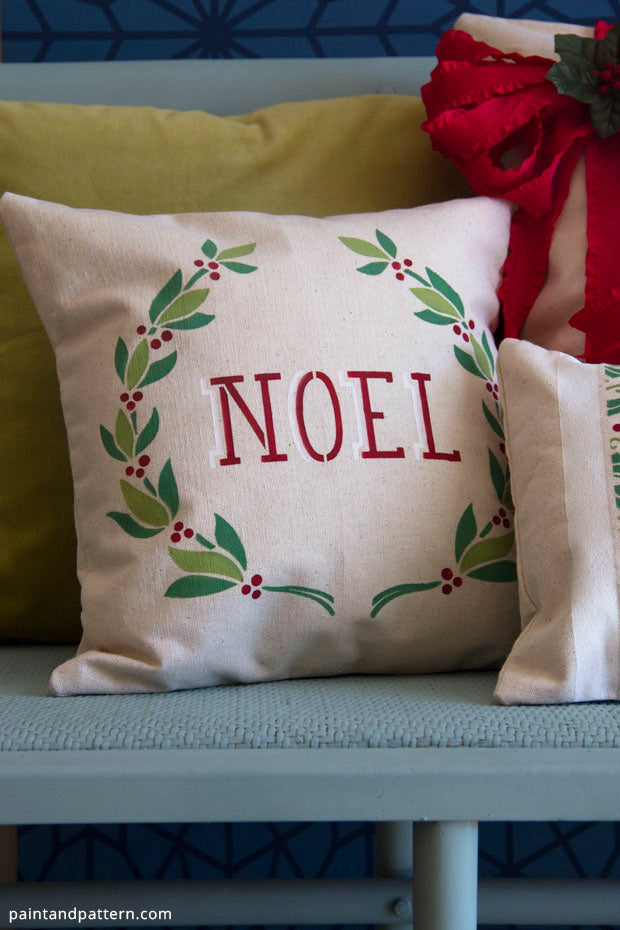
A Wonderful Noel Pillow
Step 1: Stencil “Noel” on the center of the pillow case using Emperor Silk Chalk Paint and Pure White Chalk Paint.
Step 2: Place the Holiday Garland stencil on one side of the type and stencil using both of the blended green Chalk Paint for the leaves and emperor’s silk for the berries.
Step 3: Allow the paint on your Holiday Garland stencil to dry or clean it before using it on the other side. Flip it over and place it on the opposite side of the type. Stencil with the same colors used before.
And there you have it! Three festively stenciled pillows that instantly transform any every day room into one bursting with the Holiday spirit!
How to Stencil a Handmade Tree Skirt and Christmas Stockings
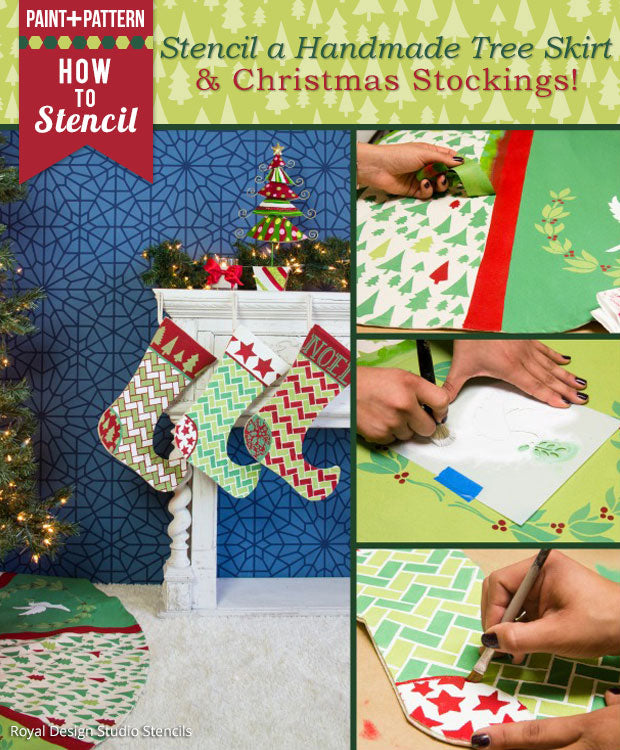
Personalize your Christmas tree with a handmade tree skirt and finish off your mantel with matching stenciled stockings! This tutorial was crafted with our Mix and Match Christmas Stencil Collection, however, you can use any stencil to create any style you want! Read below for expert tips and details on how to recreate our design or get inspired for your own project!
Supplies
- Royal Stencils: Holiday Garland Christmas Stencil, Peace Dove Stencil, Zig Zag Tiles Moroccan Christmas Stencil, Pine Forest Christmas Stencil, Falling Stars Christmas Stencil, Marching Stars Christmas Stencil, Standing Trees Christmas Stencil, Noel Lettering Christmas Stencil, Holly Berry Christmas Stencil
- Annie Sloan Chalk Paint®: Emperor Silk, Pure White, Dark Green Blend: 1 Antibes Green + 0.5 Greek Blue, Light Green Blend: 1 Arles + 0.5 Antibes Green
- Stencil Brushes: Large Pointed Sash Stencil Brush, ¾” Stencil Brush, 1” Stencil Brush
- Foam Roller, Roller Handle, Roller Tray
- Painter’s Tape
- Red Ribbon
- Measuring tape or ruler
- Bounty Paper Towels
- Tree Skirt
- Jester Stocking
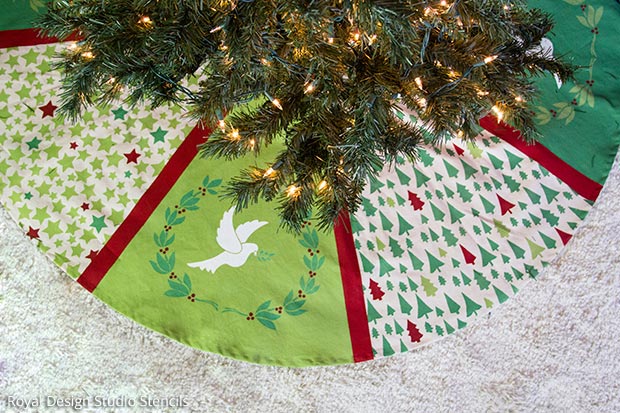
Handmade Tree Skirt

Step 1: To create this paneled tree skirt, start by measuring the canvas tree skirt in to 8 parts. The easiest way to create 8 equal parts is to fold the tree skirt in half 4 times while marking each fold. Then using a straight edge ruler, join the 2 points created by each fold in a straight line. Using a 1 ½” wide painter’s tape, tape over the lines to frame each panel.
Step 2: Paint every other panel using a large pointed sash brush. We alternated between the light and dark green blended chalk paint combinations. Allow to dry.
Step 3: While those panels dry, stencil the ones left using a stencil brush. Remember to off load excess paint onto a Bounty paper towel to avoid bleed under.
For our project, we alternated between Pine Forest Christmas Stencil with the dark green color combination and the Falling Stars Christmas Stencil with the light green on each panel. To add more detail, once your stencil was dry, we stenciled a few elements of the allover pattern with Emperor’s silk Chalk Paint and with the opposite shade of green used in that panel.
Step 4: The panels that were painted in Step 2 should be dry by now and you can add a motif stencil to finish it off. For our project, we used two motif stencils. First we stenciled the Holiday Garland Christmas Stencil with the opposite shade of green as the panel and used Emperor’s Silk for the berries. Once finished with the first side of the garland, we flipped the stencil over to create a wreath.
Step 5: Then, we placed the Peace Dove Stencil centered between the two garlands, and stenciled it with Pure White Chalk Paint for the bird and the opposite green blend for the leaves.
Step 6: Move the tape that was used to divide each panel to one of the sides of the border. You will cover the pattern now. Use a second piece of tape to mask the other side. This will leave an unpainted space with straight lines.
Step 7: Use a 1 ½” stencil brush to paint between the tapes with Emperor’s Silk Chalk Paint. Remove the tapes to reveal the red border.
Stenciled Christmas Stockings
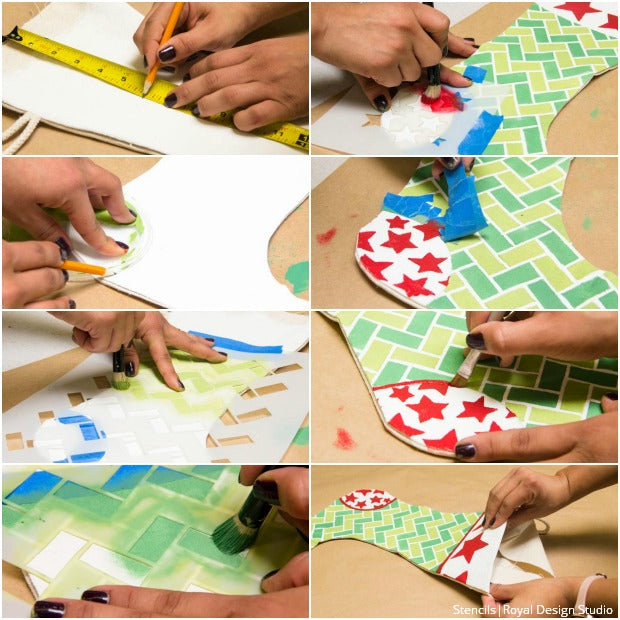
Step 1: Paint the canvas stocking with a base color using a Large Pointed Sash brush. Allow To Dry. We opted for Pure White Chalk Paint. Next, tape off 8” from the top of your stencil, to create a border.
Step 2: Using a common household circular object, like a plate, Tupperware lid, glass, etc., trace half a circle on the heel area of the stocking. Mask off with pieces of painter’s tape.
Step 3: Paint an allover stencil pattern or a motif stencil between the taped off areas. For this project, we used Zig Zag Tiles Moroccan Christmas Stencil, which is an allover pattern. Once you are finished with the first layer of the stencil, use a second color to stencil the second paste of the allover pattern placing your stencil in between what was previously stenciled.
Step 4: Move the painter’s tape on the heel of the stocking to cover the area you just painted and stencil your design. We used Emperor’s Silk Chalk Paint to stencil the Falling Stars Christmas Stencil on the heel and the Marching Stars Christmas Stencil on the top border. Remove the tape and use a small paint brush to paint a thin border at the top and the heel of the stocking. If your stocking is unfinished at the top, fold inward the excess fabric to give it a nice finished edge.
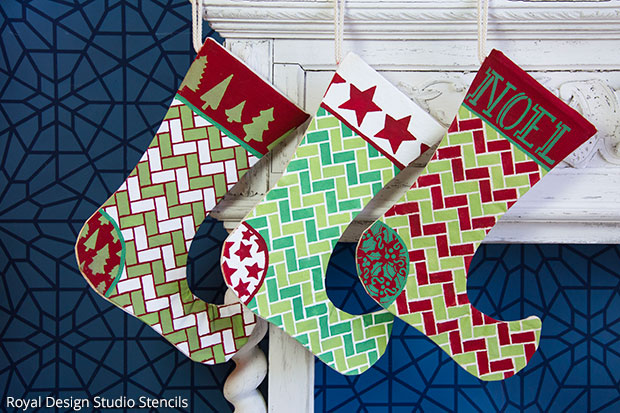
What a beautiful sight! Your handmade tree skirt and stenciled stockings will be draped gracefully on the mantel and snug under the tree! 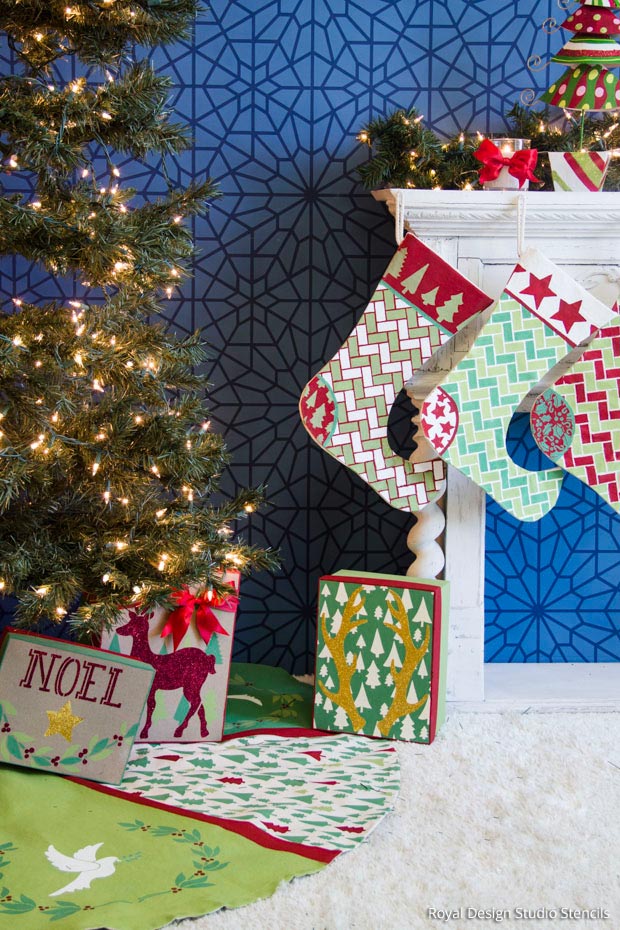
Christmas décor doesn’t have to come from a store… Maybe it can mean a little bit more. Want some more Christmas-themed DIY fun? Check out our Holiday Stencils Collection to see what others have done! Spread your Christmas cheer! Share your holiday stencil projects! Email us at projects@royaldesignstudio.com or tag us on Instagram with #royaldesignstudio.