


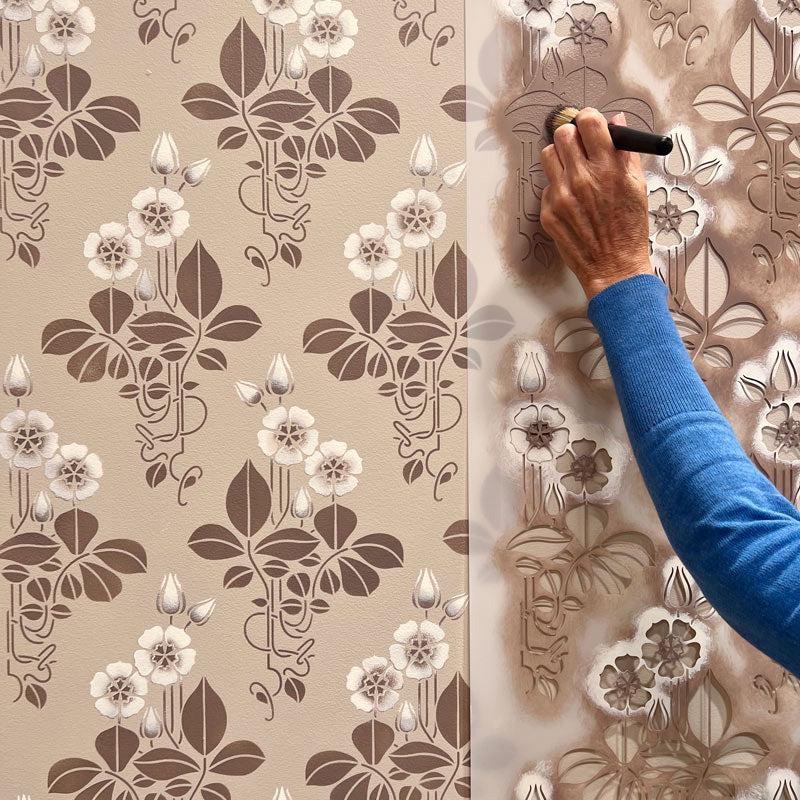
Learn how to bring a simple stenciled wall finish to life! It’s easy when you use our Royal Stencil Brushes to add small shading details to stencil elements that create instant depth and dimension. We brought our Craftsman-style English Cottage Flower wall stencil to life with this simple touch.

You can use this same stencil technique with almost any stencil, but it’s particularly effective when stenciling floral elements to add a 3-dimensional effect. Our How to Stencil video shows you how and be sure to read the stencil tips and details below.
Stencil Supplies
- Stencil: English Cottage Flower Wall Stencil
- Stencil Brushes: 1.5”, ½”, 3/8”
- Behr Dynasty Flat Latex Colors:
- Basecoat-Sculptor Clay Stencil-Art District, Linen White

Step 1:
Stencil the whole wall area first with a solid application of the dark brown color (Art District) using a 1.5” stencil brush.
Step 2:
Use a ½” stencil brush to stencil the round flowers solidly with Linen White. It may take 2 passes of stencil paint to cover the brown well. Just move through the whole stencil repeat with the white color and then come back to where you started to add the second layer of color to get full coverage.

Step 3:
Shade the “buds” as you stencil with the white “in reverse”. This means that you are stenciling the white heavily at the top and letting the color fade out as you near the bottom of the bud. This naturally produces a dimensional shaded effect of the white blending in towards the brown at the bottom. (See stencil shading tips below)
Step 4:
Now go back and shade the centers of the larger, open flowers by using a 3/8” stencil brush with the original brown stencil color. Focus the intense color in the middle of the flower and allow the brown color to fade out as it comes out over the outer petals.
PRO STENCIL TIP!
Stencil shading takes a little bit of practice, but after you get used to it, it can become second nature.
The 3 keys to successful stencil shading are:
- Paint
- Pressure
- Position
Paint: Make sure you are using a “dry brush”. You should load your stencil well with paint and then offload it on paper towels to make sure the excess paint is removed and also to make sure the paint is loaded evenly on the brush. Having a dry stencil brush will help a LOT with the next key point…
Pressure: Having a dry brush will allow you to put more pressure on the brush without have any paint seep under your stencil. Using pressure will help you get a dry “air-brushed” effect and a smooth look.
You will want to use more pressure in the areas that you want to fill in more densely and opaquely with the color. As you move away from those areas you will ease up on the pressure of the brush to allow the color to fade away naturally. This is what creates a dimensional effect.
Position: Controlling the position of the brush in the open areas you are stenciling is very important. You want to concentrate on the areas you want to apply color to and avoid the rest. Using smaller stencil brushes allows you to do this with ease. The smaller the detail area that you want to apply color to, the smaller the stencil brush. Our smallest brush is ¼”


