Halloween is a great time for holiday decorating. Many people spend days, not to mention a small fortune, making their homes look scary and fun. The truth is that you don’t really have to spend a fortune or a lot of time on Halloween decor. That’s why we are sharing with you 2 Halloween décor projects that you can do in an afternoon and without breaking the bank. Here are some festive stencil tutorials featuring our Holiday Craft Stencils that include a Halloween backdrop and trick-or-treat bags:
How to Stencil a Halloween Backdrop
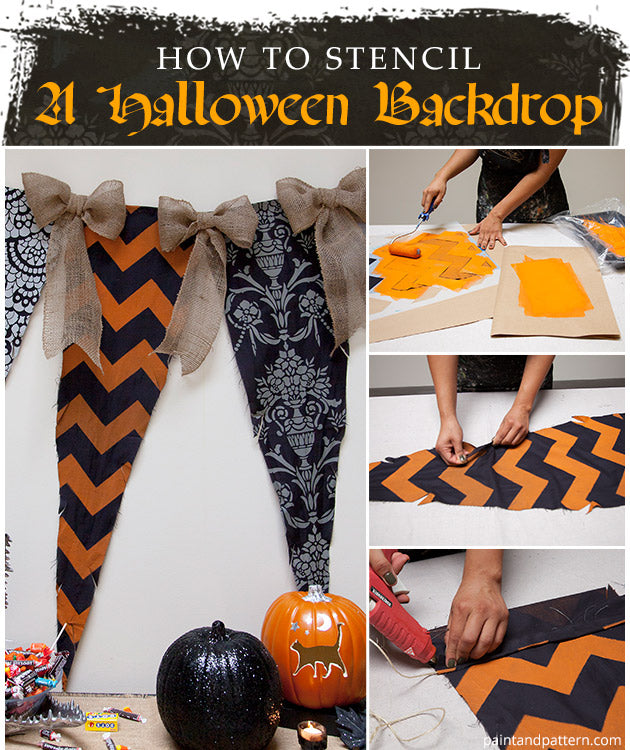
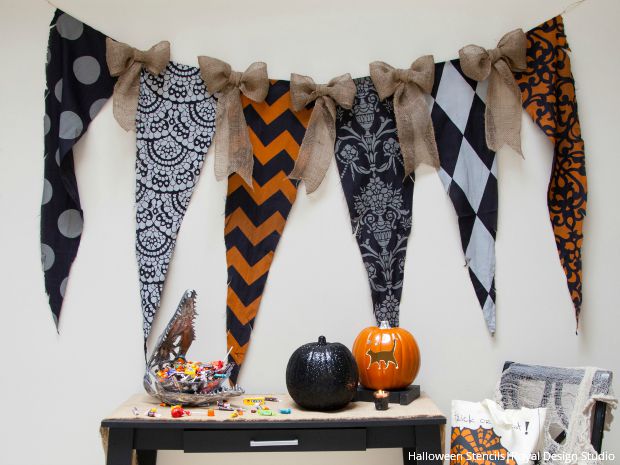
A Halloween Backdrop is a cute way to finish off your Trick-or-Treat table on Halloween night or a dessert table for your Halloween party. Because stenciling offers you an unlimited amount of color possibilities, you can use any of our stencils to decorate your Halloween backdrop. Here are the supplies you will need:
- Stencils: Polka Party Halloween Stencil, Spanish Lace Halloween Stencil, Chevron Halloween Stencil,Vase and Pearls Stencil, Harlequin Halloween Wall Stencil, Donatella Damask Halloween Stencil
- Annie Sloan Chalk Paint®: Barcelona Orange Chalk Paint, Paris Grey Chalk Paint, French Linen Chalk Paint
- Foam Roller
- Black Fabric 2-3 yards
- Scissors
- Painter’s tape
- Contractor’s paper
- Twine
- Hot glue gun
- Burlap
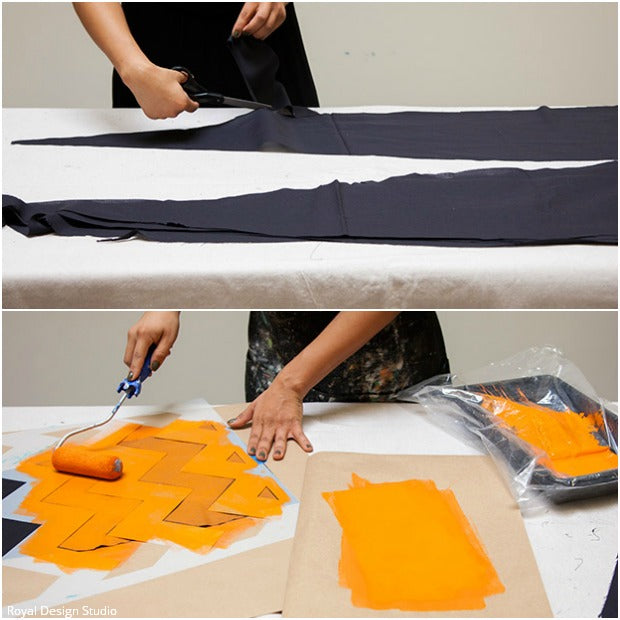
Step 1: Cut several pieces of black fabric in large triangle shapes. Lay them on contractor’s paper and tape the fabric down with painter’s tape.
Step 2: Use a foam roller to stencil each piece of fabric. Choose 6 different stencil patterns from either ourHalloween Stencil Collection or any Damask or Modern Allover stencil will look great. Paint each stencil in “Halloween” colors (black, various greys, orange, green, purple…). For this project we used Barcelona Orange Chalk Paint®, Paris Grey Chalk Paint and French Linen. Allow to dry.
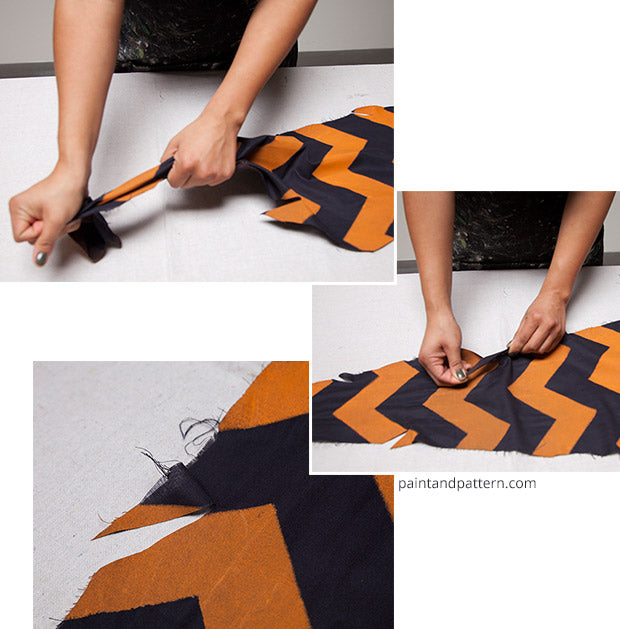
Step 3: Once dry, make some cuts into the fabric and wrinkle it to create a ragged look.
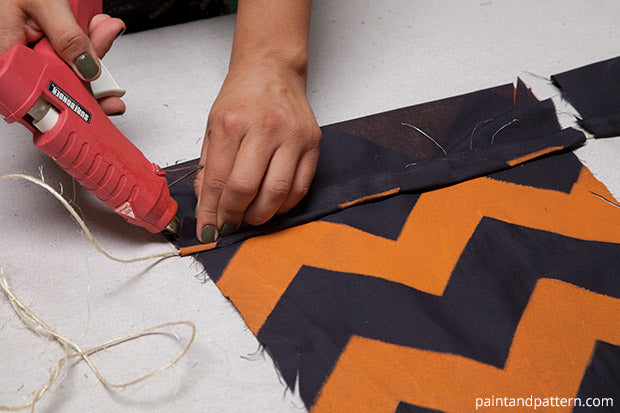
Step 4: Use a hot glue gun to attach each triangle to a piece of twine and create a bunting.
Optional Step 5: We used some burlap ribbon we had left from an earlier project to tie a few bows and placed them between the fabrics to hide the twine. You can use any type of tick ribbon you have left. A fabric with some pumpkins or skulls would also look very festive!
That’s IT! Your backdrop is ready to be displayed! The bonus is that it’s also easy to store for your next Halloween party!
Halloween DIY: Stencil Trick-or-Treat Bags
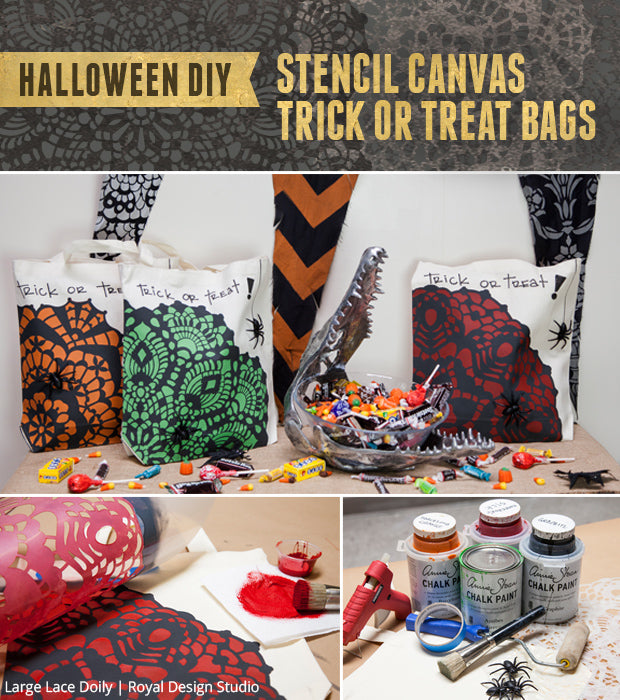
Get more boo for your budget by stenciling your own Trick-or-Treat bags! You can customize them to match your kid’s costumes or personalize them with their names! One thing for sure is these stenciled bags are all treat – no trick! This project illustrates how you can make three bags. Here are the supplies you’ll need:
- Large Lace Doily Halloween Stencils
- Annie Sloan Chalk Paint®: Graphite Chalk Paint, Barcelona Orange, Emperor’s Silk, Antibes Green
- 2″ Stencil Brush
- Foam Stencil Roller
- 3 Canvas tote bags
- A bag full of Plastic spiders
- Black Sharpie or Medium point Tee Juice Pen
- Painters Tape
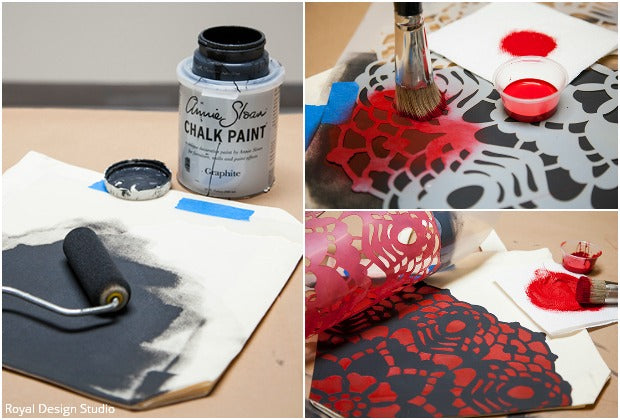
Step 1: Doilies are a 2 layer stencil that includes the silhouette and the detail. First stencil the silhouette using a foam roller and Graphite Chalk Paint. This will later become the lines for the spider web. Allow to dry.
Step 2: Leave the silhouette in place and lay the second layer of the stencil inside. Using a stencil brush with a contrasting color, for this project we used Barcelona Orange Chalk Paint, Antibes Green Chalk Paint and Emperor’s Silk Chalk Paint. Stencil the details of the doily.
Step 3: Remove the stencil and allow to dry.
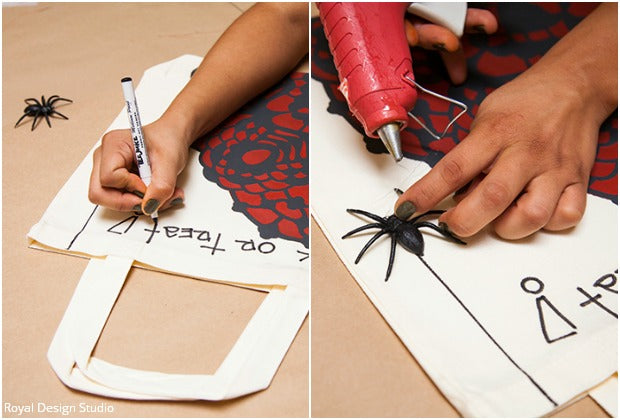
Step 4: Using a tee Juice pen or a Sharpie, write “Trick or Treat” across the top of your bag. Another idea would be to put your kids’ names to personalize the bags!
Step 5: Using the straight edge of a stencil or a ruler trace a vertical line from the top to the middle of your bag.
Step 6: Using a hot glue gun add a plastic spider where your line ends. Place a second spider in the spider web.Now you have spooktacular trick-or-treat bags!

Can’t seem to get enough of Halloween DIY fun? See what we are howling about with our Holiday Stencils Collection! It’s to die for… Once you’ve got your terror-ific Halloween stencil project underway, email us your pics at projects@royaldesignstudio.com or tag us on Instagram with #royaldesignstudio.