
Supplies:
- Royal Design Studio Stencils: Pompeii Border Stencil, Herculaneum Pompeii Border Stencil
- Antique Cherry and Golden Oak Stain & Seal, So Slow Extender
- Faux Effects® Decorative Products: Texturecoat, Untinted Plastertex, Venetian Gem Tint Base, Aquacolors in Blue, Earth Brown, White, Yellow Ochre, Earth Green, Teal, Autumn Brown, Dark Brown
- Tools: Assorted Stencil Brushes, Small Artist's Pointed Round Brush, 1/4" Nap Roller and Tray, Venetian Trowel, Japan Scraper or Putty Knife, Terry Towel, Paint Sticks
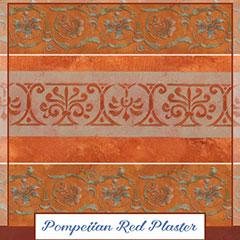
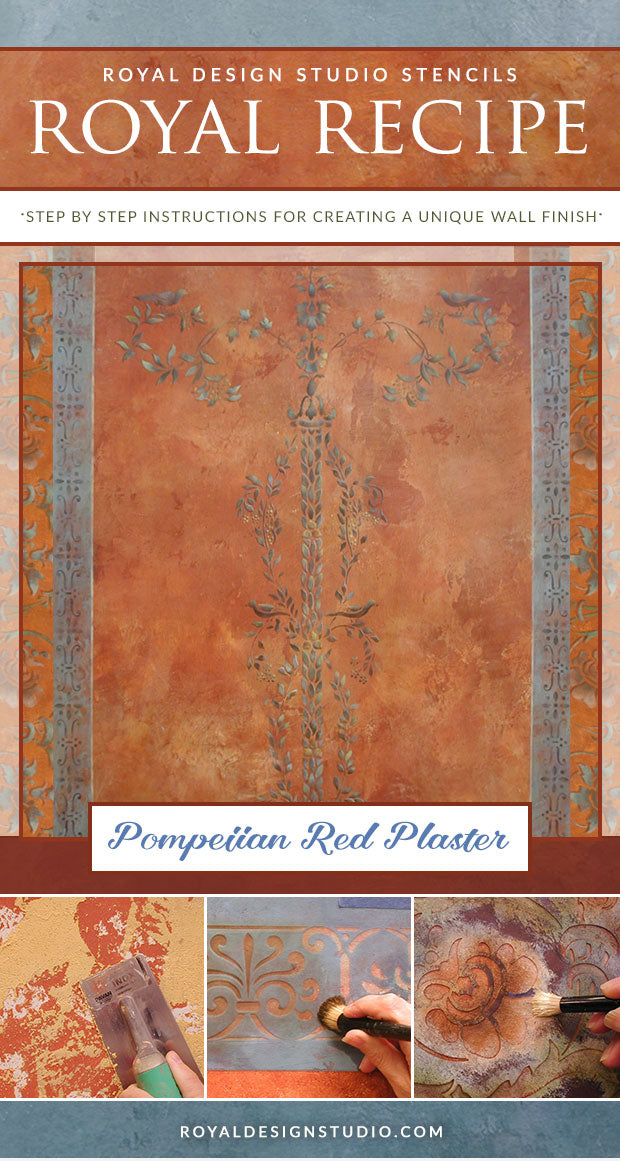
Pompeii Red Plaster Finish
Prep: Roll a thin, even coat of Texturecoat over the entire surface. Texturecoat has a gritty, sand-like substance in an off-white base. If desired, substitute with a coat of good quality, off-white Eggshell paint.
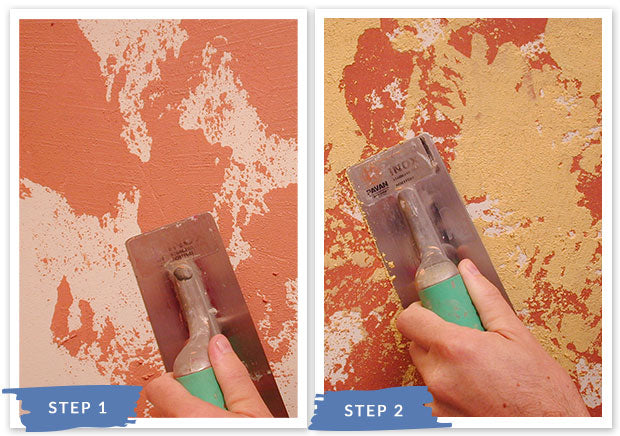
Step 1: Create two different color mixes of Untinted Plastertex by tinting the material separately with Antique Cherry and Golden Oak Stain and Seal at a rate of approx. 2.5T. of stain per quart of Untinted Plastertex.. Note: Estimated coverage for this technique is 100-150 sq. ft. per gallon. Trowel on the Antique Cherry in random, open patches. Complete the entire surface area with the Cherry mix.
Step 2: Repeat the process, now with the Golden Oak/Untinted Plastertex mix. Use this layer to both cover over and fill in areas untouched with the Antique Cherry color. For this layer, work in smaller areas at a time-about a 3’ by 3’ space.
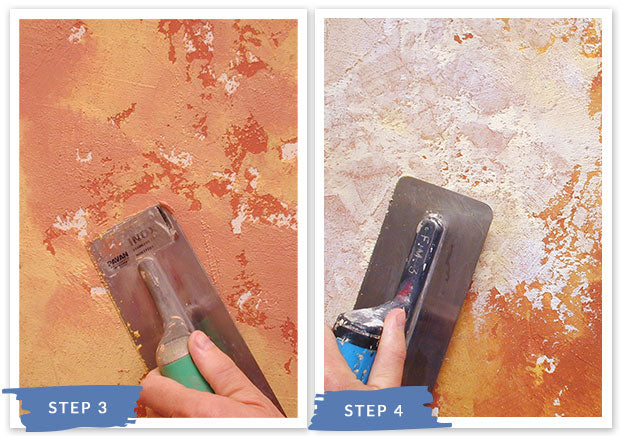
Step 3: While the Golden Oak is still wet, go back and work in some additional Antique Cherry mix, blending it slightly with the yellow color by pressing hard with the trowel. Note that there are still some small, open areas of the background showing through.
Step 4: Now apply a very tight skim coat of Venetian Gem Tint Base overall. Push the material hard into the recessed areas with the trowel held parallel to the surface and pull it very tightly and thinly on the raised areas by changing the angle of the trowel to be more perpendicular. During this step, you may want to add back in a little more of the Golden Oak mix and blend it well into the Venetian Gem on the wall. Let dry completely.
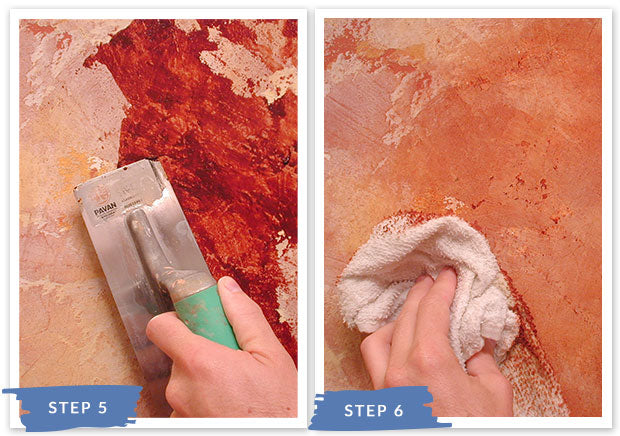
Step 5: Thin some Antique Cherry Stain and Seal with about 30% So Slow Extender. Trowel some onto the surface in small amounts, pushing it into the recessed areas.
Step 6: Immediately use a damp terry towel to spread the stain around on the surface, removing the excess. Since you are working in small areas, you will want to “feather out” the stain to nothing around the edges. Apply more stain with the trowel slightly away from the area you just worked and blended and “feather in” the stain towards the previous area. Note: If you want a more toned down, antique look to the color, add some Rich Brown or Honey Pine Stain and Seal to the Antique Cherry mix
Pompeii Stenciling Techniques
Multi-colored Distressed Pattern with the Herculaneum Pompeii Border Stencil
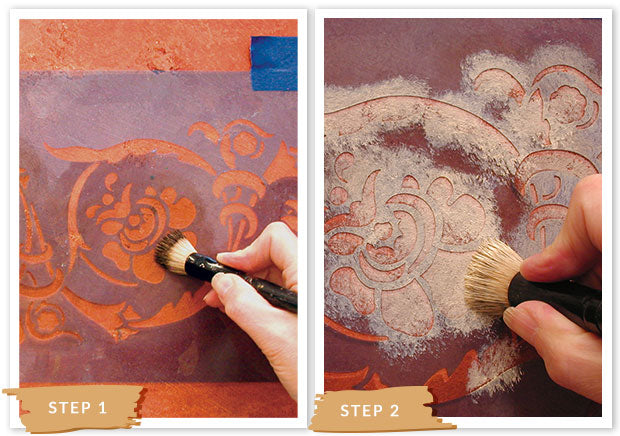
Step 1: Stencil the design solidly first with a medium value of Dark Brown. Continue this to repeat the pattern the desired number of times.
Step 2: Shift the stencil up and diagonally to the right just under 1/8”. Add a few drops of Yellow Ochre to White Aquacolor and stipple the entire design area to cover. It is OK if this is somewhat blotchy and irregular. It will add to the distressed effect.
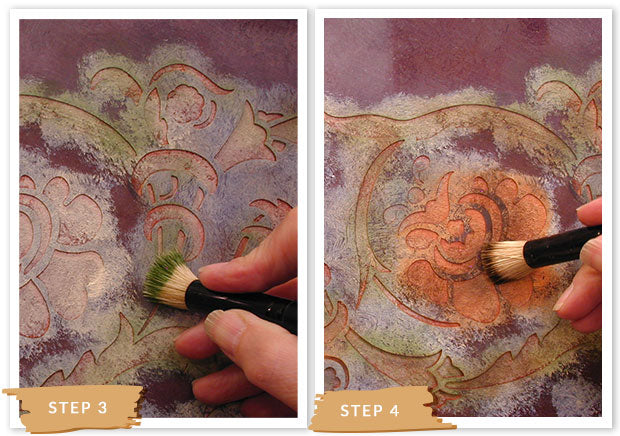
Step 3: Stencil in the various areas of the design with Earth Green, Teal, Autumn Brown and any other desired or appropriate colors.
Step 4: To add interest and dimension, use a small brush to stipple Dark Brown in areas that would be naturally shaded.
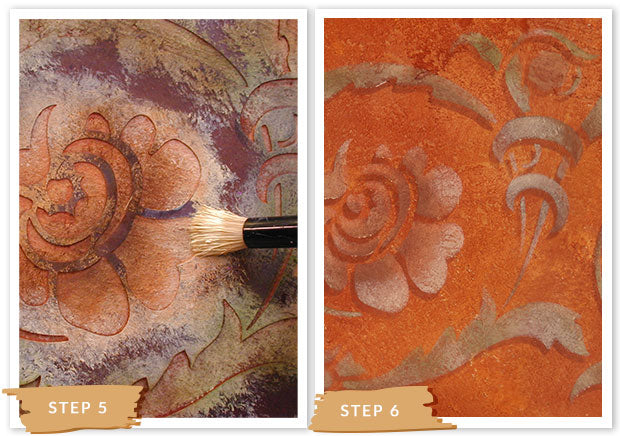
Step 5: Use another small brush to stipple the White/YO mix in areas that would be naturally highlighted.
Blue Banded Embossed Pattern with the Pompeii Border Stencil
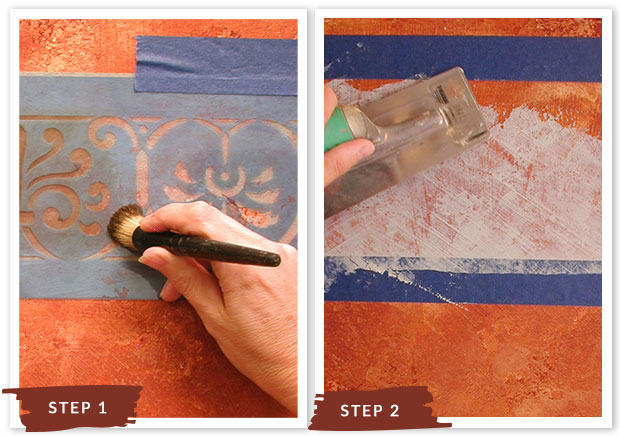
Step 1: Tape off a border the total width of the stencil mylar. Burnish well. Create a plaster mix by mixing Untinted Plastertex and Venetian Gem Tint Base 1:1. Tint this to a Steel Blue color with 1.5 teas. Blue and 2 teas. Earth Brown Aquacolor per 1 quart of the texture mix. Trowel on 1 to 2 coats of the Steel Blue mix depending on the desired depth of color. Allow to dry.
Step 2: Stencil the design solidly first with a medium value of Dark Brown. Continue this to repeat the pattern the desired number of times.
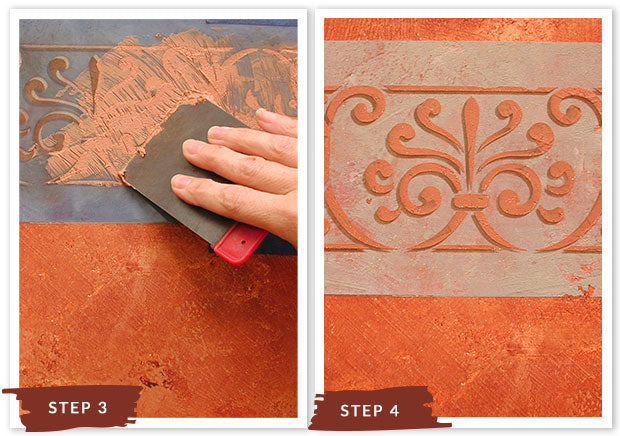
Step 3: Go back to your origination point and the original position of the stencil used for stenciling the Dark Brown. Shift the stencil up and diagonally to the right just under 1/8”. Use a small trowel or blade to trowel on a low relief embossing of the design with the original Untinted Plastertex/Antique Cherry mix used for the background.
Step 4: Repeat the stencil embossing to continue the pattern. Always go back to the original brown stenciling and shift up and over from there. Always shift in the same direction and by the same amount. You may find it best to “hopscotch” and stencil every other repeat. Go back when these have dried to stencil emboss the “in betweens”.

Step 5: If a deeper color intensity of red is desired for the embossing, replace the stencil and stencil back over it lightly with the Antique Cherry/Aquaglaze mix. Use a very dry brush and a light pressure to avoid run-unders.
Step 6: For hand painted highlights, mix equal parts White and Autumn Brown Aquacolor. Add a touch of Yellow Ochre and thin slightly with water. Apply highlights with a small artist’s pointed round brush to the upper edges of the design-opposite the shadows.
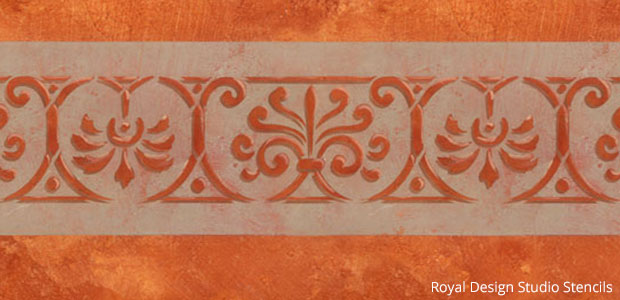
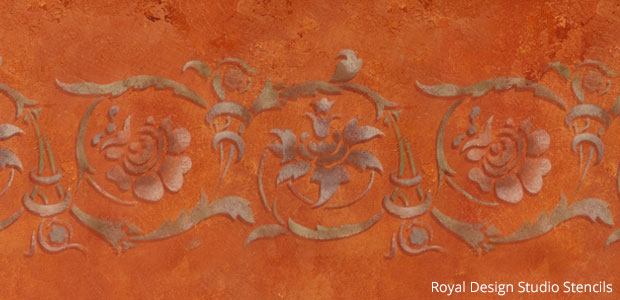
Closeup detail of the finished Pompeii Border stencil.
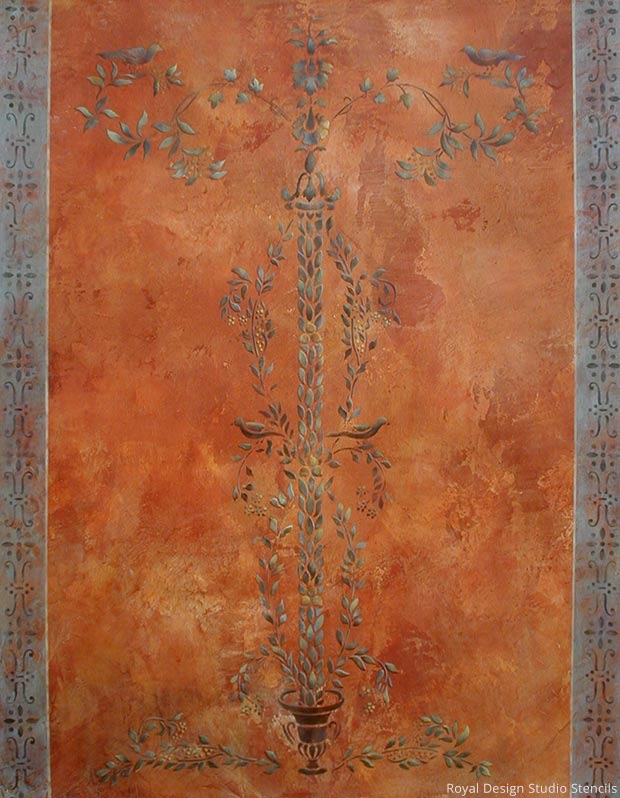
For this mural we've used the same colors and techniques outlined above and combined them with the Botanical Column Pompeii Wall Stencil, Pompeii Berries Wall Stencil, and Simple Pompeii Border Wall Stencil.