


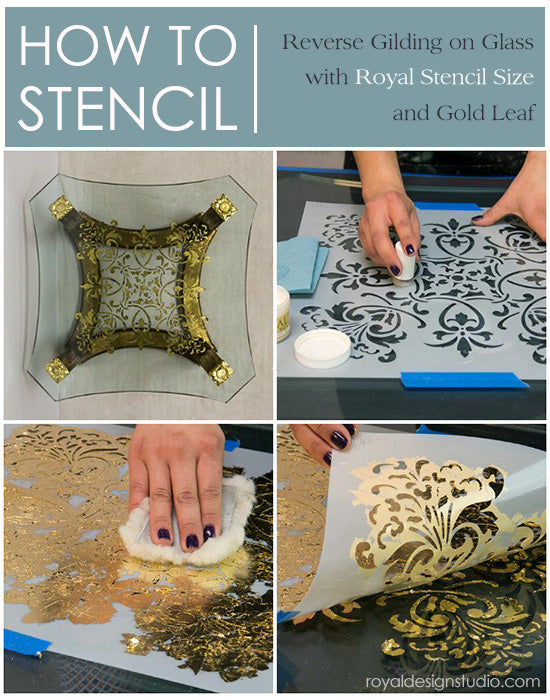
In this stencil tutorial we share how easy it is to create a verre églomisé finish on glass using our Clear Royal Stencil Size. Verre églomisé is a French term that literally translates to "glass gilded" and refers to the process where the reverse side of glass is gilded with gold or other metal leaf. Our Clear Royal Stencil Size, with its gel-like formula is designed to make this technique easy to achieve with any of the stencils from Royal Design Studio.
Watch the video and read the instructions below on to find out how to recreate this elegant look on glass tabletops, or for glass cabinet doors and even framed art pieces.
Stencil Supplies for this Project:
- Royal Stencil Size: Clear
- Gold Metal Leaf
- Stencil Pouncer Tool
- Royal Stencil Crème: Flat Black
- Modern Masters Dead Flat Varnish
- Lambswool pad
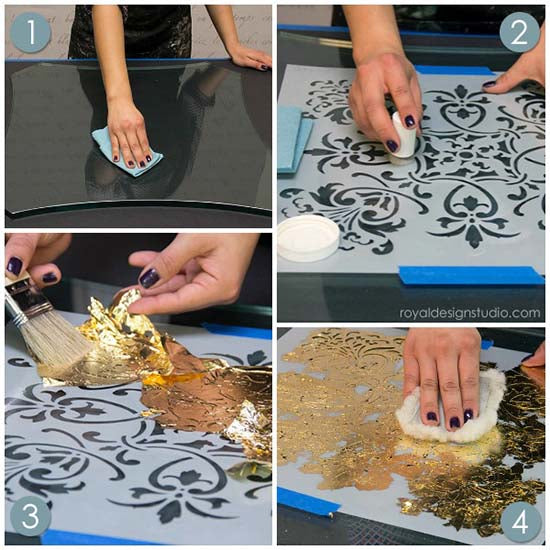
Step 1: Clean your glass piece using glass cleaner or alcohol and a lint free rag or microfiber cloth.
Step 2: We have found that the foam tipped stencil pouncer tools that are available in craft stores (such as Michaels) are ideal for this technique on glass.To use the stencil pouncer tool, dip the foam tip into the Clear Royal Stencil Size and pounce of the excess size onto paper towels. Apply the size through the stencil using a straight up and down pouncing motion.
Allow the Stencil Size to get "tacky", which will take approximately 15 minutes. You will know that the size has reached the right level of "tack" if you press your finger down on it and feel resistance and hear a "pop" as you pull your finger off quickly.
Note: You can also use a Stencil Brush from Royal Design Studio if you carefully offload the excess size from your stencil brush before stenciling and use a light pressure.
Step 3: Use a soft, natural bristle brush to lay and pounce sheets of Gold Metal Leaf through the stencil on to the tacky size.
Step 4: With the stencil still in place, burnish the size by pressing over it firmly with a lambswool pad or soft cotton cloth.
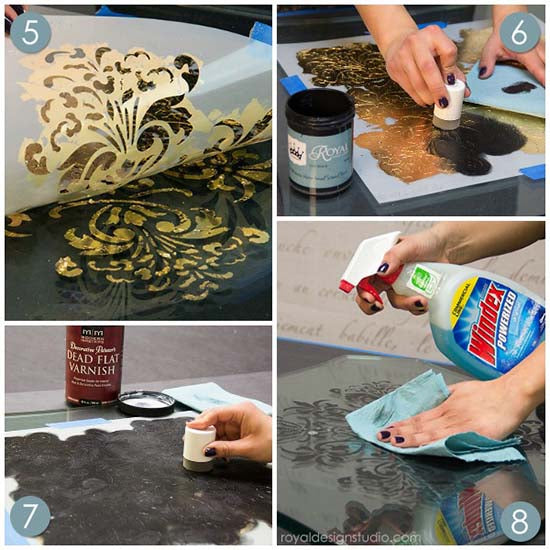
Step 5: Check your final effect with the leaf by looking at the stenciled leaf on the back of the glass and also turning the glass over to see how it will look through the front side of the glass.
Step 6: Depending on how completely you covered the Stencil Size with the leaf, there may be some open areas between the pieces of leaf. For this technique we are "reverse stenciling", meaning that we are stenciling the layers as they will be seen through the glass from front to back. Adding a layer of black paint, such as Flat Black Stencil Creme, with a stencil pouncing tool will fill in any open areas. It will also add depth and color behind and around the leaf when it is viewed from the top side of the glass.
Step 7: Reverse stenciling on glass also means that the side of the glass we are stenciling on will not be touched or receive daily wear and tear. It is important to seal and protect it though, so that the glass can be cleaned of loose leaf and fingerprints before turning it over and installing it.
You can use any type of water-based varnish for this step. We just happened to use some Modern Masters Dead Flat Varnish we had on hand. Again, use the foam stencil pouncing tool to apply the varnish for best results. Allow the varnish to dry completely.
Step 8: Clean the stenciled side of the glass with regular glass cleaner using a lint free towel or microfiber cloth.
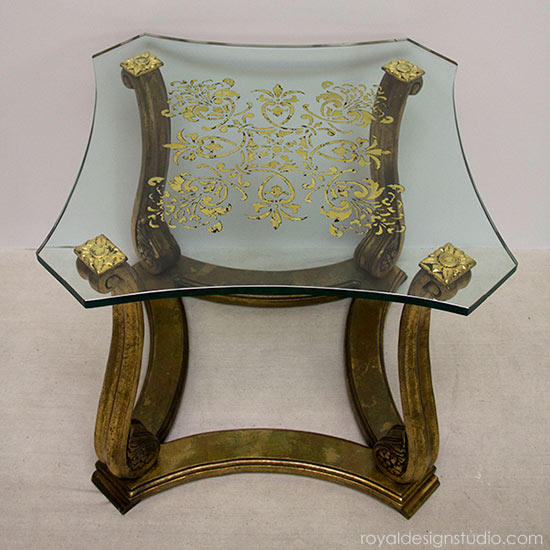
Viola! A verre églomisé finish on a glass tabletop! Because your stencil work is done on the reverse side of the glass, it is fully protected. Also, viewing the gilding through the thick glass gives it an interesting dimensional effect as well as adding to the overall rich look of the metal leaf.
This project represents just the beginning of the possibilities that can be achieved with reverse gilding on glass. Consider using different colors of metal leaf-even within the same stencil. Also, you can spray paint over the whole back of the glass in any color to provide a solid background that compliments the leaf.
Please feel free to share your OWN ideas in the comments below, and we always appreciated seeing and being able to share pictures of your projects. Please send them to projects(at)royaldesignstudio.com at any time!
Find more inspiring stencil tutorial using Royal Stencil Size here:


