Skip to content

Floor Stencils Have This Tiled Bathroom Makeover Covered!

Use Royal Design Studio tile stencils for a stenciled floor design

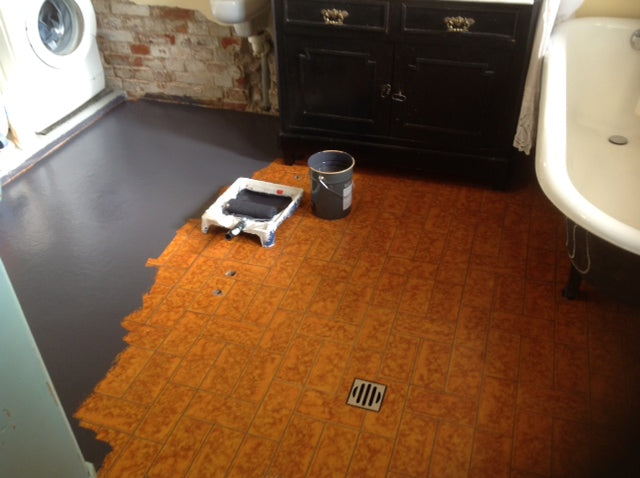
Rick and Mary Beth Holladay of The Art Factory in Germany finally decided to tackle their bathroom makeover project. The old red, vinyl floor needed replacing, but they didn’t have the time or money to invest in it. They found the perfect solution to their problem through Pinterest’s inspiring DIY projects using tile stencils from Royal Design Studio. They were delighted that painting over the existing old floor with tile patterned floor stencils was a perfect alternative to the expense and mess of removing the old tiles.

Makeover your bathroom with this DIY stenciled floor idea!

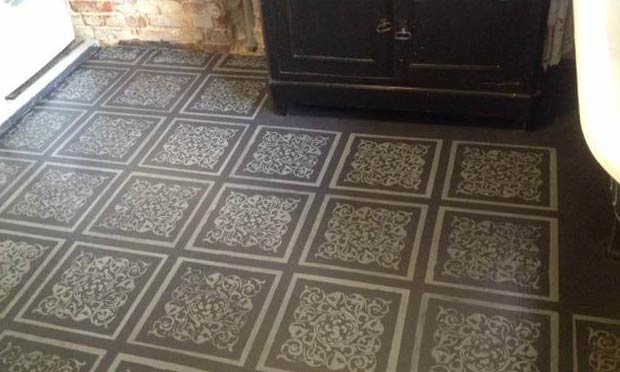
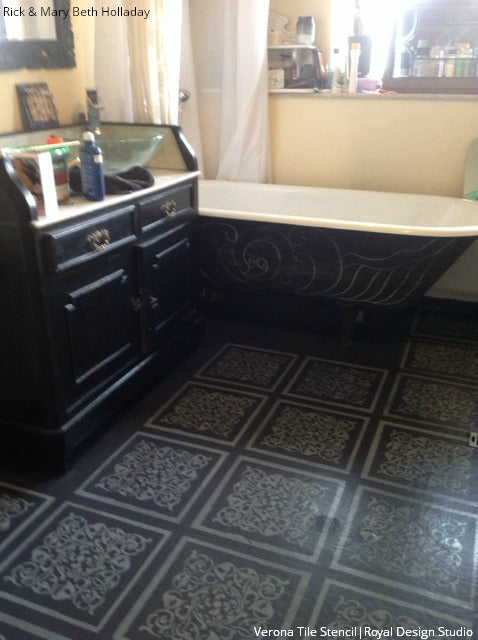
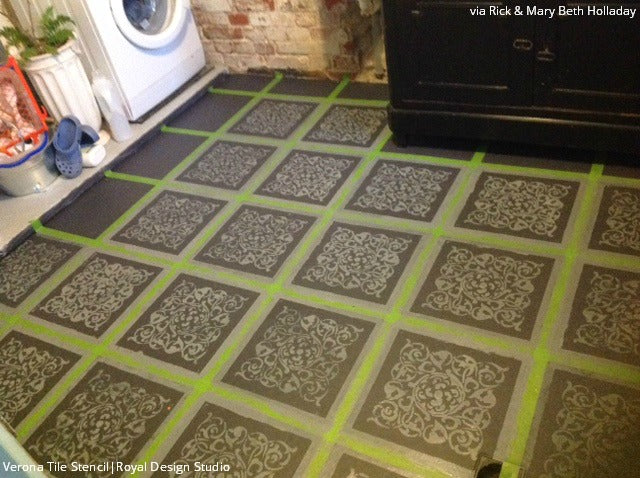
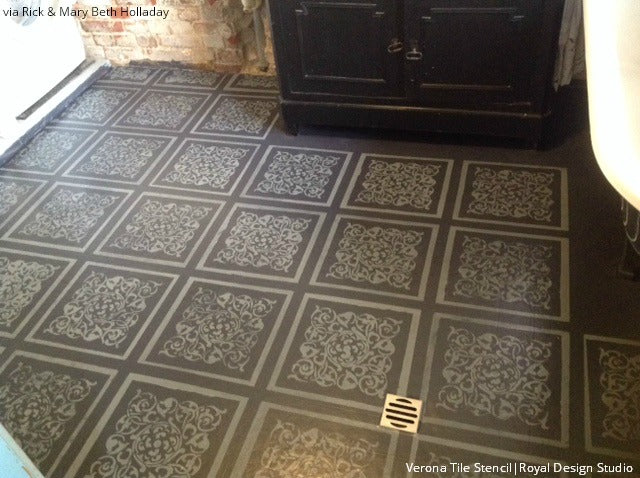
For their tile transformation, they used garage floor paint in both dark and light gray colors to create a sophisticated, neutral palette. They taped off the tile squares using Frog Tape, following the lines of the original tile floor.

Tile Floor Stencils for a DIY Bathroom Makeover

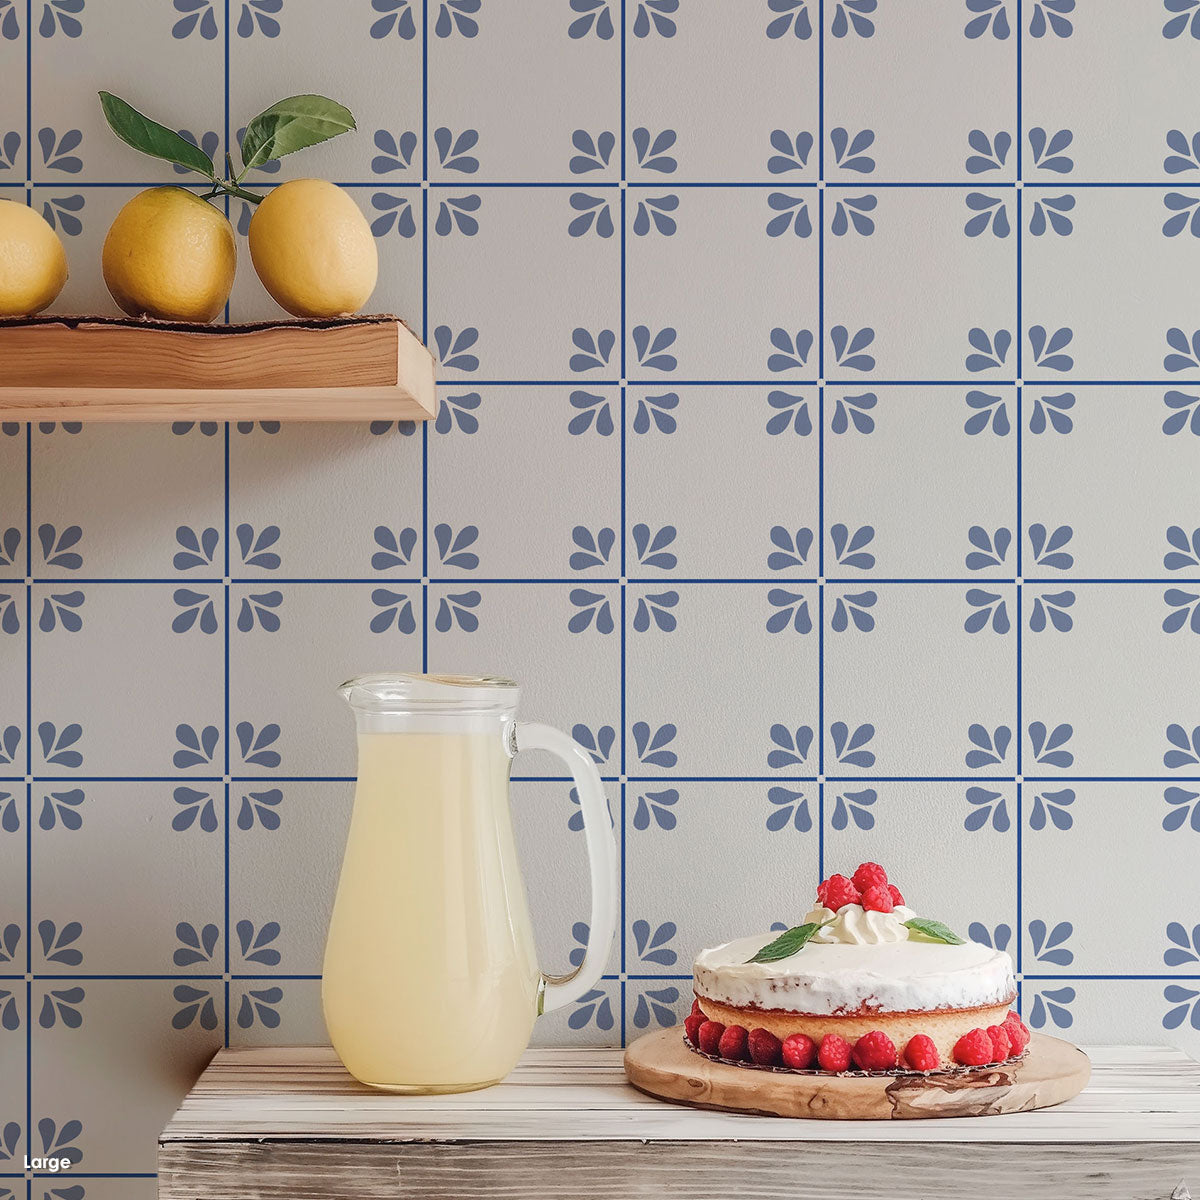
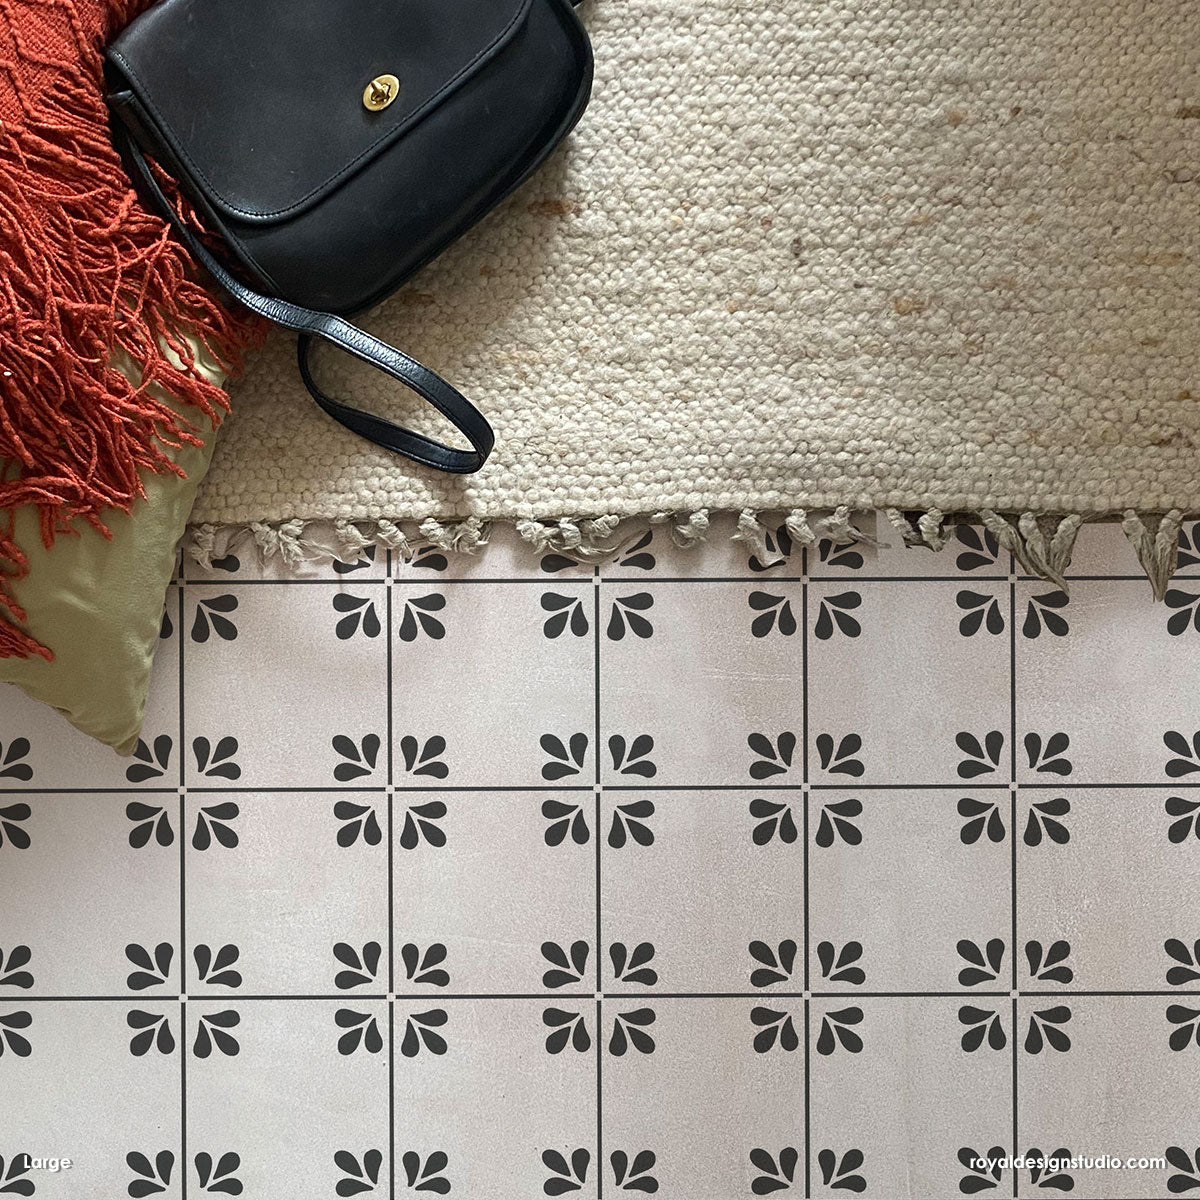
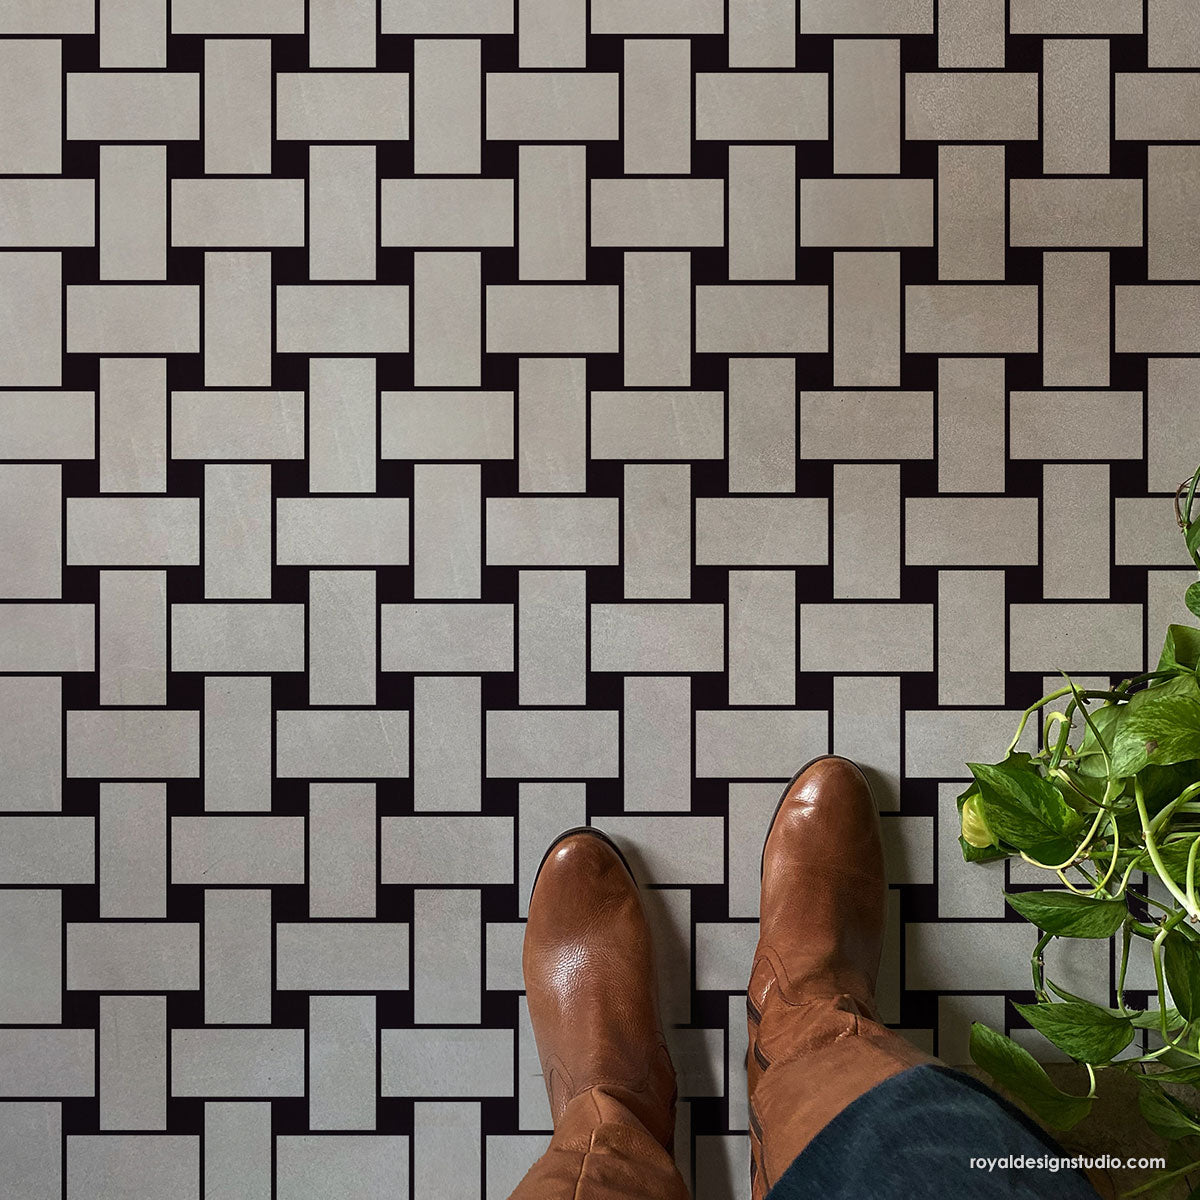
To create a classic tile effect on their bathroom floor, they chose our Verona Tile Stencil from our Tile Stencils Collection. Look how elegant this “tiled” floor is compared to the original vinyl! Who would guess that it was floor stencils?

Bathroom Remodel with DIY floor stencils from Royal Design Studio

Note: For high traffic areas such as the bathroom, we recommend using a durable, floor-rated topcoat seal the deal!

Are you floored by this stenciled floor before and after project? You can find even more floor stencil ideas on our Stenciled and Painted Floors Pinterest board, and on our Stencils for Floor Ideas and Tile Stencils posts here on Royal Design Studio.

Now it’s time to stencil your own! We’d love to see more on the floor and love to share your beautiful stencil projects with our readers! Email us at projects@royaldesignstudio.com, share them on our Facebook Page, or Instagram your Royal Design Studio stencil projects and tag us with #royaldesignstudio.

Older Post
Newer Post

13 comments

  • Hi Dawn – We recommend using an 8" tile stencil of ours that you would paint up until your grout line, so you would be stop stenciling before the design ends. You can also cut the stencil for the same effect. You can tape your grout lines beforehand to protect them or you can stencil them and paint over them afterwards with a contrasting color. Hope that helps! Happy Stenciling!

    Royal Design Studio
  • I am getting ready to stencil my plain white bathroom floor tiles. All the stencils are either 6" or 8" and my tiles are 7 3/4". I don’t want to stencil into the grout because I want it to look like tile. Would it be better to use an 8" design, cutting it short on all 4 edges. Or use a 6" stencil, leaving a border? Are their some designs better suited to having part of the design cut off? I really like the Mediterranean, Italian and Moroccan designs.

    Dawn Cameron
  • Do you know what stencil size they used ? Medium or Large? I love the look, I will use it in my basement !!!

    Ania

Leave a comment

Please note, comments must be approved before they are published

Close (esc)

Popup

Use this popup to embed a mailing list sign up form. Alternatively use it as a simple call to action with a link to a product or a page.

Age verification

By clicking enter you are verifying that you are old enough to consume alcohol.

Search

Shopping Cart

Your cart is currently empty.
Shop now