Are you tired of your bathroom looking… well, blah? Britny Robinson was feeling the same way about her guest bathroom, which was a yellowy dated tile that was screaming for help.

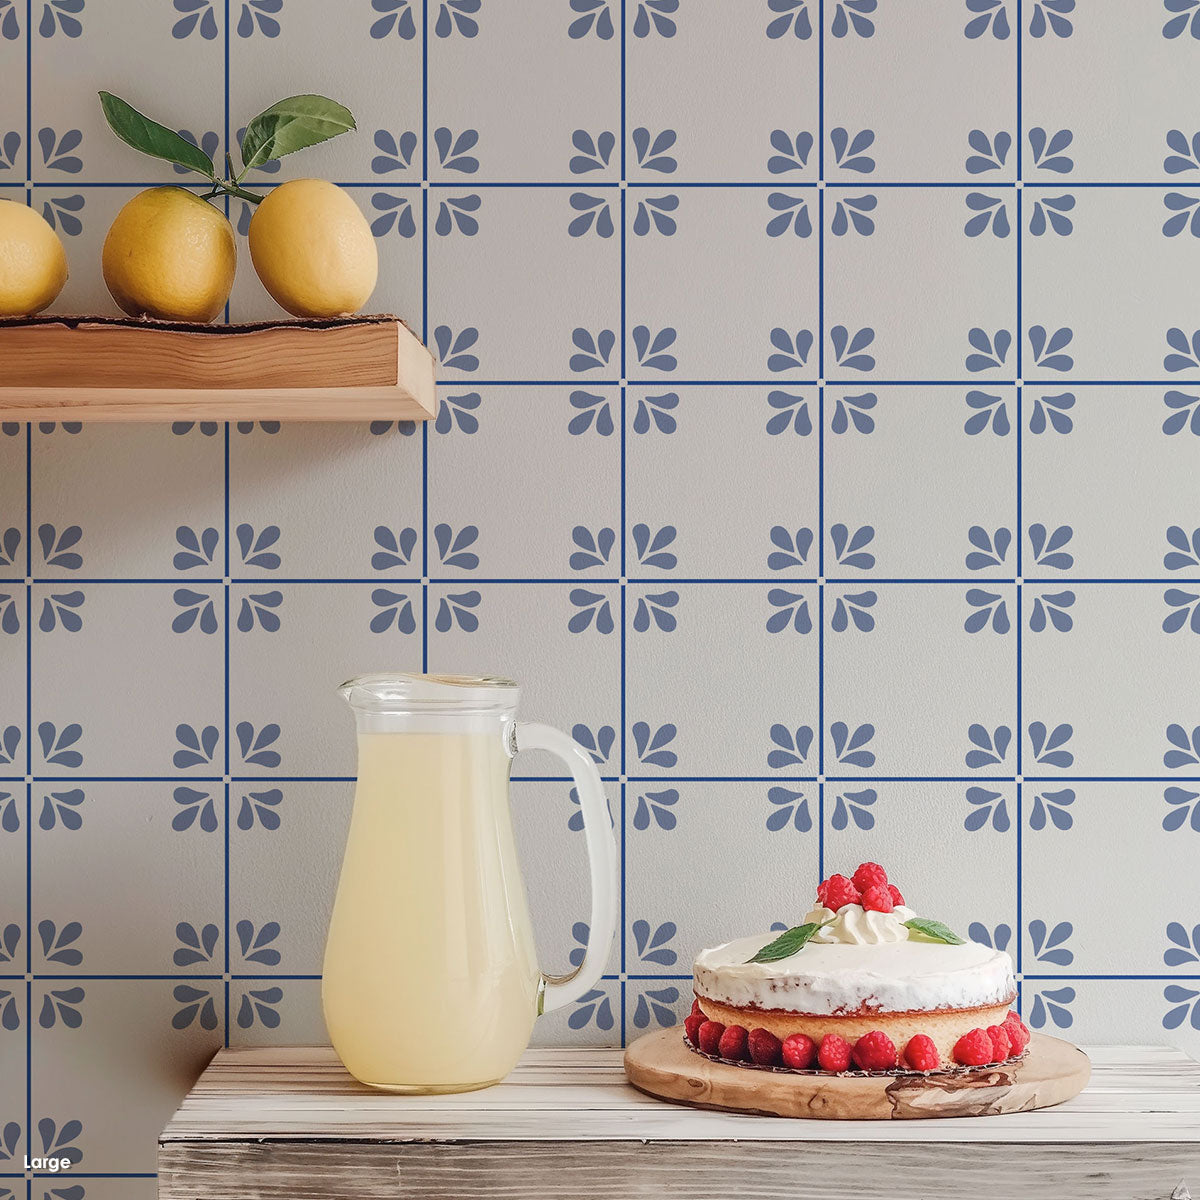
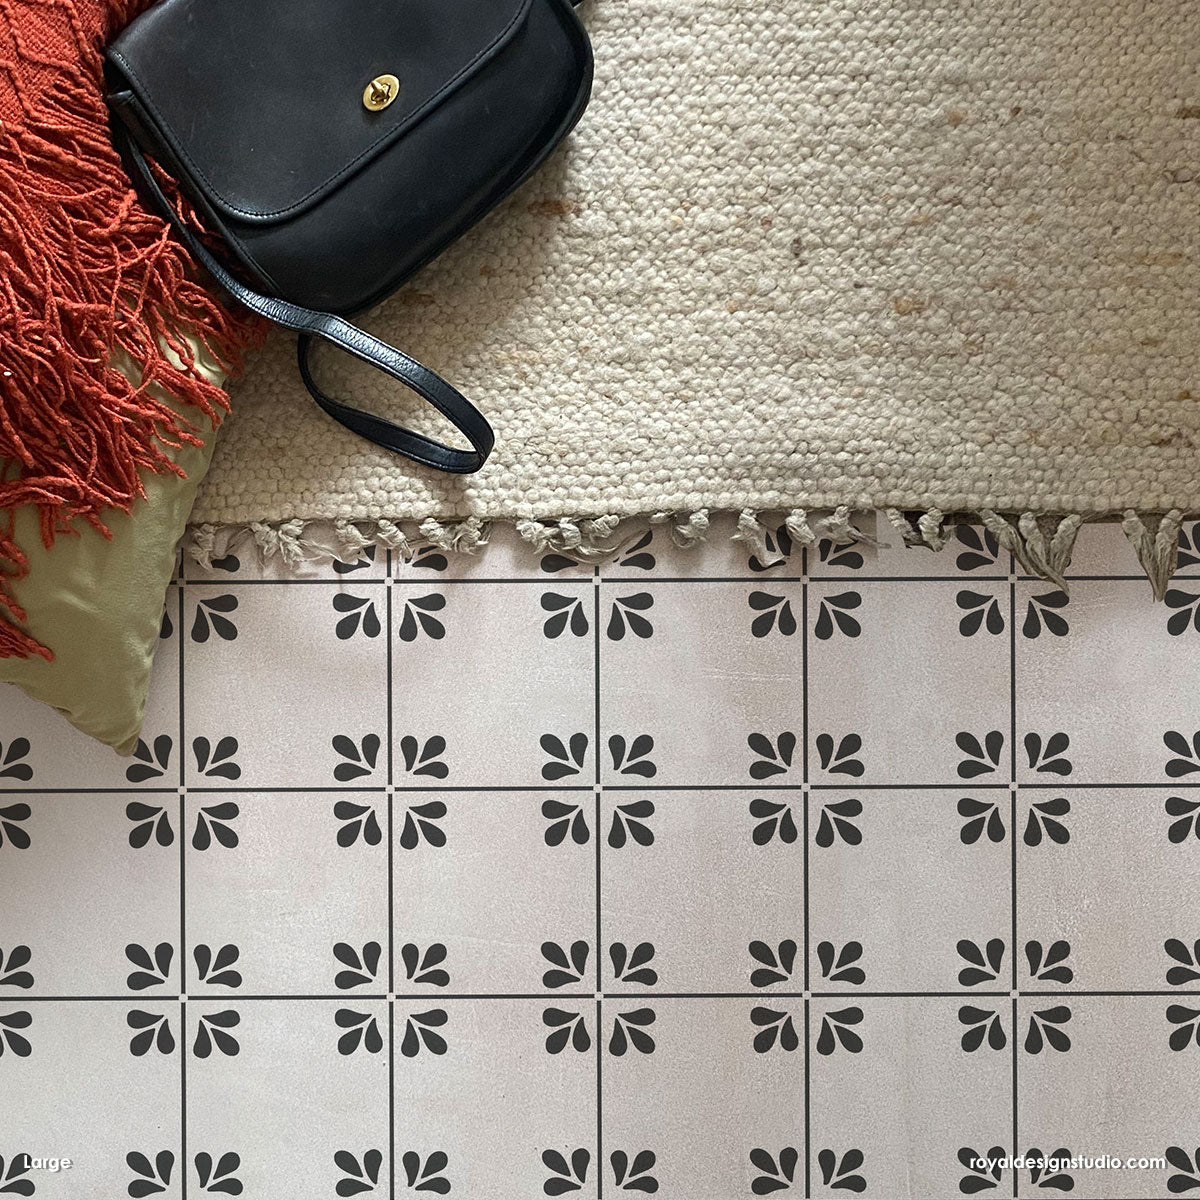
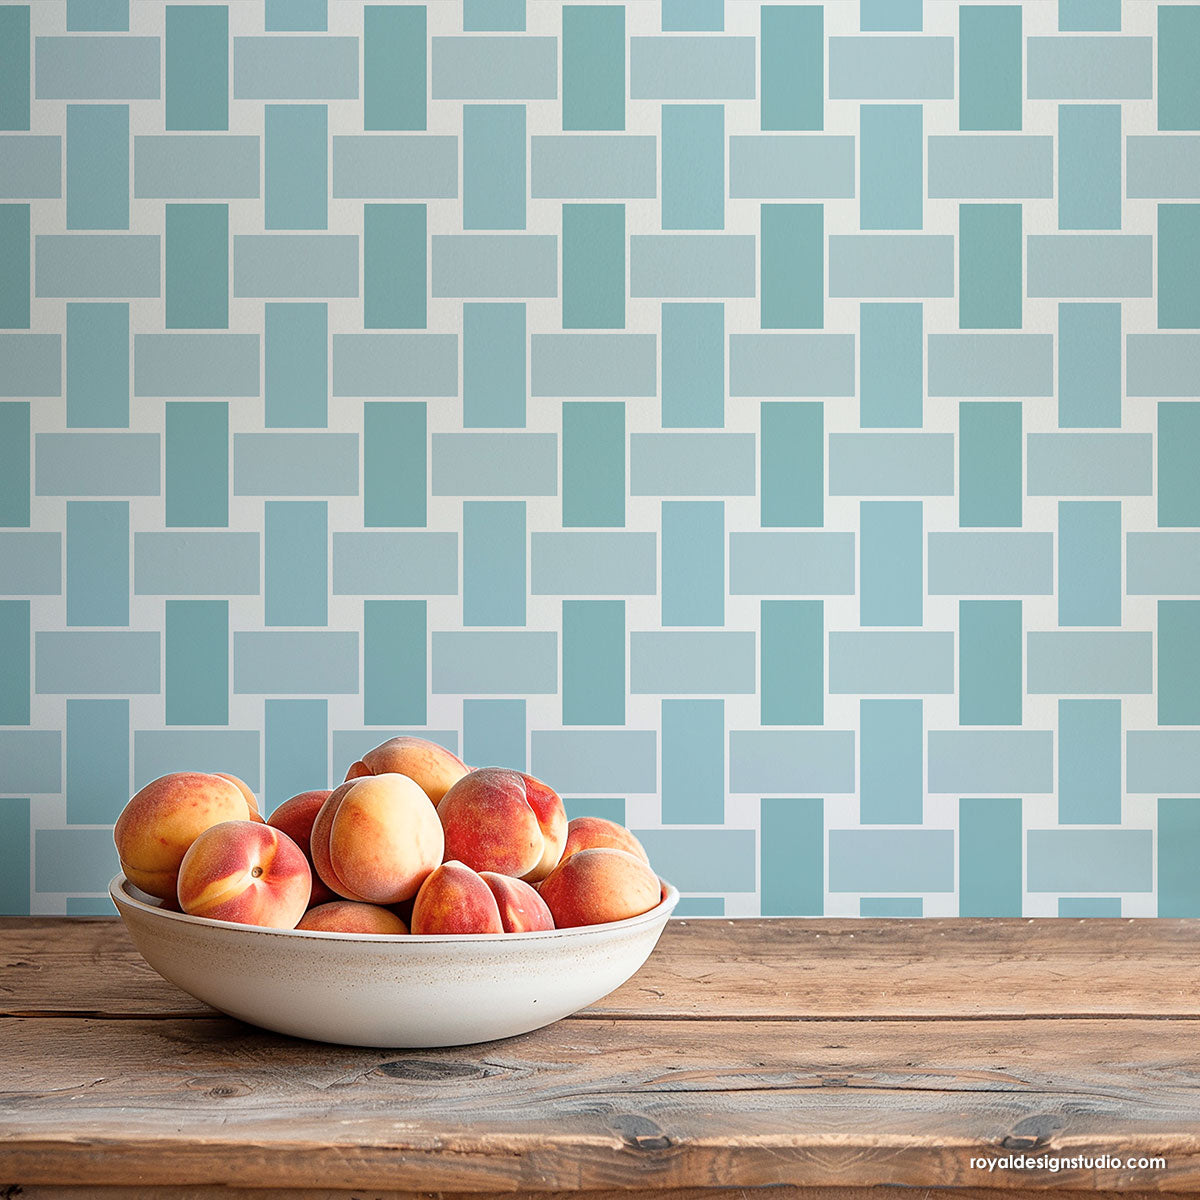
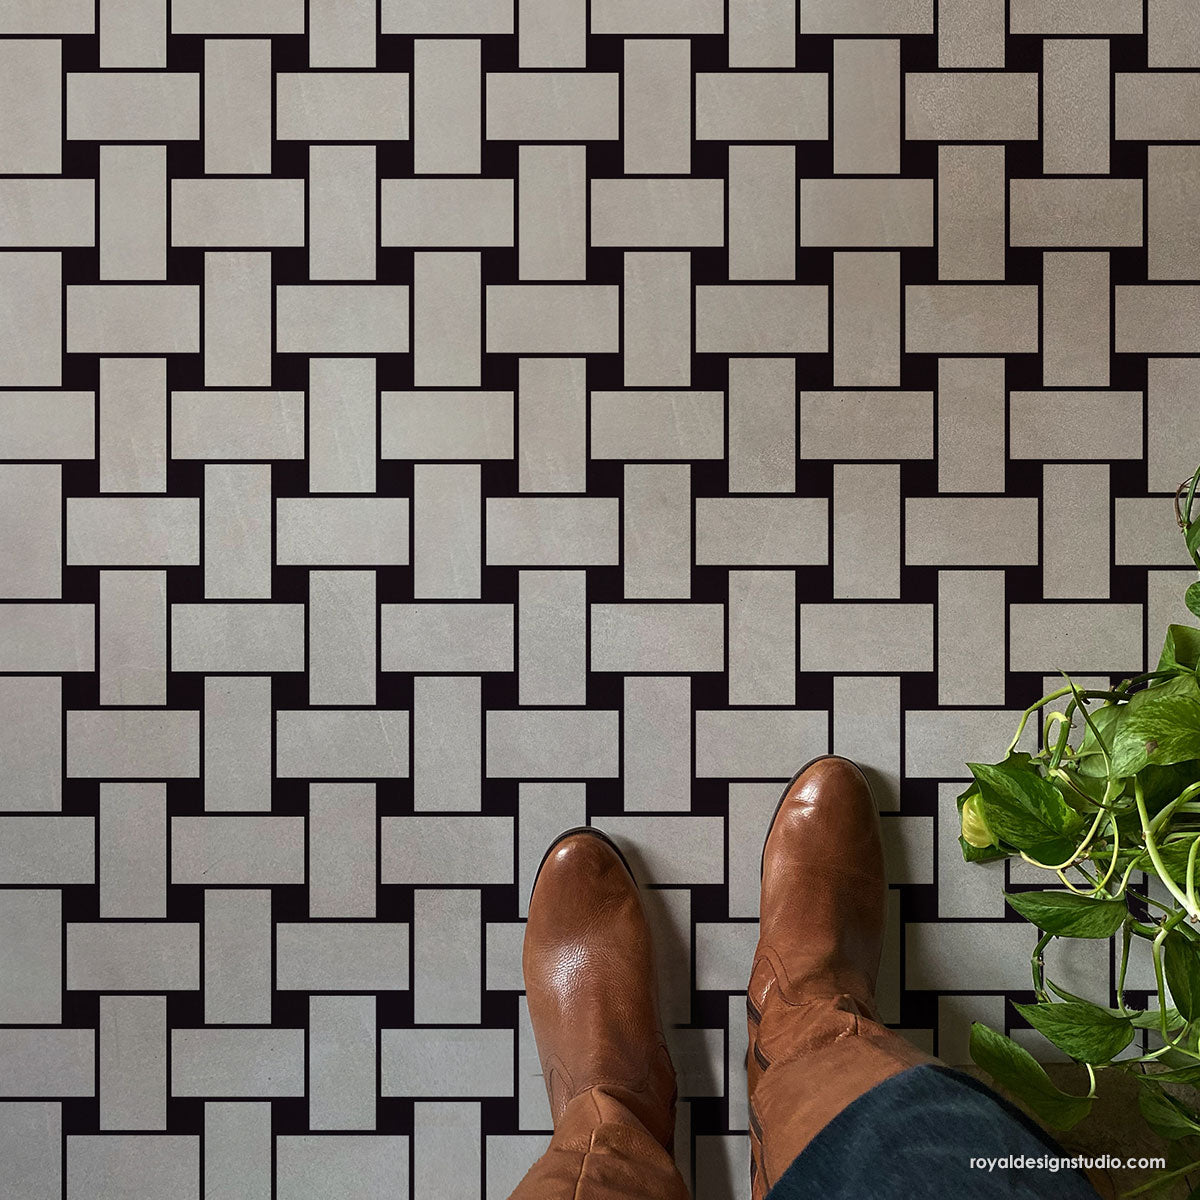
She says, “Every time I walked in there to bathe my son I cringed and imagined what I could do on a budget that would ultimately give the space a whole new look without breaking the bank. I have been fascinated with the idea of stenciling our tile flooring for a while now. I purchased my stencil from Royal Design Studio Stencils. They have so many amazing patterns and sizes! I finally decided on the Toledo Tile Stencil. It was a perfect fit for the look I was going for.”

Want to know how she did it? Stenciling is actually quite simple and is beginner-friendly! It was Britny’s first time stenciling her bathroom floors. Even pregnant, she thought it was easy and totally worth it! She says, “The Royal Design Studio Stencils website is loaded with ‘how-to’ information and inspiration for first time stencilers, so I had plenty of resources to guide me during the process.”
Supplies:
- Toledo Tile Stencil from Royal Design Studio Stencils
- Annie Sloan Chalk Paint® in Old White and Paris Gray
- Royal Stencil Brush
- Paint tray, paper towels, painter’s tape, paint roller
- Water-based polyurethane sealant
Prep: Clean your bathroom floor. Paint the entire floor with one or two coats of Old White Chalk Paint. Let dry between coats. Use painter’s tape to protect baseboards, cabinets, and the toilet/tub.
Britny says, “The fun part was next! There are so many different styles and sizes for any project at Royal Design Studio Stencils, so take a look around and choose the one that’s right for you.”
Step 1: Secure the floor tile stencil with painter’s tape onto your bathroom floor.
Step 2: Load a stencil brush with Paris Grey Chalk Paint. Offload the excess paint from the roller onto a paper towel. This will disperse the paint evenly on the roller as well as make sure you are using minimal paint. Using minimal paint is essential for preventing bleed under the stencil. Stencil the tile stencil design using light to medium pressure.

Step 3: Remove the tile floor stencil and reposition it using the registration marks that are built right into the stencil. Continue stenciling the next repeat and repositioning the stencil up, down, and around the first repeat you stenciled until you have stenciled your entire floor.

“I was fed up with my tile enough to take the plunge and take a chance. It ended up turning out so much prettier than I dreamed it was going to! I am so, so thrilled with the end result! Royal Design Studio Stencils and their DIY tutorials are the best resource!” Comment below and tell Britny that you love how her stenciled bathroom floor turned out!