


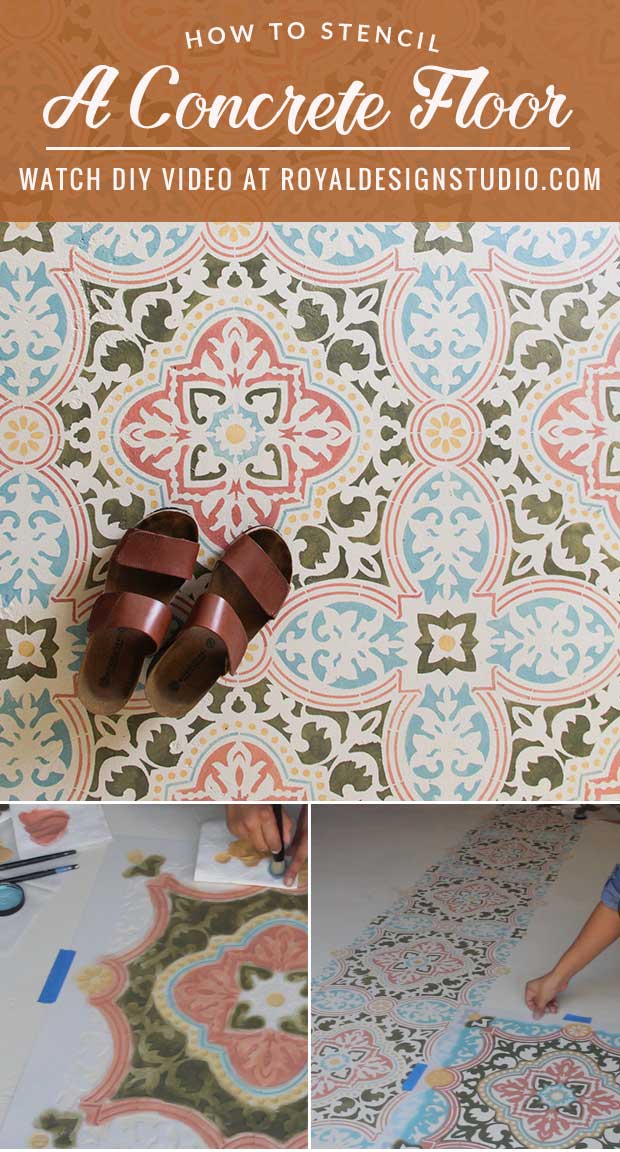
Stencils are usually seen on walls, but our stencil designs work equally well to create an amazing allover concrete carpet effect. Stenciling concrete is an inexpensive way to add style to an otherwise utilitarian floor. A stenciled concrete floor can also help you hide imperfections, create a lovely focal point in your home, or just add a dose of beauty to your space for very little cost. And not to worry: Stenciling on concrete is actually quite easy! You just need the right paint for concrete, some patience, and a good pair of knee pads! Watch the video and follow the instructions below to see how you can transform your concrete floor in 10 easy steps:
Supplies:
Buy the Tutorial Stencil Kit along with your favorite stencil and you're all set to recreate this look!
Or, buy stencil supplies separately here:
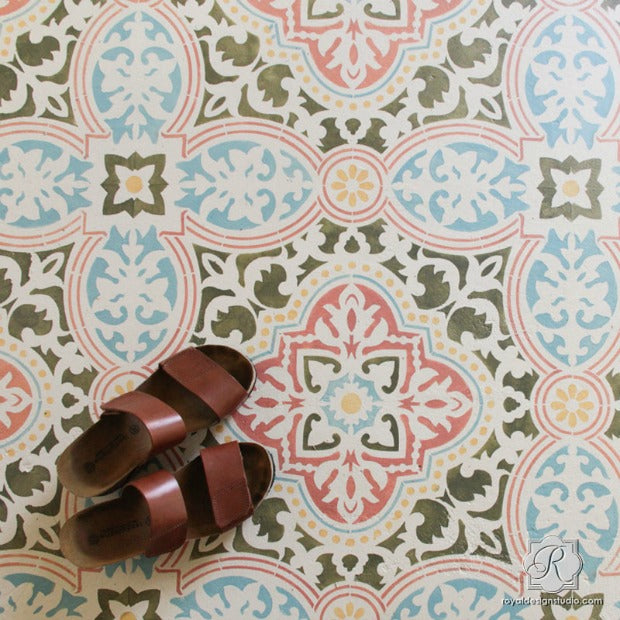
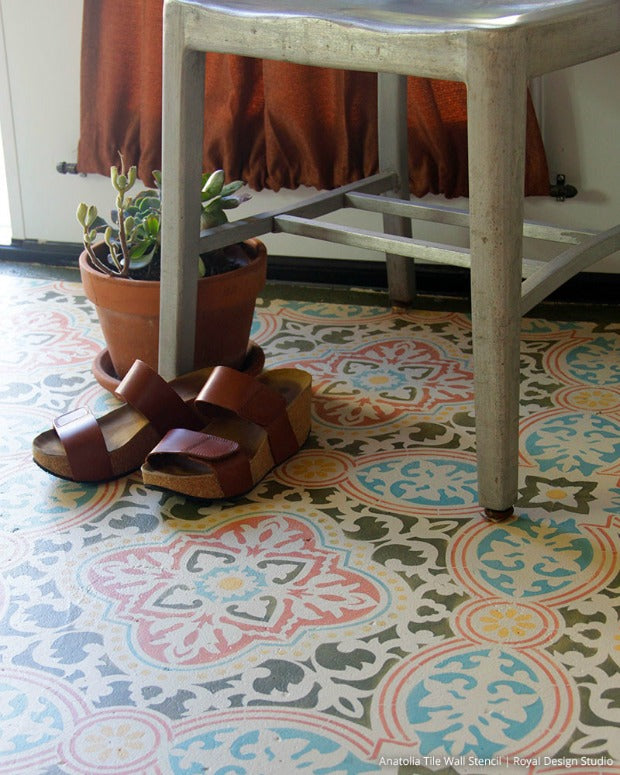
- Anatolia Tile Stencil
- Annie Sloan Chalk Paint® in Old Ochre, Olive, Arles, Scandinavian Pink, and Provence
- Annie Sloan Floor Lacquer
- Royal Stencil Brushes in assorted sizes
- Flocked roller and tray
- Foam roller and tray
- Motsenbocker’s Lift Off 5
- Chip brushes, foam brushes, measuring tape, chalk line, paper towels, and painter’s tape
Here's the Boring, Blah, and Bland Before:

Step 1: Clean your concrete floor of dust, dirt, grease, and any adhesive residue. Tape off your surrounding walls and load your tray with Old Ochre Chalk Paint®. Then paint your concrete floor using a nylon roller. Use a paint brush to paint the edges.
Step 2: Use measuring tape to find the center of your floor. Use a chalk line to trace a straight line from the center to the front of the room.
Step 3: Place your stencil on at the front center of your floor, using the chalk line as a guide. Secure it with painter’s tape.
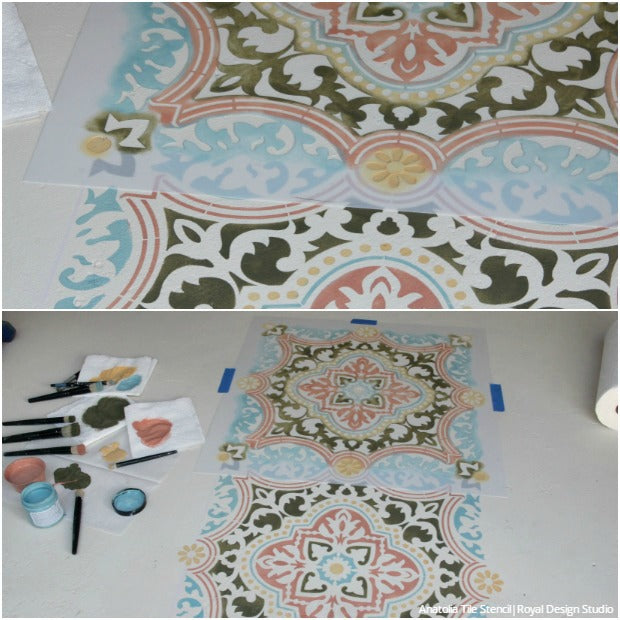
Step 4: Use a small stencil brush for each of these paints and mixes:
- Olive
- 2 parts Scandinavian Pink and 1 part Arles
- Provence
Load your stencil brush with paint and off-load most of it back onto a paper towel. Use a firm swirling motion to distribute the paint evenly onto the brush and to remove the excess paint.
Step 5: Use a firm swirling motion to stencil the different elements of the stencil with the different colors.
Step 6: Remove the stencil from its first repeat and reposition it to its next repeat. There are registration marks built right into the edges of the stencil so that you can align each repeat perfectly every time. Use the same color scheme to paint the next repeat. Let dry.
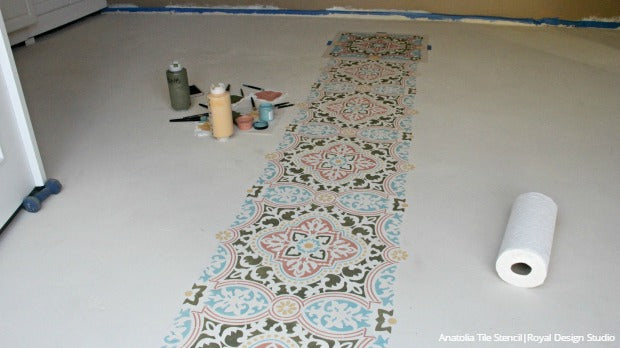
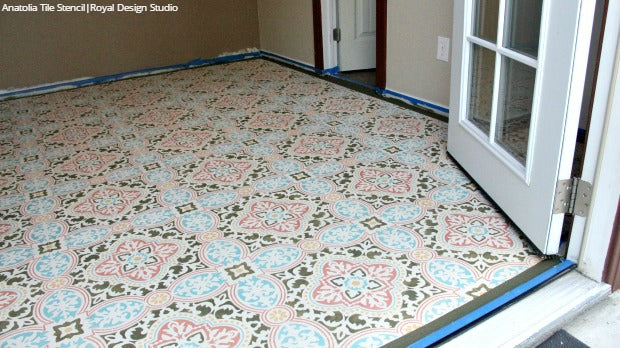
Step 7: If paint builds up the stencil, clean the stencil by spraying it with Mosenbockers Lift Off 5, placing it in a plastic bag overnight, and then cleaning it with a scrub brush. Now you have clean stencil to continue working on your floor! Repeat Steps 4 through 6 until you have stenciled the entire concrete floor. Let dry.
Step 8: Use painter’s tape to create a 1 ½” border around the floor. Use a flat paint brush to paint the border with 2 coats of Olive Chalk Paint®, allowing each to dry in between.
Step 9: To protect your gorgeous stenciled floor, apply 1 thin mix of Annie Sloan Lacquer and a small amount of water (up to 10%) with a sponge roller. Let the first coat dry for 1-2 hours. Then apply a second coat of only Annie Sloan Lacquer.
Step 10: Let dry overnight before walking on it and showing it off to all of your friends!
Looking for more Stencil Techniques like this? Check out these other stencil tutorials and videos:


