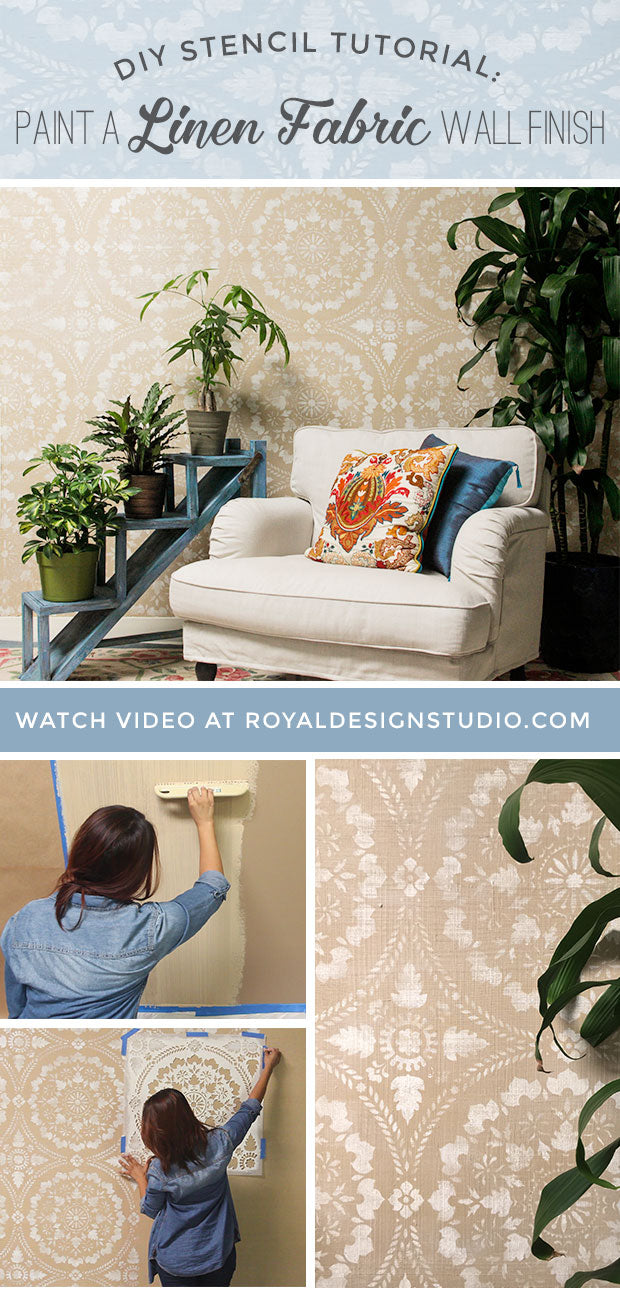
The elements of design that every room needs are color, pattern, and texture. But with so many elements, it can be hard to include each when you are decorating. Not to worry! We’ve got you covered! Wall Stencils and a unique wall finish is all you need to decorate with color, pattern, AND texture. In this DIY décor tutorial, we show you how to do the technique of dragging, or stria, which creates fabric-like texture to an otherwise smooth wall. Watch the video and follow the step-by -step instructions below to see how you can transform your accent wall into something that looks AND feels beautiful:
Supplies:
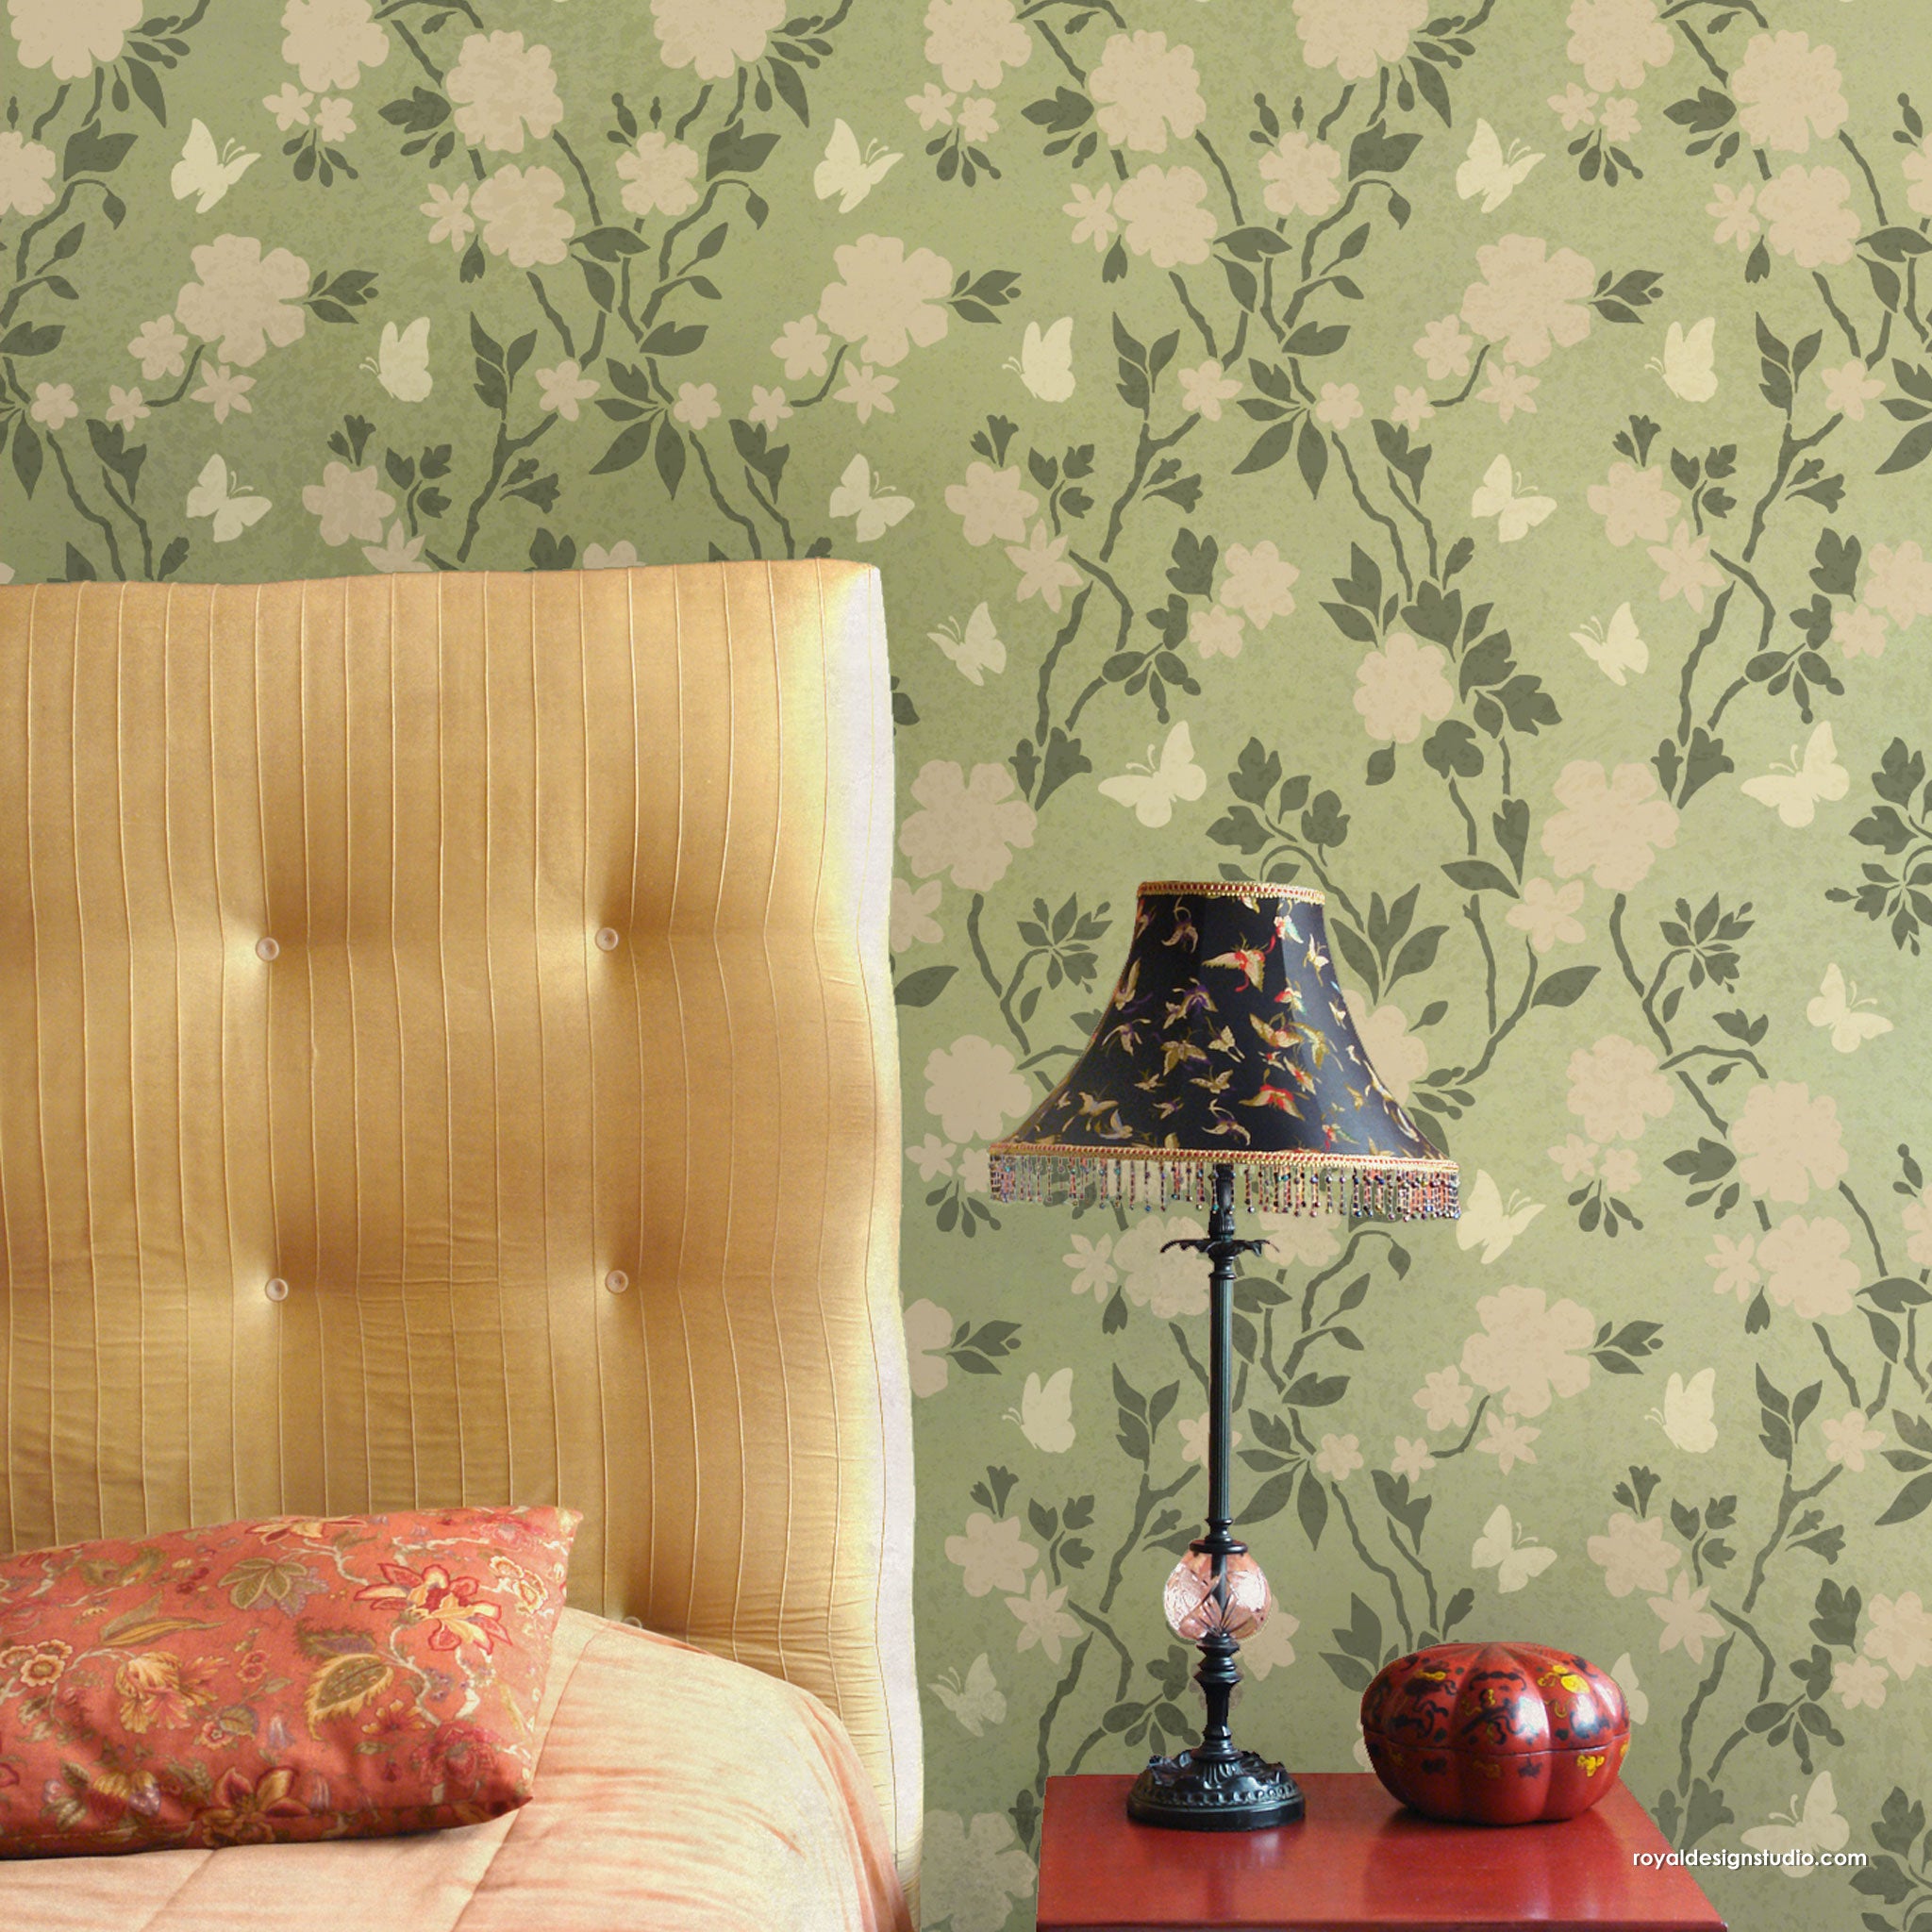
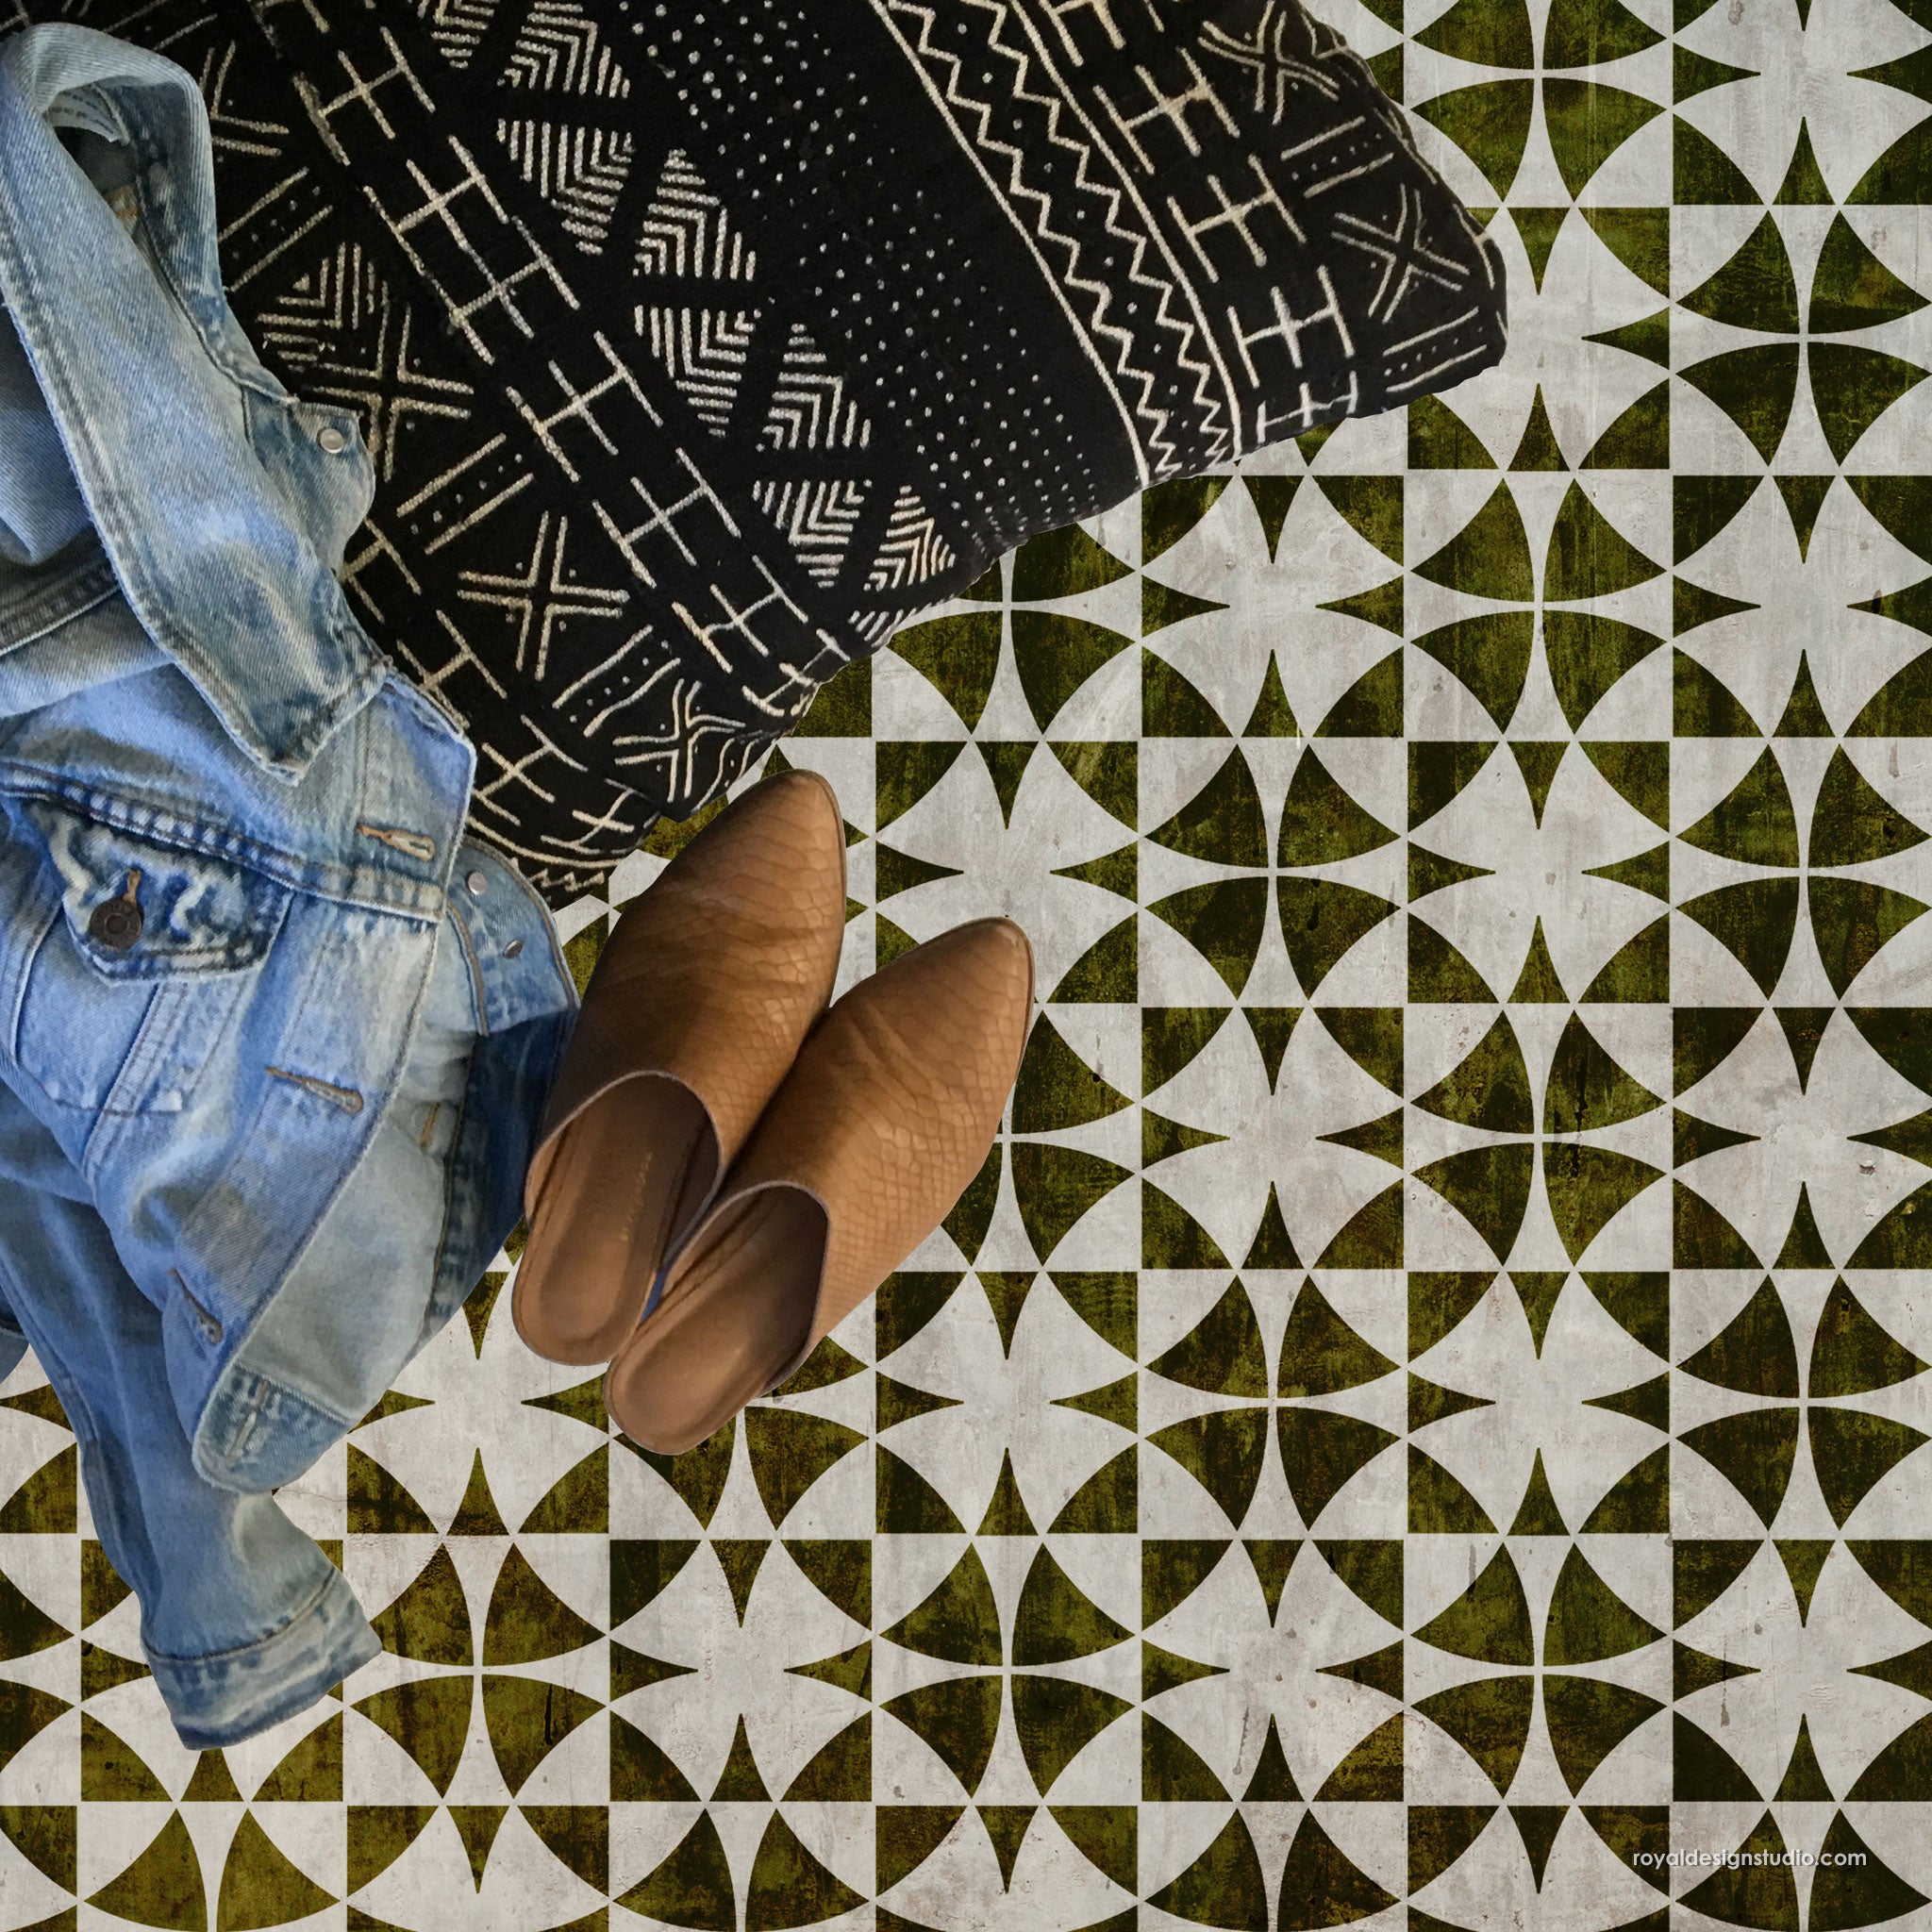
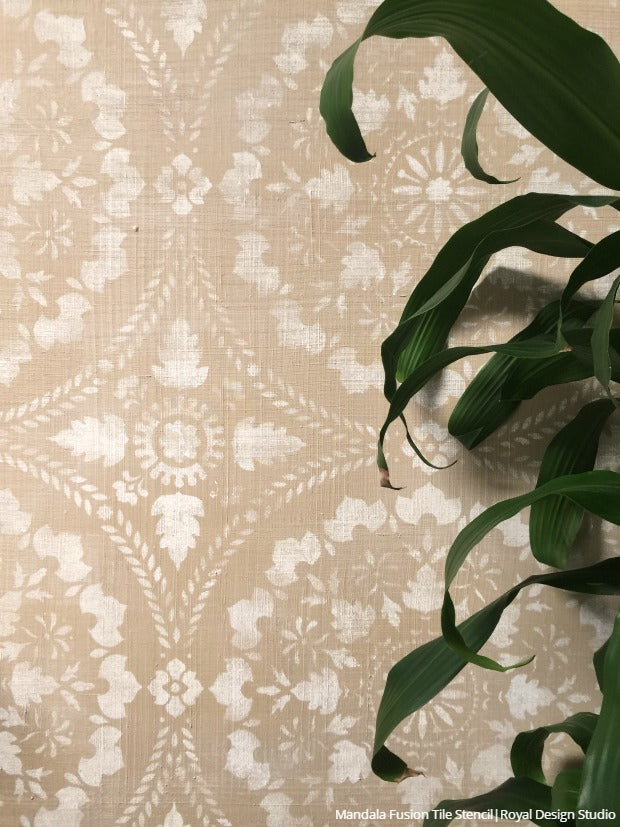
- Mandala Fusion Tile Wall Stencil
- Annie Sloan Chalk Paint® in Old White and Pure White
- Behr Premium Plus Interior Flat Paint in Merino
- Aqua Glaze® by Faux Effects®
- Off White Latex Paint
- Premixed Joint Compound
- 4”-6” Nylon Roller and Tray
- 4” Chip Brush
- Wallpaper Smoothing Brush
- Plastic sheet or contractor’s paper
- Painter’s tape and paper towels
Paint a Linen Fabric Finish
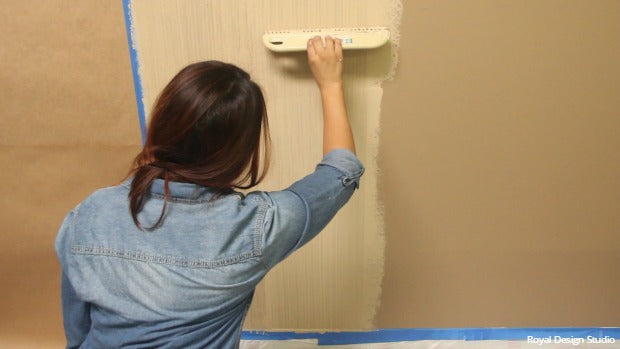
Step 1: Place down plastic sheet or contractor’s paper to protect the surrounding floor area. We’re about to get messy!
Step 2: Mix 1 part latex paint with 4 parts premixed joint compound. You can use a drill mixer to speed up the mixing process, if you have one available.
Step 3: Generously load a 6” paint roller with the paint mix and roll it onto the wall. Make sure to paint small areas (18” by 36” sections) at a time because this paint mix dries very fast!
Step 4: Immediately drag a wallpaper smoothing brush vertically through the paint mix on the wall. Use a takeoff and landing technique with the brush to avoid obvious starting and stopping points. Allow to dry.
Step 5: Repeat Steps 3 and 4, but this time drag the brush horizontally through the paint mix.
Step 6: Smooth out your start and stopping points as much as possible. Allow the wall to dry.
Stenciling the Wall
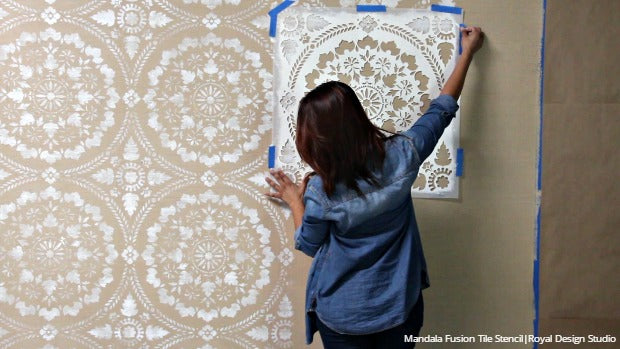
Step 1: Center and secure the Mandala Fusion Tile Wall Stencil on the wall with painter’s tape.
Step 2: Pour Old White and Pure White Chalk Paint® side by side in the paint tray. Double load the 4” roller with both colors at once. Use the off-loading method and remove excess paint onto a paper towel.
Step 3: Use the roller to stencil the mandala design onto the wall with light pressure and in random directions. The multiple colors and random painting directions will help give the design a distressed fabric look.
Step 4: Use the registration marks built right into the stencil to repeat the design across the wall.
Step 5: Mix 1 part off-white paint with 5 parts Aqua Glaze.
Step 6: Load the 4” chip brush with the glaze mix and use the off-loading method and remove excess paint onto a paper towel.
Step 7: Use the dry brush technique with light pressure and cross hatch motion. This will highlight the raised areas of the stria finish.
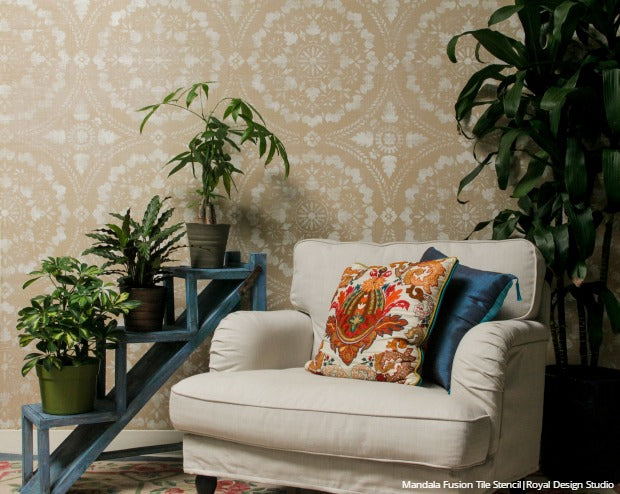
And there you have it, folks! Texture is a key element to creating a special space, and this DIY tutorial is a great way to include texture in your home in a totally unique way. Looking for more Stencil Techniques like this? Check out these other stencil tutorials and videos: