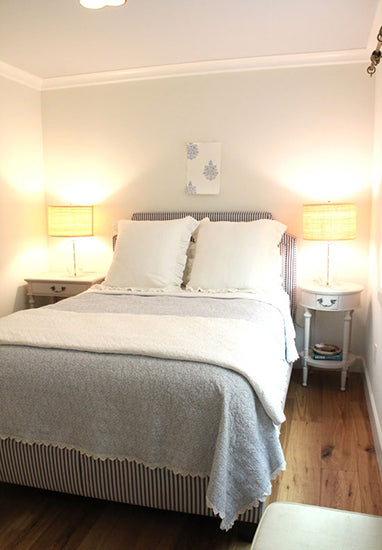
Do you have a room that needs its own design intervention? Well, twenty Design and DIY bloggers had that same issue and joined together in a "One Room in Six Weeks" Challenge. Fun! One of the bloggers, Mary Ann Pickett from Classic Casual Home, opted to redecorate her guest bedroom and after deciding to keep the existing bed and light fixtures, she focused on her first project: the walls. Her high design and budget-friendly decision of using a Royal Design Studio Stencil set the tone for the entire project and helped create one of the prettiest guest bedrooms we've ever come across.
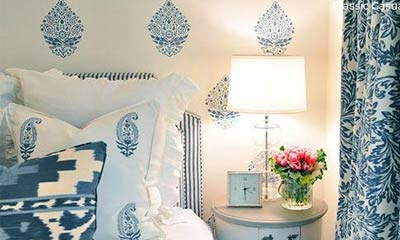
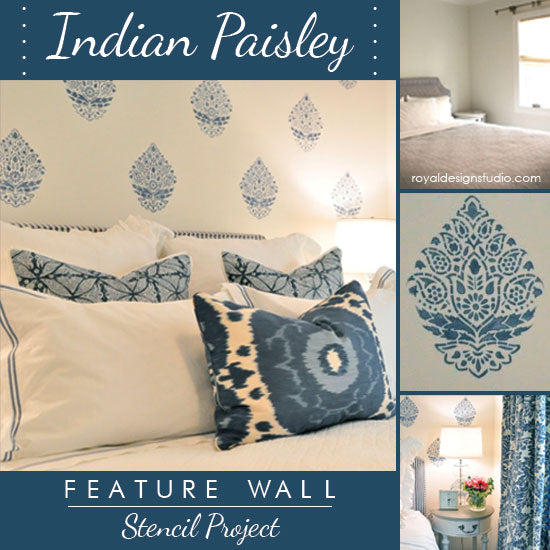
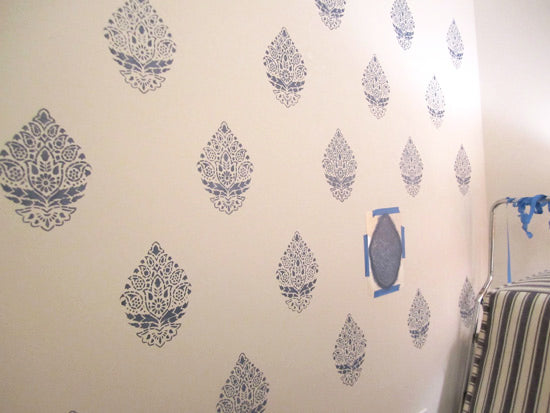
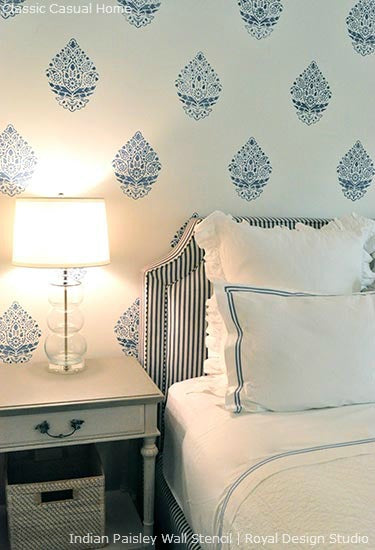
Mary Ann had a blocked wallpaper from India she had in mind for the feature wall but it would have cost her over $550. Thinking she could hand block it herself with a stencil, she conducted an online search and found a near-perfect fit in the Indian Paisley Wall Stencil from our Allover Ethnic Stencils Collection. One wonderful aspect of the Indian Paisley Wall Stencil is that it is considered a Motif Stencil. Motif Stencils are versatile patterns that can be used as single accents or stenciled precisely or randomly across a wall to create an allover stencil pattern. Mary Ann chose to use it as a precise allover pattern to give it a "wallpaper" look and feel.
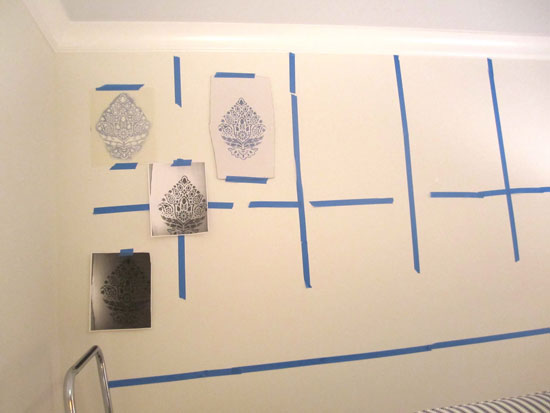
Stenciling on paper first, Mary Ann tested out the stencil before applying it to the wall and used the test pattern to make copies for wall placement. The copies are actual size so they helped determine where she wanted to stencil. Smart cookie! Note that this step is optional, but it's a fantastic way to help you plan out your preferred stencil pattern placement on a wall! Mary Ann used one tube of acrylic color for the wall and shared a few tips and details of the stenciled feature wall project on her blog.
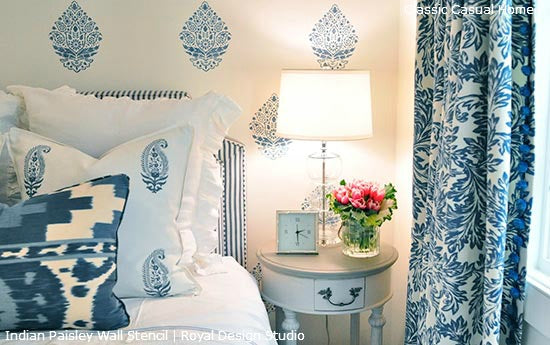
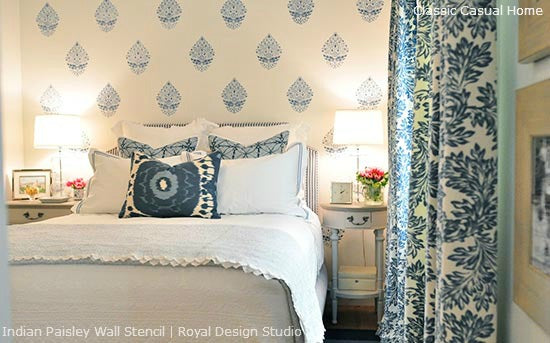
With the blue and white design scheme in mind, she added curtains, bedding, colorful accents and custom decorative pillows. This is also the room where her daughter stays when she visits so there are many personal touches as well in her redecorated guest room. We think one of the best aspects of the project is that the stencil and materials to create the stenciled accent wall cost Mary Ann less than $45 -- a savings of over $500! Now that's Stencil Success!
Some tips to keep in mind when planning to stencil an allover motif pattern on the wall:
- Create stencil proofs, like Mary Ann did, by stenciling one repeat of your chosen stencil pattern on plain white paper. Run off multiple copies to create a series of these proofs and you are ready to plot out your pattern design on the wall.
- Use tape to affix your stencil proofs to the wall to give you a great visual guide as to how your pattern lays out and works in the space.
- Move the paper proofs around until you get your desired allover effect, playing with spacing and variety of designs. As you work the stencil patterns across the wall, simply remove the paper pattern and replace with the corresponding stencil. You can then keep moving the paper patterns ahead of yourself to keep the pattern placement going.
- Fun Tip: If you prefer a random stencil pattern, you can try to offset the designs, meaning that they do not fall necessarily on the same horizontal or vertical lines. This creates wonderful balance AND interest.
You can see more of this technique in the stenciling a dimensional drop-shadow tutorial. Have you been inspired to tackle your own design room dilemmas, Stencilistas? We'd love to see how you solve them with stencils so be sure to send us YOUR beautiful design results to projects(at)royaldesignstudio.com or share them on our Facebook fan page! Have a creative day!
More inspiring ideas with Motif Stencils!
- Lowe's Creative Ideas magazine features several Royal Design Studio stencil projects!
- Be sure not to miss the wonderful Wall Art & Motif Stencils Collection!